This powerful technology has become the gold standard in the design world, and for good reason. It’s not just about creating a pretty picture; it’s about creating clarity, confidence, and excitement. It’s a visual handshake that ensures you and your client are dreaming the exact same dream. In this ultimate guide, we will explore every facet of 3D rendering. We’ll uncover:
- The Fundamentals: What exactly are renderings and how do they work?
- The Benefits: Why this tool is a non-negotiable for modern design success.
- The Process: A detailed, step-by-step journey of how a render is brought to life.
- The Options: Exploring the different types of renderings and whether you should DIY or hire a pro.
- The Investment: A transparent breakdown of how much 3D rendering costs.
- The Future: A glimpse into what’s next for the world of design visualization.
Whether you’re a homeowner nervous about a big renovation, an interior designer aiming to elevate your presentations, an architect planning a new build, or a student eager to learn the tools of the trade, this guide is for you. Let’s step into the world of 3D rendering and turn imagination into reality.
Part 1: What is an Interior Design Rendering? The Core Fundamentals
Before we dive into the exciting benefits and processes, let’s start with the basics. Understanding what a rendering is—and what it isn’t—is the first step to harnessing its power. It’s a simple concept with profound implications.
What is a 3D Interior Design Rendering?
Simply put, an interior design rendering is a digital image that shows what an interior space will look like. Think of it as a photograph of the future. Using specialized computer software, a designer or 3D artist creates a virtual, three-dimensional model of a room and then generates a realistic 2D image from that model.
This isn’t just a simple sketch. A high-quality rendering, often called a 3D visualization or a photorealistic render, communicates every detail of the proposed design. This includes:
- The precise layout of the room and furniture.
- The colors of the walls, ceilings, and decor.
- The textures and materials of flooring, fabrics, and surfaces.
- How natural and artificial lighting will interact with the space.
- The scale and proportion of every element.
It’s the ultimate communication tool, taking all the abstract elements from a mood board and floor plan and assembling them into one clear, cohesive, and visually stunning image.
A Brief History: From Hand-Drawn Sketches to Digital Realism
To appreciate where we are today, it helps to know where we came from. For generations, interior designers and architects relied on manual methods to convey their ideas. Hand-drawn perspective sketches, watercolor paintings, and intricate 2D floor plans were the tools of the trade. These methods had an undeniable artistic charm and are still valuable for quick conceptualization.
However, they had their limits. They couldn’t perfectly replicate the complex play of light and shadow, nor could they easily be changed. A client wanting to see a different sofa color meant starting a new drawing from scratch.
The seeds of change were planted in the 1960s, not in design, but in industries like aerospace and automotive engineering, where the first simple 3D wireframe models were created. As computer technology exploded through the 80s and 90s, these tools became more sophisticated and found their way into architecture. By the 2000s, software became powerful and accessible enough to make photorealistic 3D rendering a viable tool for interior designers everywhere. What was once a niche, expensive technology is now the industry standard, enabling a level of clarity and collaboration previously unimaginable.
What are the Core Components of a 3D Render?
A stunning photorealistic render isn’t magic—it’s the result of four core digital components working together in perfect harmony. Understanding these building blocks helps you appreciate the artistry and technical skill involved.
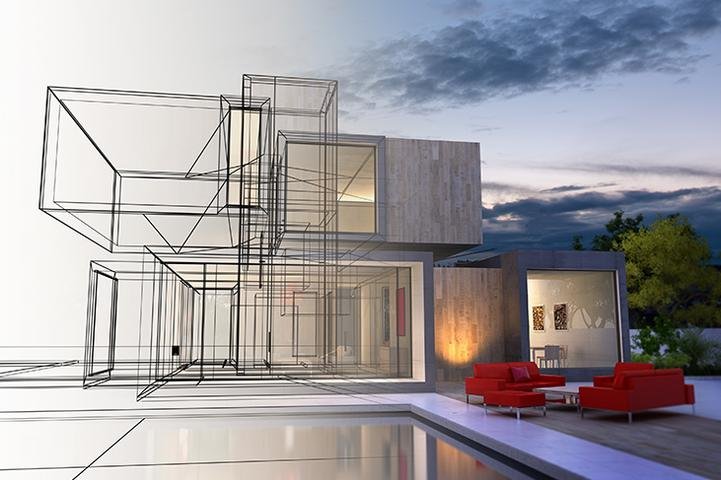
Models: The Digital Skeleton
The foundation of any render is the 3D model. This is the digital architecture of the scene. Artists create the geometric shapes and structures of everything you see: the walls, windows, and doors that form the room, as well as every piece of furniture, every lamp, and every decorative vase. This digital “skeleton” defines the size, shape, and placement of every object in the space.
Textures and Materials: The Realistic “Skin”
A 3D model on its own is just a collection of grey shapes. What brings it to life is the application of materials and textures. This is the digital “skin” that gives every surface its realistic appearance. Artists apply texture maps—high-resolution images of materials like wood grain, fabric weaves, marble veins, or metal finishes—to the models. They then fine-tune properties like:
- Reflection: How much light a surface bounces back.
- Glossiness: Whether a surface is shiny (like polished chrome) or matte (like a stone floor).
- Bump/Displacement: Tiny surface details that create the illusion of texture, like the grooves in wood or the tufts of a carpet.
Lighting: The Soul of the Scene
Lighting is arguably the most critical element for realism and mood. Without good lighting, even the best models and textures will look flat and fake. The artist sets up a complete lighting system that mimics the real world:
- Natural Light: A digital “sun and sky” system that casts realistic light and shadows through windows, changing depending on the time of day.
- Artificial Light: Placing digital versions of light fixtures like pendants, lamps, and spotlights, each emitting light just as its real-world counterpart would.
This lighting interacts with all the materials in the scene, creating the bright highlights, soft shadows, and subtle reflections that make a space feel real and inviting.
Perspective and Camera: The Viewer’s Eye
Finally, the entire scene is viewed through a digital camera. The artist chooses the perfect camera position, angle, and focal length to create a compelling composition that best showcases the design. This determines the perspective—how objects appear in relation to one another—and ensures the final image feels balanced and professional, just like a photograph taken by a skilled architectural photographer.
3D Rendering vs. Virtual Staging: What’s the Difference?
This is one of the most common points of confusion in the industry. While both tools are used to visualize a property, they are fundamentally different processes with different applications. Let’s clear it up.

Virtual Staging starts with a real photograph of an existing, empty room. A digital artist then uses software to add furniture and decor to that photo. It’s an incredibly useful tool for real estate agents who want to help potential buyers see the potential in a vacant home. Its main purpose is to “stage” an existing space without the cost and hassle of physical furniture.
Interior 3D Rendering, on the other hand, creates an entirely digital scene from scratch. There is no initial photograph. The entire room—the walls, the flooring, the lighting, the furniture—is built in a 3D environment. This makes it the perfect tool for projects that don’t exist yet, such as a new building, a major renovation, or a completely new design concept.
“Think of it this way: Virtual staging is like digitally decorating a real room. 3D rendering is like building and decorating a digital room from the ground up.”
Here’s a simple table to highlight the key differences:
| Feature | Virtual Staging | Interior 3D Rendering |
|---|---|---|
| Starting Point | A real photograph of an empty room | A digital 3D model created from plans |
| Creative Flexibility | Limited. You can’t change the room’s architecture or the camera angle of the original photo. | Unlimited. You have complete control over every element, including layout, materials, and camera views. |
| Primary Use Case | Marketing existing, vacant properties for sale or rent. | Visualizing new construction, renovations, and conceptual interior designs. |
| Best For | Real estate agents and property managers. | Interior designers, architects, and property developers. |
Both are valuable, but they serve different needs. Knowing the difference helps you choose the right tool for your specific project.
Part 2: Why You Need Them: 10 Game-Changing Benefits of 3D Rendering
Now that we know what renderings are, let’s explore why they have become so indispensable. The benefits go far beyond just a pretty picture; they impact your budget, your timeline, your client relationships, and your overall success.
1. Saves Time and Money: The Tangible Return on Investment
This is the most practical and compelling benefit. Making changes during the design phase is easy and inexpensive. Making changes during construction? That’s a nightmare of delays and budget overruns. A 3D render allows you to spot potential design flaws before a single nail is hammered.
Imagine the render reveals that a planned kitchen island is too large, restricting workflow. Or that the placement of a sofa blocks a doorway when opened. Identifying these issues digitally costs nothing. Fixing them after they’re built could cost thousands. Furthermore, clear visuals lead to faster decisions and approvals from clients, which shortens the overall project timeline and saves money on labor.
2. Improves Communication and Builds Unbreakable Client Trust
Interior design is filled with technical jargon and abstract concepts. Terms like “spatial flow,” “negative space,” and even specific material names can be confusing for clients. A 3D render cuts through the noise. It is a universal visual language that everyone can understand instantly. There’s no room for misinterpretation.
When a client sees a photorealistic image that perfectly matches the vision they had in their head, it builds an incredible amount of trust. They feel heard and understood. This collaborative clarity is the foundation of a great designer-client relationship and a successful project.
3. Enhances Design Decision-Making and Drastically Reduces Revisions
One of the biggest sources of client anxiety is uncertainty. “Will I like that color on all four walls?” “Is that sofa too modern for the room?” A 3D render eliminates this guesswork. It offers a “try before you buy” experience for design choices.
Want to compare a dark, moody color palette with a light, airy one? An artist can create two versions. Can’t decide between a marble or a quartz countertop? You can see both in context. This ability to experiment visually empowers clients to make confident decisions, which means fewer second-guesses and costly revisions down the line.
4. Creates a Powerful Marketing, Branding, and Sales Tool
For professionals, 3D renderings are a marketing goldmine.
- For Interior Designers: You can build a stunning portfolio of your best work, including projects that haven’t even been built yet. This allows you to showcase your skills and unique style to attract new clients.
- For Real Estate Developers: You can start marketing and selling properties “off-plan” long before construction is finished. These visuals create buzz and secure buyers early in the process.
- For Furniture Companies: Products can be showcased in perfectly curated, aspirational digital rooms without the expense of building physical sets and organizing photoshoots.
These high-quality visuals are perfect for websites, social media, brochures, and presentations, giving your brand a polished and professional look.
5. Gives a Strong Competitive Edge in a Crowded Market
In today’s competitive landscape, showing up to a client pitch with 2D floor plans and a mood board is no longer enough. A competitor who presents a stunning, photorealistic 3D render of the client’s future space immediately demonstrates a higher level of professionalism, expertise, and dedication. Offering 3D visualization sets you apart. It shows you are invested in modern tools and, more importantly, in ensuring your client has total clarity and confidence in their project.
6. Provides Detailed and Accurate Visualization
A render doesn’t just show the general idea; it shows the intricate details. You can see the precise pattern of the tile, the texture of the wallpaper, the subtle veining in the wood. This level of detail ensures that every nuance of the design is seen and appreciated, leaving nothing to the imagination.
7. Fosters a Deep Emotional Connection
A great design isn’t just about how a space looks; it’s about how it feels. A high-quality render, with its realistic lighting and carefully chosen details, can evoke a powerful emotional response. When a client sees a warm, inviting image of their future living room, they don’t just see a design—they see themselves living there, making memories. This emotional connection is invaluable for getting a project approved.
8. Allows for More Accurate Cost Estimation
When every single element of a design is modeled and visualized—from the specific light fixtures to the exact number of cabinet pulls—it becomes much easier to create an accurate budget. This detailed visual inventory helps prevent unexpected costs and ensures the project stays on track financially.
9. Streamlines Team Collaboration
A 3D render serves as a single source of truth for the entire project team. The interior designer, the architect, the builder, and the various subcontractors can all refer to the same set of visuals. This ensures everyone is aligned on the final goal, minimizing errors and miscommunications between different trades.
10. Increases Client Engagement and Satisfaction
The rendering process is inherently collaborative. Clients get to see their space take shape and provide feedback along the way. This involvement makes them feel like active partners in the design journey, not just passive recipients. This engagement leads to a final product that truly reflects their vision, resulting in higher satisfaction and a greater likelihood of referrals.
Part 3: The Spectrum of Visualization: Key Types of Interior Renderings
Not all renderings are created equal. The type you choose depends on your project’s stage, your goals, and your budget. Let’s explore the spectrum of options, from simple sketches to fully immersive virtual worlds.
The Industry Standard: 3D Still Image Renderings
This is the most common and versatile form of 3D rendering. It’s a single, high-resolution static image—like a digital photograph—of the proposed space. Within this category, there are two main styles:

Conceptual Renderings
Often done in a “clay” or monochrome style, these renders focus on the big picture: form, layout, scale, and the overall volume of the space. They deliberately leave out detailed colors and textures to allow for discussions about the core architectural and spatial elements. They are perfect for the early stages of a project.
Photorealistic Renderings
This is the ultimate goal for most projects. The aim is to create an image that is indistinguishable from a real photograph. Every detail—from the subtle reflections in the window to the soft wrinkles on a linen cushion—is meticulously crafted. These are used for final client presentations, marketing materials, and securing project approval.
Immersive Experiences: 360° Panoramas and Virtual Tours
A step up from a still image, a 360° panorama allows the viewer to “stand” in a fixed spot within the virtual room and look around in any direction—up, down, and all around. By linking several of these panoramic spots together, you can create a simple virtual tour.

“A 360° panorama is no longer just showing your client a picture of the room; you’re letting them stand inside it.”
This format is fantastic for helping clients get a true sense of the space and its proportions. It’s especially effective for remote clients who can’t visit a site in person.
Dynamic Storytelling: Animated Walkthroughs and Flythroughs
If a still image is a photograph, an animated walkthrough is a movie. This is a pre-rendered video that guides the viewer on a cinematic journey through the designed space. The camera can smoothly “walk” from room to room, pan across beautiful details, and “fly” over the layout to show the connections between spaces. These are ideal for large-scale projects like hotels, restaurants, or luxury homes, where understanding the flow and experience of moving through the space is critical.
The Cutting Edge: Virtual Reality (VR) and Augmented Reality (AR)
This is where design visualization becomes truly interactive.
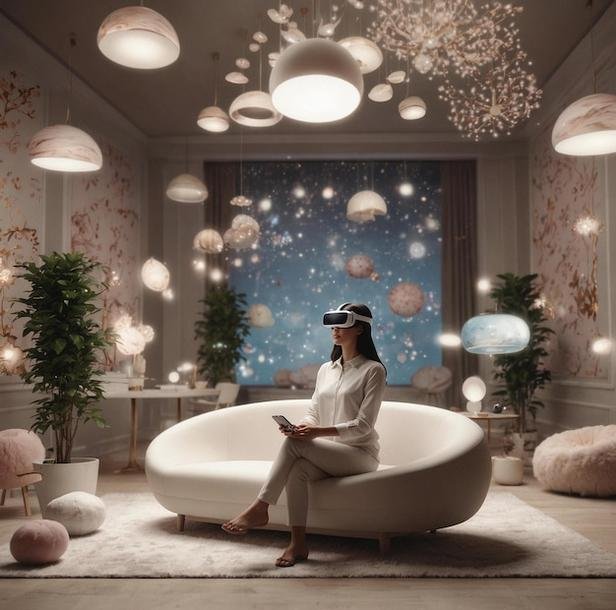
Virtual Reality (VR) Rendering
This is the most immersive experience possible. The client puts on a VR headset and is digitally transported into the 3D model. They can “walk” around the space freely, at a 1:1 scale, as if they were actually there. They can look at details up close, get a true sense of ceiling heights, and experience the space in a deeply personal way. It’s a powerful tool that is revolutionizing high-end client presentations.
Augmented Reality (AR) Rendering
AR doesn’t create a fully virtual world; instead, it overlays digital elements onto the real world, viewed through a smartphone or tablet. For interior design, this means a client can use their phone’s camera to look at their actual, existing living room and digitally place a 3D model of a new sofa in the space to see how it fits. It’s a practical and accessible way to test out new furniture and decor in a real-world context.
| Rendering Type | Description | Best Use Case |
|---|---|---|
| 3D Still Image | A single, photorealistic “digital photograph.” | Final presentations, marketing, portfolio, client approvals. |
| 360° Panorama | An interactive image allowing the viewer to look around from a fixed point. | Giving clients a better sense of space, remote presentations. |
| Animation/Walkthrough | A cinematic video tour through the space. | Large-scale projects (hotels, luxury homes) to show flow and experience. |
| Virtual Reality (VR) | A fully immersive, walkable experience using a headset. | High-end client presentations, design validation at a 1:1 scale. |
Part 4: The Professional Workflow: How a 3D Render is Created, Step-by-Step
Creating a breathtaking 3D render is a meticulous process that blends technical skill with artistic vision. While the specifics can vary, most professional studios follow a structured, multi-stage workflow to ensure efficiency and quality. Let’s walk through the journey from initial idea to final image.
Step 1: The Briefing & Information Gathering
This is the most critical stage. The quality of the final render depends entirely on the quality of the initial information. A designer provides the 3D artist or studio with a comprehensive project brief, which typically includes:
- Architectural Plans: 2D floor plans, elevations, and ceiling plans with precise measurements are the absolute minimum. If a 3D model already exists, that’s even better.
- Mood Boards & References: A collection of images that define the desired style, atmosphere, and color palette.
- FF&E Schedule: A list of specific Furniture, Fixtures, and Equipment.
- Camera Angle Suggestions: The designer will often suggest the key views they want to see.
The more detailed the brief, the smoother the process will be.
Step 2: 3D Modeling – Building the Digital Architecture
With the brief in hand, the 3D artist begins constructing the digital scene. They start by using the 2D plans to “extrude” the walls, creating the basic shell of the room. They then model all the fixed architectural elements, such as cabinetry and fireplaces, and then model or import all the furniture and decorative items.
Step 3: Camera Setup – Defining the View
Early in the process, the artist will set up the proposed camera angles and send simple “clay” views to the designer for approval. This crucial step ensures that the final render will be framed perfectly to capture the essence of the design.
Step 4: Texturing & Materials – Applying the Realistic Surfaces
This is where the scene starts to come to life. The artist meticulously applies the specified digital materials to every surface in the 3D model, fine-tuning properties to mimic how they would behave in the real world.
Step 5: Lighting – Creating the Mood and Atmosphere
The artist sets up a sophisticated lighting system, using a digital sun and sky for natural daylight and placing digital versions of lamps and pendants for artificial light. This creates the mood and realism of the scene.
Step 6: Adding “Entourage” – Bringing the Scene to Life
The magic of a believable render often lies in the “entourage”—the small, carefully placed details that suggest human presence, like a draped throw blanket or a stack of books. These elements make the space feel lived-in.
Step 7: The Rendering Process – From 3D Model to 2D Image
This is a purely computational process where the computer calculates the interactions of light with every surface to generate the final image. This can take anywhere from a few minutes to many hours.
Step 8: Post-Production & Revisions – The Final Polish
The “raw” render is taken into a photo-editing program for final tweaks like color correction and contrast adjustment. After a client review and any minor revisions, the full-resolution, polished image is delivered.
Part 5: The Practical Decision: DIY vs. Outsourcing Your 3D Renders
So, you’re sold on the power of 3D rendering. The next big question is: should you learn to do it yourself, or should you hire a professional? Both paths have their merits, and the right choice depends on your time, budget, and long-term goals.
The DIY Route: Should You Create Your Own Renderings?
For the creatively curious and technically inclined, learning to create your own renderings can be an incredibly rewarding skill. However, it’s essential to understand the commitment involved.
The Required Software
You’ll need a combination of 3D modeling software and a rendering engine. Here are some of the most popular choices:
| Software Type | Popular Programs | Best For |
|---|---|---|
| 3D Modeling | SketchUp, Autodesk 3ds Max, Blender, Cinema 4D | Building the core 3D model of the space and furniture. SketchUp is great for beginners, while Blender is a powerful free option. |
| Rendering Engine | V-Ray, Corona Renderer, Lumion, Enscape | Plugging into your modeling software to add realistic materials, lighting, and generate the final image. |
Be aware that professional software can come with significant subscription costs, often thousands of dollars per year.
The Hardware Investment
3D rendering is one of the most demanding tasks you can ask of a computer. You will need a powerful desktop computer with a high-end graphics card (GPU) and a large amount of RAM to handle complex scenes. This can be an investment of several thousand dollars.
The Time and Skill Commitment
“Rome wasn’t built in a day, and neither is the skill of photorealistic rendering. It’s a craft that takes hundreds of hours to learn and thousands of hours to master.”
This is the most significant factor. Achieving a truly photorealistic result is a steep learning curve. For a busy design professional, the time spent learning software is often time taken away from core design work and client management.
The Verdict: The DIY path is best suited for students or designers who want to make 3D visualization a central part of their professional skill set. For most working designers, outsourcing is more efficient.
The Outsourcing Route: How to Choose a 3D Rendering Partner
The vast majority of interior designers choose to outsource their rendering needs to specialized studios or freelance artists. This allows them to access world-class results without the overhead. But how do you find the right partner?

Here is a checklist to guide your selection:
- ✅ Review Their Portfolio: Does the quality of their work meet your standards? Does their artistic style align with your design aesthetic?
- ✅ Look for Interior Design Specialization: A studio experienced in interiors will have a better understanding of scale, decor, and lighting.
- ✅ Evaluate Their Workflow and Communication: A professional studio should have a clear process and a dedicated project manager.
- ✅ Check Turnaround Times: Ensure their delivery schedule aligns with your project deadlines.
- ✅ Confirm Guarantees and Security: Ensure the studio is willing to sign a Non-Disclosure Agreement (NDA) to protect your work.
Taking the time to vet your options and find the right partner will pay dividends in the quality of your visuals and the smoothness of your project.
Part 6: The Investment: How Much Do 3D Interior Rendering Services Cost?
This is often the first question on everyone’s mind. The cost of a 3D render can vary dramatically based on a number of factors. Understanding these factors will help you budget effectively.
What is the Average Cost for an Interior Rendering?
While prices are always project-specific, we can provide some general price ranges for a single still image to give you a ballpark idea.
| Rendering Quality Tier | Estimated Cost per Image (USD) | Description |
|---|---|---|
| Basic / Conceptual | $350 – $750 | Good for early-stage design exploration, often with simpler models and lighting. |
| Mid-Range / Professional | $750 – $1,500 | The most common tier. High-quality, photorealistic results suitable for client presentations. |
| High-End / Hyper-Realistic | $1,500 – $5,000+ | Top-tier quality, often indistinguishable from a photograph. Used for luxury projects and high-end advertising. |
Animations and VR experiences are priced on a per-project basis and typically start in the low thousands.
What are the Key Factors That Influence Rendering Prices?
So, what makes one render cost $500 and another $5,000? It comes down to the amount of work and expertise required. Here are the main drivers of cost:
1. Complexity of the Design and Geometry
A simple, minimalist living room is cheaper to model than a grand dining room with intricate crown molding and ornate furniture.
2. Level of Detail and Photorealism
Achieving that last 10% of realism takes a disproportionate amount of time and skill, which increases the cost.
3. Image Resolution
A standard web-resolution image is less expensive than an ultra-high-resolution image needed for a large-format print.
4. Number of Views and Revisions
Ordering multiple views of the same room often comes with a discount. Additional rounds of revisions beyond what is included will increase the cost.
5. Turnaround Time
A rush job that requires artists to work overtime will almost always come with a priority fee.
6. Quality of Provided Materials
Providing a highly detailed, well-organized brief can reduce the artist’s time and potentially lower the cost.
Part 7: Applications in Practice: Examples of Interior Renderings by Room Type
The power of 3D rendering is best understood through real-world examples. The goals of a rendering can change depending on the specific space being designed.
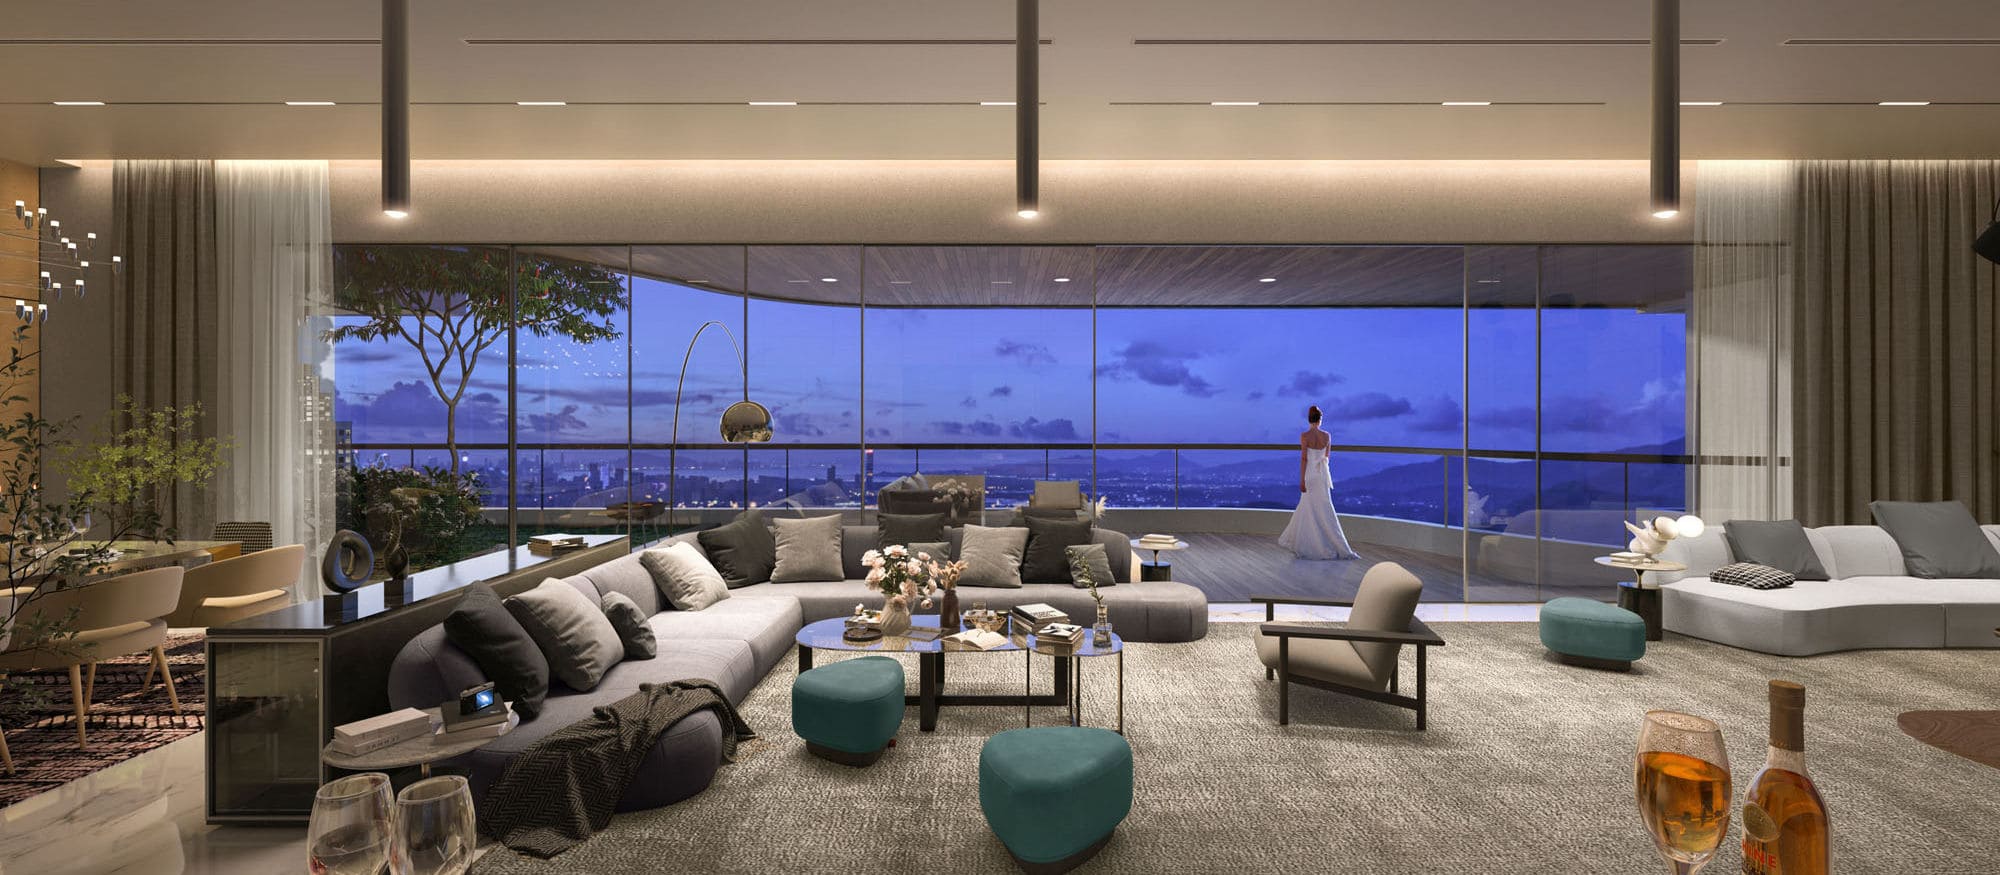
Living Room Renderings
As the heart of the home, the living room focuses on creating a sense of comfort, style, and personality, showcasing well-arranged furniture and a welcoming atmosphere.
Kitchen Renderings
Kitchens are about the balance between beauty and function. A rendering is essential for visualizing layout, workflow, and material choices for cabinetry and countertops.

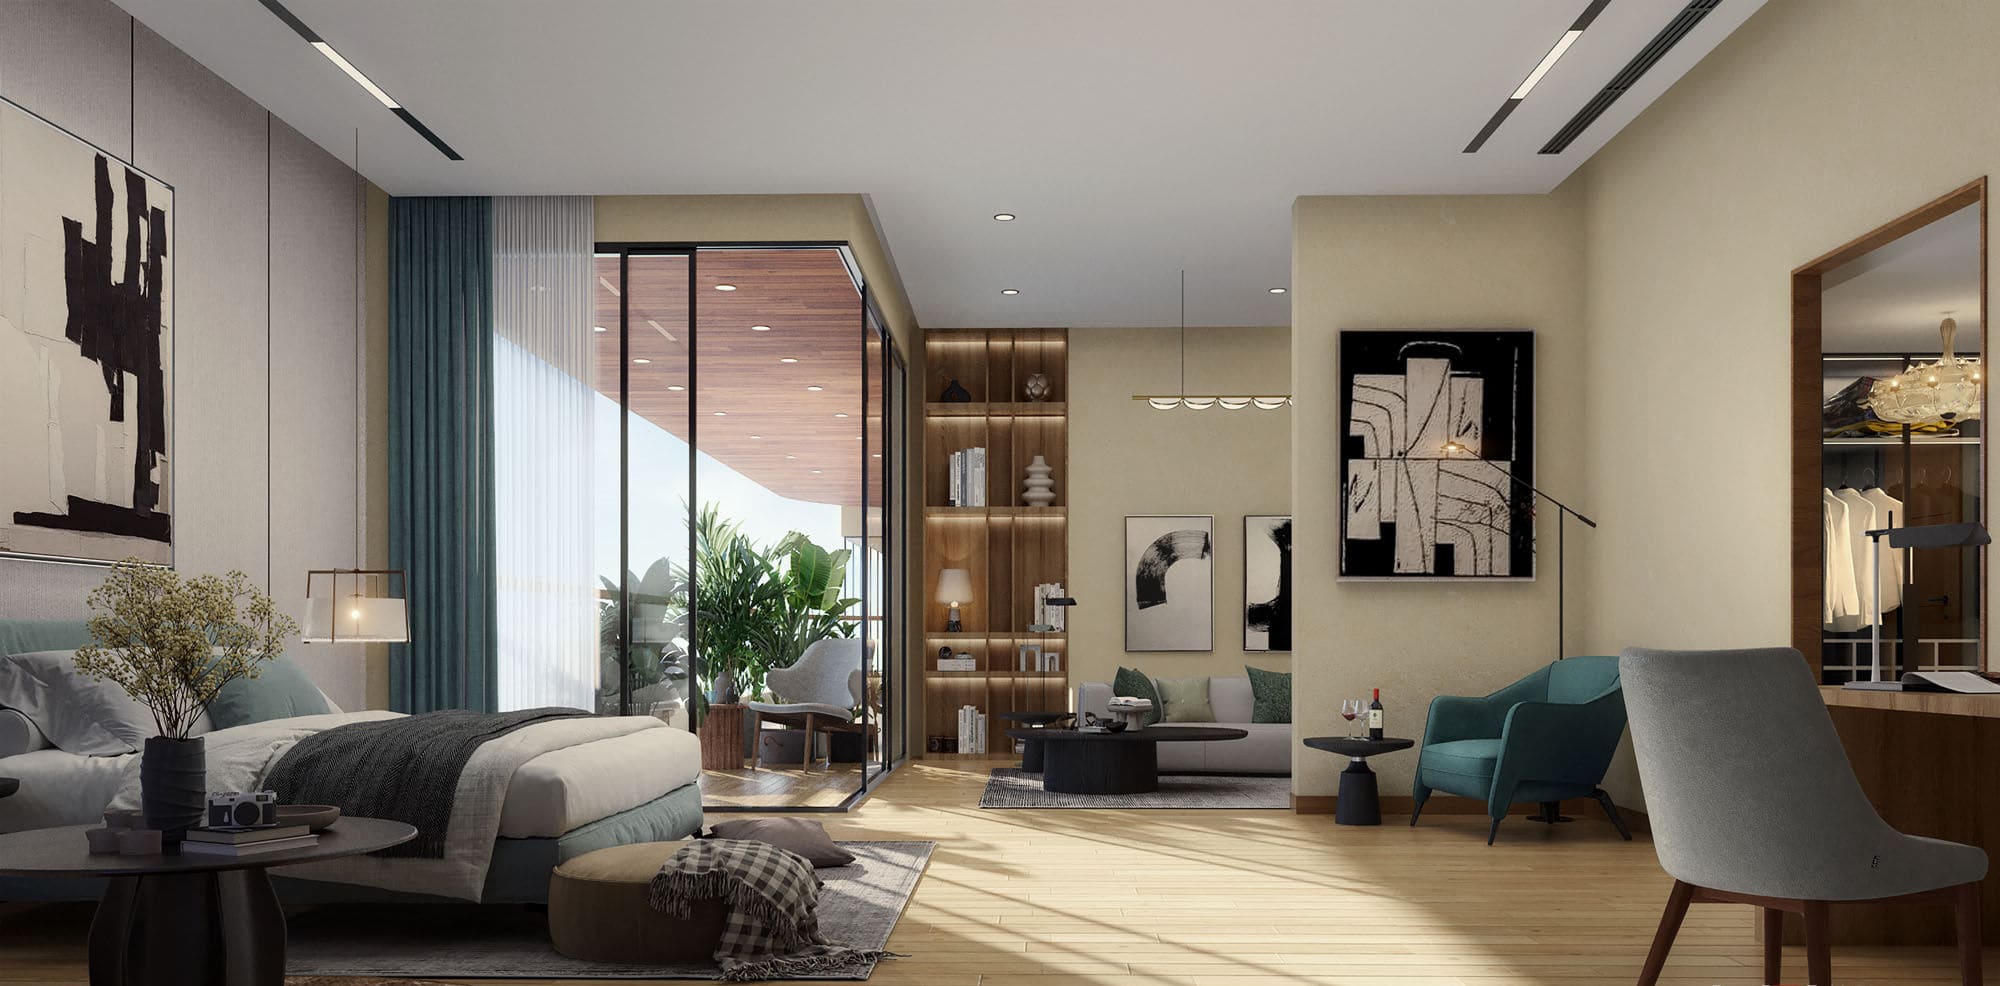
Bedroom Renderings
A bedroom is a personal sanctuary. These visuals showcase textiles, color palettes, and the soft, layered lighting that makes a bedroom feel like a cozy retreat.
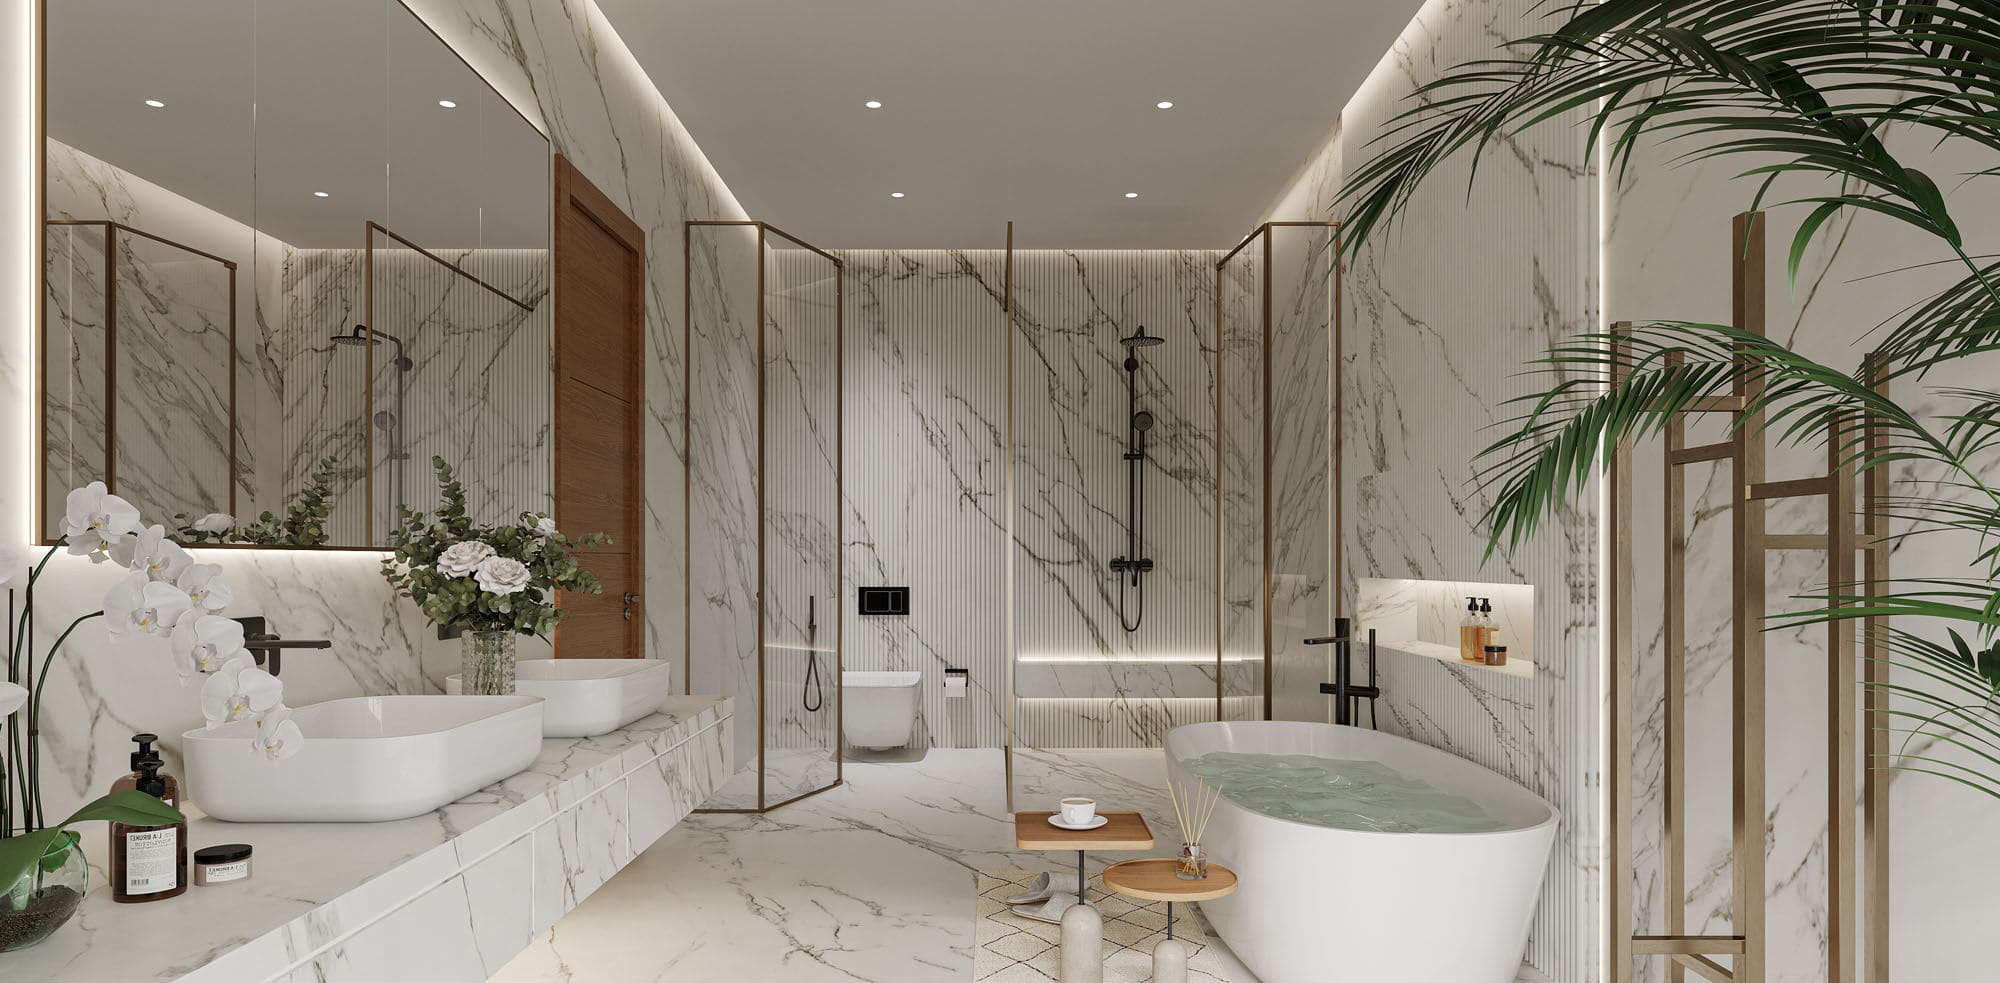
Bathroom Renderings
In a smaller space, every detail counts. Bathroom renderings are perfect for highlighting intricate tile work, fixtures, and a spa-like sense of tranquility.
Home Office Renderings
A modern home office needs to be both inspiring and functional. Renderings for these spaces balance sophisticated aesthetics with ergonomic comfort.

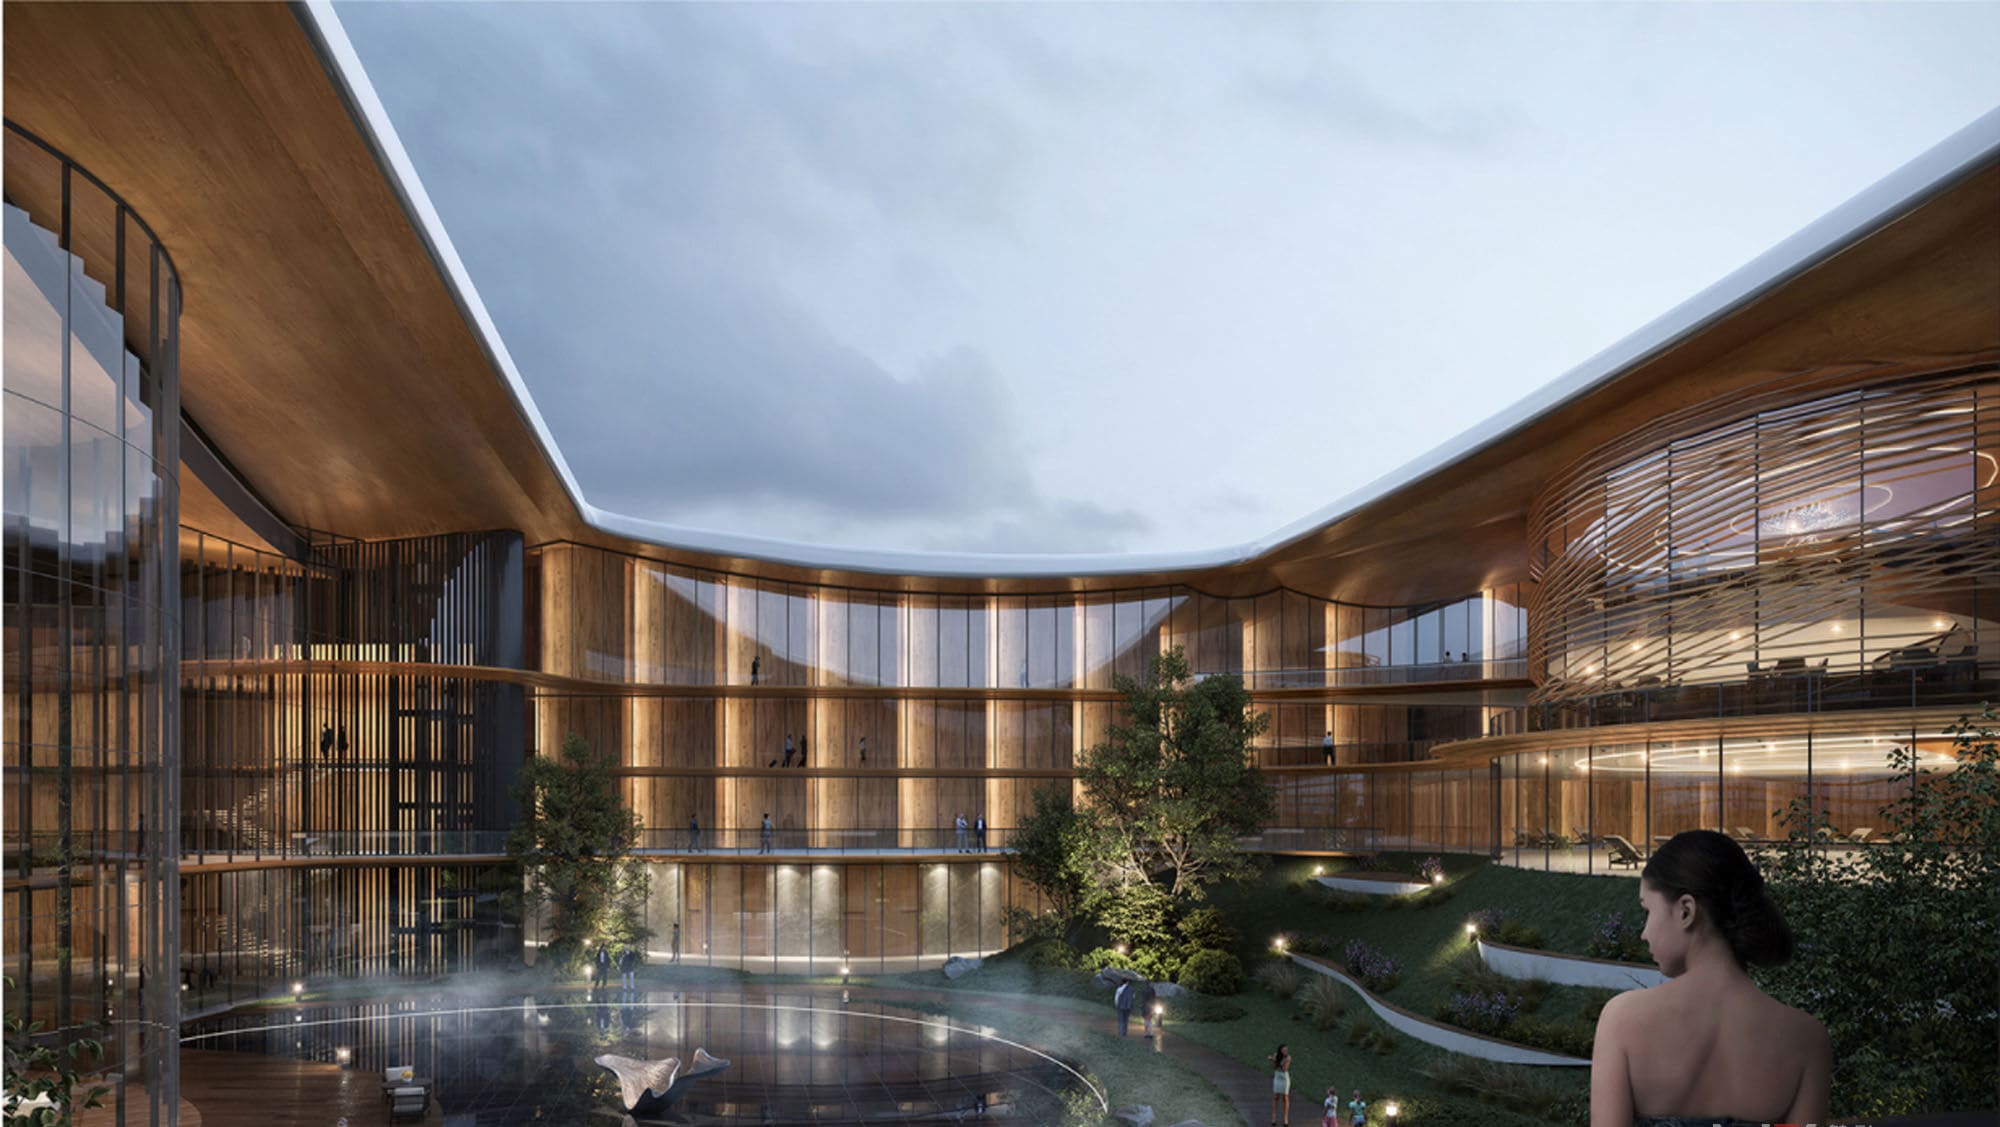
Commercial Space Renderings (Restaurants, Retail, Hotels)
For commercial projects, the rendering visualizes the brand and the customer experience, from seating arrangements in a restaurant to product displays in a retail store.
Part 8: The Horizon: What is the Future of Interior Design Rendering?
The world of 3D visualization is not standing still. Technology is evolving at a breathtaking pace, and the tools available to designers are becoming more powerful and intelligent every year.

How Will Technology Shape the Future of Visualization?
The Role of Artificial Intelligence (AI) and Machine Learning
AI is already beginning to streamline the rendering process. AI-powered “denoising” can dramatically reduce render times. In the near future, we can expect AI to play an even bigger role, potentially suggesting design layouts or generating material palettes based on a mood board.
Real-Time Rendering and Increased Interactivity
The rise of powerful real-time rendering engines, often borrowed from the video game industry, is changing the game. These tools allow designers and clients to navigate a photorealistic 3D space in real-time. Imagine a presentation where you can change the wall color or swap out flooring and see the results instantly. This level of interactivity is the future of client collaboration.
Sustainability and Eco-Friendly Design in Visualization
As sustainability becomes more critical, rendering will be a key tool for visualizing eco-friendly choices. Designers can simulate a space’s energy efficiency or create compelling visuals that showcase the beauty of sustainable materials, helping clients make more environmentally conscious decisions.
Conclusion: Your Vision, Visualized
We’ve journeyed through the what, why, and how of 3D interior design rendering. We’ve seen that it is far more than just a tool for creating a pretty picture. It is a fundamental pillar of modern design practice—a catalyst for clear communication, confident decision-making, effective marketing, and ultimate project success.
The core value of 3D rendering lies in its unique ability to perfectly align the designer’s creative vision with the client’s deepest aspirations. It removes doubt, builds excitement, and ensures that the final, built space is exactly what everyone dreamed it would be.
Whether you are embarking on a simple room refresh or developing a large-scale commercial property, embracing the power of 3D visualization is the key to unlocking your design’s full potential. It’s time to stop just describing your vision and start showing it in all its stunning, photorealistic glory.
Ready to bring your own design vision to life? Explore professional 3D rendering services today and take the first step toward transforming your concepts into breathtaking reality.