Chapter 1: The “Why” – Understanding the Power of Light
Before you even think about wiring, you need to understand the mission. Lighting isn’t just about making things visible. It’s your most powerful tool for controlling the story of your design and making people feel something.
More Than Just Seeing: Communicating Your Design Vision
Think of light as your silent partner in design. It helps you clarify your vision and show people what truly matters.
- Creating Focal Points: Where do you want people to look first? A soft spotlight on a grand entrance or a brighter glow in a public atrium immediately draws the eye. You become the director, guiding the viewer’s attention to the most important parts of your design.
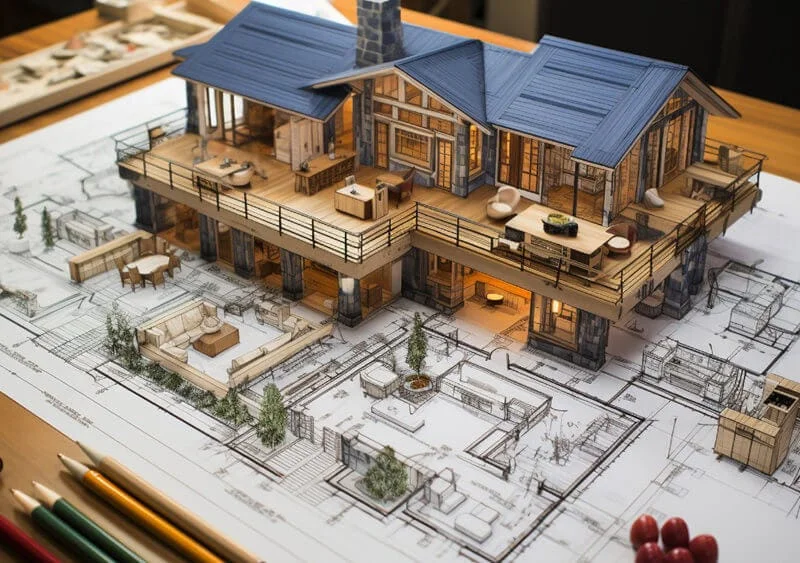
- Defining Shape and Space: Light and shadow are what make things look three-dimensional. A model with flat, even lighting looks boring and lacks depth. Skillful lighting carves out the shape of your building, highlights its unique form, and makes it feel solid and real.
- Revealing Textures: A gentle wash of light across a textured brick wall or a sharp beam on a metal panel makes the materials feel authentic. It helps viewers appreciate the details you worked so hard to create, even at a small scale.
Setting the Mood: The Psychology of Light
Light has a powerful effect on our emotions. You can use this to your advantage to make people feel a certain way about your project, which is a huge advantage in a client presentation.
“The right lighting scheme can transform a model from a simple scale replica into an effective visual communication tool, making clients feel the intended experience of the space.”
The color of the light, known as its temperature, is key. Warm, yellowish light makes a space feel cozy and welcoming, which is perfect for a residential home. On the other hand, cool, bluish-white light feels modern, clean, and efficient, making it a great choice for an office building or a high-tech lab.
The Ultimate Sales Tool: Making Your Project Irresistible
For architects and developers, a 3D model is one of the best forms of real estate marketing. A beautifully lit model is a game-changer. It shows a superior level of professionalism and attention to detail. It helps you sell your work more easily because customers will be impressed by the vision you present and will be more likely to invest. A properly lit 3D model will always arouse curiosity more effectively than a simple, unlit one.
Chapter 2: A Modeler’s Toolkit: Choosing Your Lights
To create a realistic effect, you need to think like a lighting designer and use different types of light for different jobs. Understanding your options is the first step to creating a great lighting plan.
The Undisputed Champion: Why LEDs are the Only Choice
LEDs (Light Emitting Diodes) have completely changed the game for model making. They are better than old-fashioned bulbs in every way.
| Feature | LEDs (Modern Choice) | Incandescent Bulbs (Old Method) |
|---|---|---|
| Heat Output | Very low heat. Safe for plastic, foam, and wood. | Very hot. Can melt or warp delicate model materials. |
| Lifespan | 20,000 – 50,000 hours. Will last for years. | Short lifespan. Requires difficult replacement. |
| Size | Available in microscopic sizes that are easy to hide. | Bulky and much harder to conceal within a model. |
| Energy Use | Extremely efficient. Hundreds can run on one power supply. | Uses much more power, requiring a larger power supply. |
Decoding the Lingo: A Simple Guide to Lighting Types
Not all lighting is the same. To make your model look professional, you need to use a mix of different lighting types, just like in a real building.
| Lighting Type | Purpose | How to Use It in a Model |
|---|---|---|
| Ambient Lighting | Provides general, overall light to prevent harsh shadows. | Use hidden LED strips around the ceiling or base to create a soft, even glow. |
| Accent Lighting | Highlights specific features like facades, columns, or landscapes. | Use miniature spotlights to draw attention to unique design details. |
| Task Lighting | Creates intense light in small areas for detail, like inside rooms. | Use tiny, individual LEDs to light up desks, furniture, or staircases. |
| Spotlighting | A strong form of accent lighting used for dramatic effect on a focal point. | Use a focused beam from above or the side to highlight the main entrance or a special feature. |
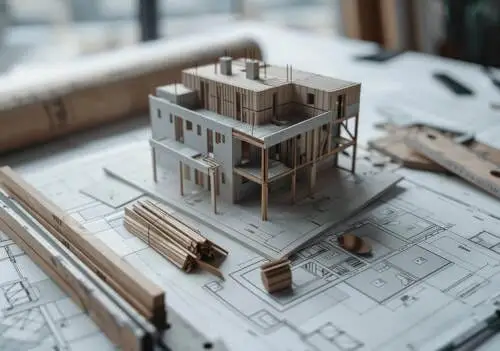
Chapter 3: The Blueprint: Planning Your Lighting System
A great lighting setup doesn’t happen by accident. Proper planning is 90% of the work and is the secret to a stress-free installation. You must do this planning before you start building your model.
Step 1: Start with a Story, Not a Switch
First, ask yourself the big questions:
- What’s the goal? Is this model for a client review, a sales center, or a museum?
- What’s the feeling? Do you want it to feel like a busy, vibrant community or a quiet, peaceful home?
- What are the hero elements? What are the top three features that absolutely must stand out?
Step 2: Drawing Your Electrical Roadmap
This is like creating a blueprint for your lights.
- Get the Plans: Start with the architectural drawings of your building.
- Create a Lighting Layer: On a printout or in a design program, create a separate layer just for your lighting plan.
- Place Your Lights: Mark the exact spot for every single light. Be specific! Note whether it’s for ambient, accent, or task lighting and what color it should be.
- Plan the Wires: This is critical. Draw the path that every wire will take. You need to plan for hidden channels in the floors and walls so nothing is visible in the final model.
Step 3: Powering Your Vision (Without the Burnout)
You need to make sure you have enough power for all your lights.
“A quick and dirty soldering trick is to tape your wires down to a piece of scrap wood. This keeps them from moving around and makes the job much easier.”
Make a list of every LED in your plan. Find out how much voltage and current each one needs (this info is on the packaging or the manufacturer’s website). Add up the total current for all the lights and add about 20% extra just to be safe. Then, choose a power supply that can provide the correct voltage and handle the total current. A power supply that is too small will overheat and fail.
A simple 9-volt to 12-volt DC system is common for model railroads and works perfectly for architectural models. You can often buy pre-wired LEDs that already have a resistor attached, making them ready to hook up to a 9V or 12V power source right out of the package. This is the easy way to do it!
Step 4: Who’s in Control? Choosing Your Control System
How will you turn the lights on and off?
- Simple System: A single master switch that turns everything on at once.
- Zoned System: A few different switches that control separate areas, like “Exterior,” “First Floor,” and “Second Floor.”
- Advanced System: A programmable system connected to a computer or tablet. This lets you create amazing, dynamic scenes, like simulating different times of day or allowing clients to light up specific apartments by touching a screen. For more on this, jump to our section on Advanced Techniques.
Chapter 4: Hands-On: The Essential Wiring and Installation Guide
Now it’s time to get your hands dirty. Using the right tools and techniques will make the difference between a frustrating mess and a professional masterpiece.
Your Workshop Essentials: Tools of the Trade
Having the right tools makes any job easier. Here’s a breakdown of what you’ll need.
| Tool | Why You Need It | Beginner or Pro? |
|---|---|---|
| Temperature-Controlled Soldering Iron | Lets you set the perfect temperature for delicate electronics so you don’t burn them. | Pro (but highly recommended for beginners too!) |
| Fine-Gauge Solder & Flux | Thin solder and flux paste help you make clean, strong connections on tiny parts. | Everyone |
| “Helping Hands” Tool | A stand with clips that holds your parts steady so you can solder with both hands. | Everyone |
| Digital Multimeter | An essential tool for testing your connections and troubleshooting problems. | Everyone |
| Fine-Point Tweezers | For handling and placing microscopic LEDs without losing them. | Everyone |
The Pro’s Secret: How to Solder Tiny LEDs Like a Surgeon
Soldering tiny Surface-Mount Device (SMD) LEDs can be tricky, but this method makes it much easier. The secret is “tinning.”
- Secure the LED: Place the tiny LED in your helping hands tool.
- Prepare the Wire: Use a very thin wire. Scrape the colored coating off the very tip.
- Tin Both Parts: This is the key! Apply a tiny bit of flux and then a tiny bead of solder to the LED’s metal contact pad. Do the same for the tip of your wire.
- Make the Connection: Hold the tinned wire against the tinned pad. Briefly touch them with your hot soldering iron. The solder on both parts will instantly melt and fuse together. It takes less than a second!

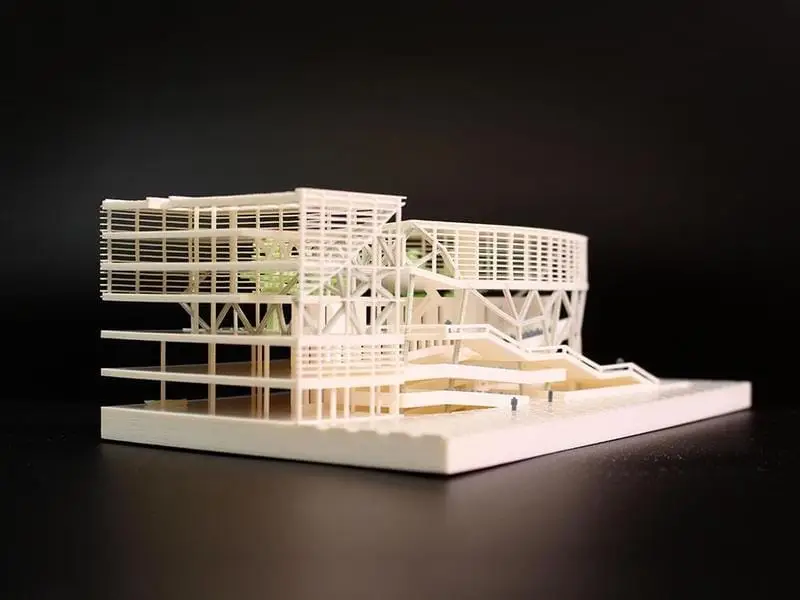
Light-Proofing: The Key to Professional Realism
This is one of the most important steps. If you don’t do this, your model’s thin walls will glow, and it will look like a cheap toy. This is called “light leak.”
The solution is simple: before you assemble the model, paint the inside of all the walls and the roof with two or three coats of opaque black paint. Once that’s dry, you can paint your final interior color over the black. The black layer will completely block the light from shining through the walls. For even better results, you can build small, individual boxes out of cardboard or foam core for each room. This method, demonstrated by many experienced modelers, completely traps the light and prevents it from spilling into adjacent rooms.
Hiding the Magic: How to Conceal Wires
The best lighting is the kind where you can’t see the technology. Wires should be completely invisible.
- Plan Ahead: As you build, create channels for your wires. You can do this by gluing two floor pieces together with a small gap between them, or by carving a small groove in the back of a wall panel.
- Use Tubes: For running wires vertically through multiple floors, you can hide small plastic or brass tubes inside the model, disguised as pipes or columns.
- Be Neat in the Base: All your wires should come down into the model’s base. Use screw terminal blocks to keep your connections organized. Don’t just twist them together! And be sure to label every wire so you know what it controls.
Chapter 5: Advanced Techniques for a Breathtaking Display
Ready to take your model to the next level? These advanced techniques can create a truly unforgettable experience for your audience.
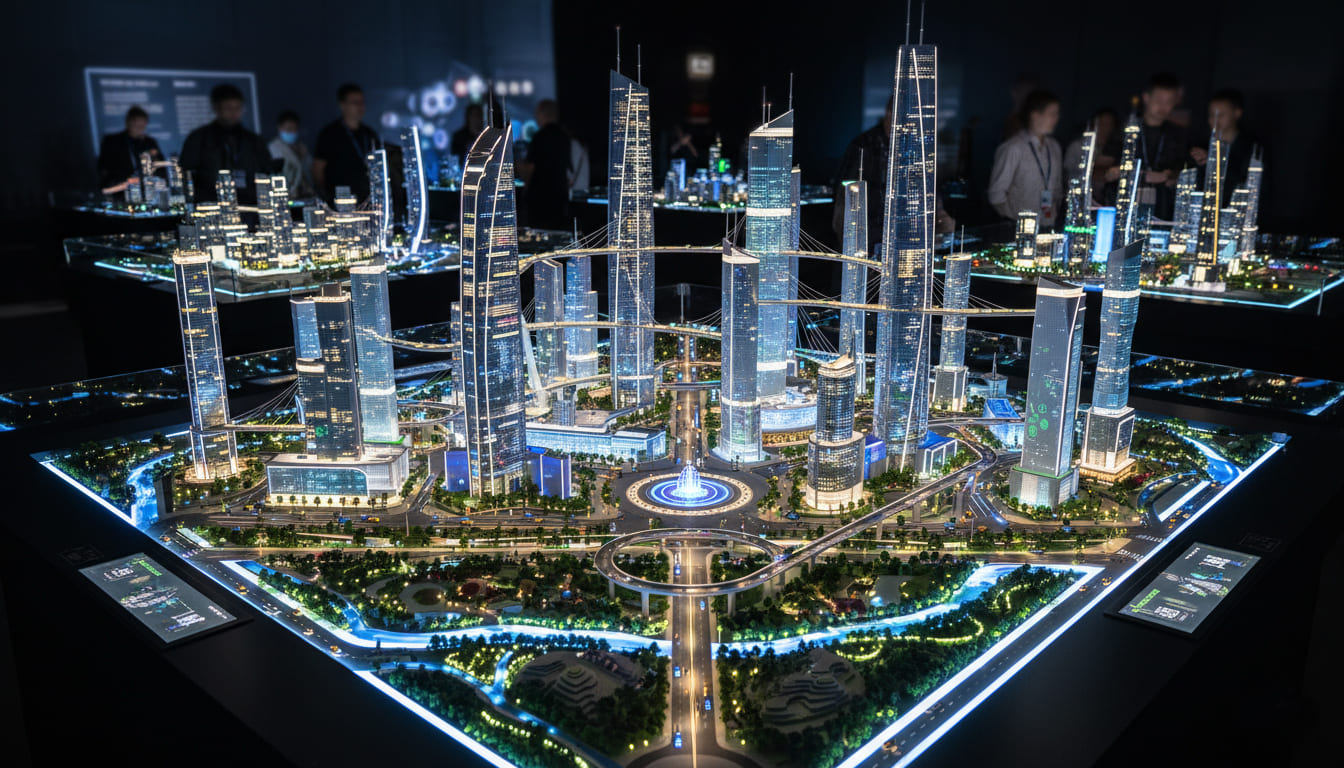
The Interactive Revolution: Touchscreens and Individual Control
This is the cutting-edge technology used in high-end real estate sales centers. The secret is using a special type of LED called an “addressable LED.”
Each of these LEDs has a tiny computer chip that gives it a unique ID number, like a street address. Instead of complex wiring, all the LEDs are connected in a simple line, one after the other. This is called a “daisy chain.” A controller sends a command down the single wire, like “Turn on LED #404,” and only the LED with that specific address will light up.
This system is controlled by software, which can be linked to something as simple as an Excel spreadsheet. This makes it incredibly flexible. The model maker connects the lights, and a programmer links them to a touchscreen interface. A potential buyer can then walk up, press a button for “2-bedroom apartments on the 4th floor,” and watch as only those units light up on the model. It’s a powerful and engaging sales tool that makes understanding the project effortless.
Creating Special Effects: Flickering Flames and More
Want to add a flickering fireplace to your model? Or a cozy, flickering kerosene lamp in an old-timey structure? The easiest way is to buy special flickering LEDs. These have a tiny chip built right in that creates the effect for you. They are ready to go right out of the package. For even more realism, you can combine one flickering LED with one steady LED of the same color. This creates a more subtle, natural effect that looks just like a real flame.
Chapter 6: Troubleshooting: When the Lights Go Out
Even with careful planning, things can go wrong. Here’s a quick guide to solving common problems.
| Problem | Possible Cause | How to Fix It |
|---|---|---|
| One LED is not working. | The wires are backward (polarity is wrong), or it’s a bad solder joint. | Try swapping the positive and negative wires. If that doesn’t work, re-heat the solder connection. |
| The whole model is dark. | The power supply is unplugged, or there is a short circuit. | Check your power supply first. Then, look for any bare wires that might be touching each other. |
| The model’s walls are glowing. | You didn’t light-proof the inside properly. | This is hard to fix after assembly. You may need to try and inject black paint inside. It’s why planning is so important! |
| The lights are too bright. | The resistor value is too low, or the LED is too powerful. | You can add a higher-value resistor to dim the LED. You can also add a diffuser (like frosted plastic) to soften the light. |
Final Thoughts: Your Vision, Illuminated
Lighting an architectural model is a craft that combines technical precision with artistic vision. It requires careful planning and a steady hand, but the results are more than worth the effort.
By following the steps in this guide—from planning and light-proofing to soldering and troubleshooting—you have the complete toolkit to create professional, stunning results. The goal is to make the technology disappear, leaving only the beautiful effect of the light itself. When a client looks at your model and can truly feel the warmth of a home or the energy of an office, you’ve done more than just build a model. You’ve brought a vision to life.
Ready to Bring Your Model to Life?
Don’t let your brilliant designs sit in the dark. Start planning your lighting today and create a presentation that will captivate and inspire. Your next project is waiting to shine.
Frequently Asked Questions (FAQ)
- What kind of lighting is best for scale models?
LEDs are the best choice because they are efficient, versatile, and produce very little heat. LED strips, mini bulbs, and fiber optics are all great options that can be scaled to fit your model. For more, see our section on choosing your lights. - How do I make the lighting for my architectural model look realistic?
The key is to layer your lighting. Use ambient lighting for general illumination, accent lighting to highlight features, and task lighting for small details. Experimenting with shadows and light angles will also create depth and make it look more real. - Can lighting damage an architectural model?
Yes, heat can damage your model, especially if it’s made from materials like paper, foam, or plastic. Using LED lights is the best way to prevent this, as they produce minimal heat. Always check the heat output of your lights. - How do I control the lighting in my model?
You can use simple manual switches and dimmers, or more advanced automated control systems. For the most impressive results, you can use programmable systems that simulate different times of day or allow for interactive control.
For lighting supplies, consider reputable electronics distributors like Digi-Key for components or specialized hobby suppliers like Evan Designs for pre-wired solutions.