Esta poderosa tecnología se ha convertido en el estándar de oro en el mundo del diseño, Y por una buena razón. No se trata solo de crear una imagen bonita; Se trata de crear claridad, confianza, y emoción. Es un apretón de manos visual que garantiza que usted y su cliente estén soñando exactamente el mismo sueño. En esta guía final, Exploraremos todas las facetas de la representación 3D. Descubriremos:
- Los fundamentos: ¿Qué son exactamente las representaciones y cómo funcionan??
- Los beneficios: Por qué esta herramienta no es negociable para el éxito de diseño moderno.
- El proceso: Un detallado, viaje paso a paso de cómo se hace realidad un render.
- Las opciones: Explorando los diferentes tipos de representaciones y si debe bricolaje o contratar a un Pro.
- La inversión: Un desglose transparente de cuánto cuesta el renderizado 3D.
- El futuro: Un vistazo a lo que sigue para el mundo de la visualización del diseño.
Si es propietario de una vivienda y está nervioso por una gran renovación, un diseñador de interiores que busca elevar sus presentaciones, un arquitecto planeando una nueva construcción, o un estudiante ansioso por aprender las herramientas del oficio, esta guía es para ti. Entremos en el mundo del renderizado 3D y hagamos realidad la imaginación..
Parte 1: ¿Qué es un renderizado de diseño de interiores?? Los fundamentos básicos
Antes de sumergirnos en los interesantes beneficios y procesos, comencemos con lo básico. Comprender qué es una representación (y qué no es) es el primer paso para aprovechar su poder.. Es un concepto simple con profundas implicaciones..
¿Qué es un renderizado de diseño de interiores 3D??
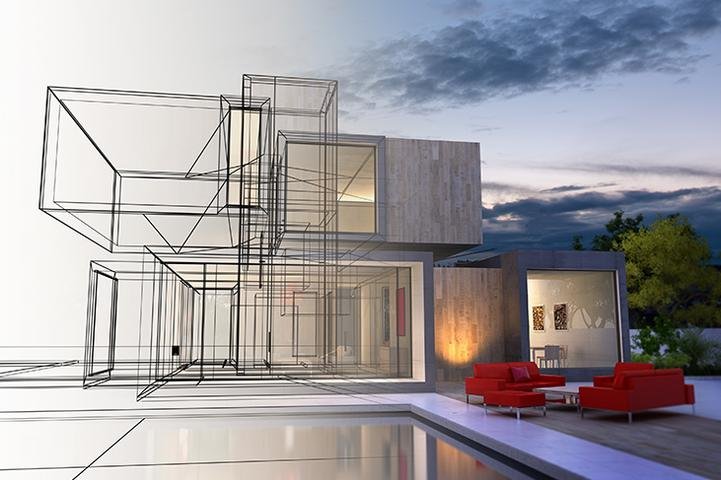
Simplemente poner, Una representación de diseño de interiores es una imagen digital que muestra cómo se verá un espacio interior.. Piensa en ello como un fotografía del futuro. Utilizar software informático especializado, un diseñador o artista 3D crea un virtual, modelo tridimensional de una habitación y luego genera una imagen 2D realista a partir de ese modelo.
Esto no es sólo un simple boceto.. Una representación de alta calidad, A menudo se le llama visualización 3D o renderizado fotorrealista., Comunica cada detalle del diseño propuesto.. Esto incluye:
- La distribución precisa de la habitación y los muebles..
- Los colores de las paredes, techos, y decoracion.
- Las texturas y materiales del suelo., telas, y superficies.
- Cómo la iluminación natural y artificial interactuará con el espacio.
- La escala y la proporción de cada elemento.
Es la mejor herramienta de comunicación, Tomar todos los elementos abstractos de un tablero de ánimo y plano de planta y ensamblarlos en un solo, cohesivo, e imagen visualmente impresionante.
Una breve historia: Desde bocetos dibujados a mano hasta realismo digital
Para apreciar dónde estamos hoy, Ayuda saber de dónde venimos. Por generaciones, Los diseñadores y arquitectos de interiores se basaron en métodos manuales para transmitir sus ideas. Bocetos de perspectiva dibujadas a mano, pinturas de acuarela, y los intrincados planos de planta 2D fueron las herramientas del comercio. Estos métodos tenían un encanto artístico innegable y aún son valiosos para una conceptualización rápida..
Sin embargo, Tenían sus límites. No podían replicar perfectamente el juego complejo de la luz y la sombra, Tampoco podrían ser cambiados fácilmente. Un cliente que quería ver un color sofá diferente significaba comenzar un nuevo dibujo desde cero.
Las semillas de cambio se plantaron en la década de 1960, No en diseño, Pero en industrias como la ingeniería aeroespacial y automotriz, donde se crearon los primeros modelos simples de estructura alámbrica 3D. A medida que la tecnología informática explotó a través de los años 80 y 90, Estas herramientas se volvieron más sofisticadas y encontraron su camino hacia la arquitectura.. A la década de 2000, El software se volvió potente y accesible para hacer que la representación 3D fotorrealista sea una herramienta viable para los diseñadores de interiores en todas partes. Que una vez fue un nicho, La tecnología cara es ahora el estándar de la industria, permitiendo un nivel de claridad y colaboración previamente inimaginable.
¿Cuáles son los componentes principales de un renderizado 3D??
Un impresionante render fotorrealista no es mágico: es el resultado de cuatro componentes digitales centrales que trabajan juntos en perfecta armonía.. Comprender estos componentes básicos le ayudará a apreciar el arte y la habilidad técnica involucrados..
Modelos: El esqueleto digital
La base de cualquier render es el modelo 3D.. Así es la arquitectura digital de la escena. Los artistas crean las formas y estructuras geométricas de todo lo que ves.: las paredes, Windows, y puertas que forman la habitación, así como cada mueble, cada lámpara, y cada florero decorativo. este digital “esqueleto” define el tamaño, forma, y colocación de cada objeto en el espacio..
Texturas y materiales: El realista “Piel”
Un modelo 3D por sí solo es solo una colección de formas grises. Lo que lo da vida es la aplicación de materiales y texturas.. Este es el digital “piel” que le da a cada superficie su apariencia realista. Los artistas aplican mapas de textura: imágenes de alta resolución de materiales como el grano de madera, tejido de tela, venas de mármol, o acabados de metal: a los modelos. Luego se ajustan las propiedades como el ajuste como:
- Reflexión: ¿Cuánta luz se recupera una superficie?.
- Brillo: Si una superficie es brillante (como cromo pulido) o mate (como un piso de piedra).
- Golpe/desplazamiento: Pequeños detalles de la superficie que crean la ilusión de la textura, Como los surcos en la madera o los mechones de una alfombra.
Iluminación: El alma de la escena
La iluminación es posiblemente el elemento más crítico para el realismo y el estado de ánimo. Sin buena iluminación, Incluso los mejores modelos y texturas se verán planos y falsos.. El artista monta un completo sistema de iluminación que imita el mundo real:
- Luz natural: un digital “sol y cielo” Sistema que proyecta luces y sombras realistas a través de las ventanas., cambiando dependiendo de la hora del día.
- Luz artificial: Colocar versiones digitales de artefactos de iluminación como colgantes., lámparas, y focos, Cada uno emite luz tal como lo haría su contraparte del mundo real..
Esta iluminación interactúa con todos los materiales de la escena., creando los reflejos brillantes, sombras suaves, y reflejos sutiles que hacen que un espacio se sienta real y acogedor.
Perspectiva y cámara: El ojo del espectador
Finalmente, toda la escena se ve a través de una cámara digital. El artista elige la posición perfecta de la cámara, ángulo, y distancia focal para crear una composición convincente que muestre mejor el diseño. Esto determina la perspectiva (cómo aparecen los objetos entre sí) y garantiza que la imagen final se sienta equilibrada y profesional., como una fotografía tomada por un experto fotógrafo de arquitectura.
3D Representación vs.. Puesta en escena virtual: ¿Cuál es la diferencia??
Este es uno de los puntos de confusión más comunes en la industria.. Si bien ambas herramientas se utilizan para visualizar una propiedad, Son procesos fundamentalmente diferentes con diferentes aplicaciones.. vamos a aclararlo.

Puesta en escena virtual comienza con un fotografía real de un existente, habitación vacía. Un artista digital luego usa software para agregar muebles y decoración a esa foto.. Es una herramienta increíblemente útil para los agentes inmobiliarios que desean ayudar a los compradores potenciales a ver el potencial en una casa vacante. Su objetivo principal es “escenario” un espacio existente sin el costo y la molestia de los muebles físicos.
Representación 3D interior, por otro lado, crea un escena completamente digital desde cero. No hay fotografía inicial. Toda la habitación: las paredes, el piso, la iluminación, los muebles: está construido en un entorno 3D. Esto lo convierte en la herramienta perfecta para proyectos que aún no existen., como un nuevo edificio, una renovación importante, o un concepto de diseño completamente nuevo.
“Piense en ello de esta manera: La puesta en escena virtual es como decorar digitalmente una habitación real. 3El renderizado D es como construir y decorar una sala digital desde cero.”
Aquí hay una tabla simple para resaltar las diferencias clave.:
| Característica | Puesta en escena virtual | Representación 3D interior |
|---|---|---|
| Punto de partida | Una fotografía real de una habitación vacía. | Un modelo digital 3D creado a partir de planos. |
| Flexibilidad creativa | Limitado. No puedes cambiar la arquitectura de la habitación ni el ángulo de la cámara de la foto original.. | Ilimitado. Tienes control total sobre cada elemento., incluyendo el diseño, materiales, y vistas de cámara. |
| Caso de uso principal | Comercialización existente, propiedades vacantes en venta o alquiler. | Visualizando nueva construcción, renovaciones, y diseños de interiores conceptuales.. |
| Mejor para | Agentes inmobiliarios y administradores de propiedades.. | Diseñadores de interiores, arquitectos, y promotores inmobiliarios. |
ambos son valiosos, pero sirven diferentes necesidades. Conocer la diferencia le ayuda a elegir la herramienta adecuada para su proyecto específico.
Parte 2: Por qué los necesitas: 10 Beneficios que cambian el juego de la representación 3D
Ahora que sabemos cuáles son las representaciones, Exploremos por qué se han vuelto tan indispensables. Los beneficios van mucho más allá de una imagen bonita; Impactan su presupuesto, Tu línea de tiempo, tus relaciones con los clientes, Y tu éxito general.
1. Ahorra tiempo y dinero: El retorno de la inversión tangible
Este es el beneficio más práctico y convincente. Hacer cambios durante la fase de diseño es fácil y económico. Haciendo cambios durante la construcción? Esa es una pesadilla de retrasos y excesos de presupuesto. Un render 3D le permite detectar fallas de diseño potenciales antes de que se marque una sola uña.
Imagine que el render revela que una isla de cocina planificada es demasiado grande, restringir el flujo de trabajo. O que la colocación de un sofá bloquea una puerta cuando se abre. Identificar estos problemas no cuesta digitalmente nada. Repararlos una vez construidos podría costar miles de dólares. Además, Imágenes claras conducen a decisiones y aprobaciones más rápidas por parte de los clientes., lo que acorta el cronograma general del proyecto y ahorra dinero en mano de obra.
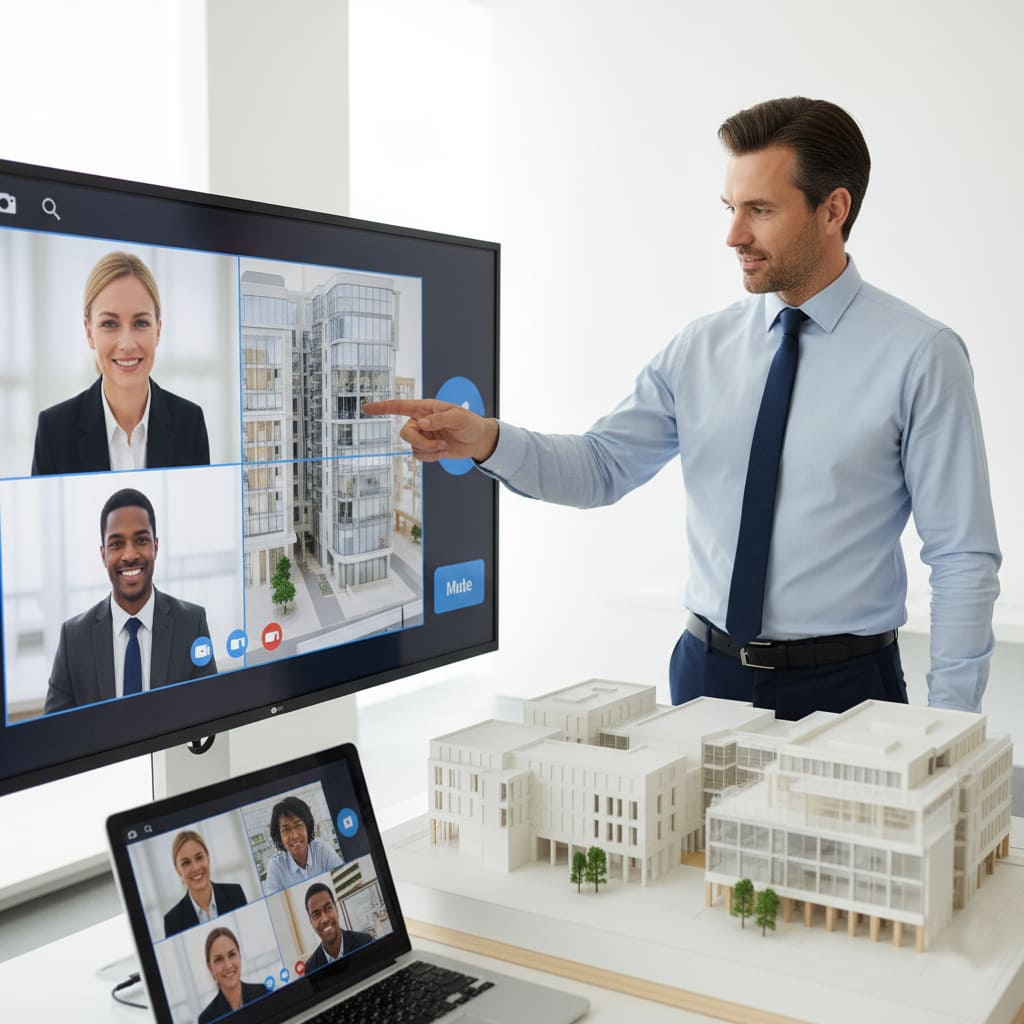
2. Mejora la comunicación y genera una confianza inquebrantable en el cliente
El diseño de interiores está lleno de jerga técnica y conceptos abstractos.. Términos como “flujo espacial,” “espacio negativo,” e incluso los nombres de materiales específicos pueden resultar confusos para los clientes. Un renderizado 3D elimina el ruido.. Es un lenguaje visual universal que todos puedan entender al instante. No hay lugar para malas interpretaciones.
Cuando un cliente ve una imagen fotorrealista que coincide perfectamente con la visión que tenía en su cabeza., genera una increíble cantidad de confianza. Se sienten escuchados y comprendidos. Esta claridad colaborativa es la base de una excelente relación diseñador-cliente y de un proyecto exitoso..
3. Mejora la toma de decisiones de diseño y reduce drásticamente las revisiones
Una de las mayores fuentes de ansiedad del cliente es la incertidumbre.. “¿Me gustará ese color en las cuatro paredes??” “¿Ese sofá es demasiado moderno para la habitación??” Un renderizado 3D elimina estas conjeturas. Ofrece un “prueba antes de comprar” experiencia para opciones de diseño.
¿Quieres comparar un oscuro?, paleta de colores cambiantes con una luz, aireado? Un artista puede crear dos versiones.. No puedo decidir entre una encimera de mármol o de cuarzo? Puedes ver ambos en contexto.. Esta capacidad de experimentar visualmente permite a los clientes tomar decisiones seguras., lo que significa menos dudas y revisiones costosas en el futuro.
4. Crea un marketing poderoso, Herrada, y herramienta de ventas
Para profesionales, 3D Las representaciones son una mina de oro de marketing.
- Para diseñadores de interiores: Puede construir una cartera impresionante de su mejor trabajo, incluyendo proyectos que aún no se han construido. Esto le permite mostrar sus habilidades y su estilo único para atraer nuevos clientes..
- Para desarrolladores inmobiliarios: Puede comenzar a comercializar y vender propiedades “fuera de plan” Mucho antes de que termine la construcción. Estas imágenes crean compradores de zumbido y seguros al principio del proceso..
- Para compañías de muebles: Los productos se pueden exhibir en perfectamente curado, habitaciones digitales aspiracionales sin el gasto de construir conjuntos físicos y organizar sesiones de fotos.
Estas imágenes de alta calidad son perfectas para sitios web, redes sociales, folletos, y presentaciones, Darle a su marca un aspecto pulido y profesional.
5. Da una fuerte ventaja competitiva en un mercado lleno de gente
En el panorama competitivo actual, presentarse a una presentación para un cliente con planos de planta en 2D y un panel de estado de ánimo ya no es suficiente. Un competidor que presenta una impresionante, La representación fotorrealista en 3D del futuro espacio del cliente demuestra inmediatamente un mayor nivel de profesionalismo., pericia, y dedicación. Ofrecer visualización 3D te distingue. Demuestra que está interesado en herramientas modernas y, más importante, para garantizar que su cliente tenga total claridad y confianza en su proyecto.
6. Proporciona una visualización detallada y precisa
Un render no solo muestra la idea general; muestra los detalles intrincados. Puedes ver el patrón preciso del mosaico., la textura del papel tapiz, las sutiles vetas de la madera. Este nivel de detalle garantiza que cada matiz del diseño sea visto y apreciado., No dejando nada a la imaginación.
7. Fomenta una conexión emocional profunda
Un gran diseño no se trata solo de cómo se ve un espacio; se trata de cómo se siente. Un render de alta calidad, con su iluminación realista y detalles cuidadosamente elegidos, puede evocar una poderosa respuesta emocional. Cuando un cliente ve un cálido, Invitando la imagen de su futura sala de estar, No solo ven un diseño, sino que se ven viviendo allí, Hacer recuerdos. Esta conexión emocional es invaluable para obtener un proyecto aprobado.
8. Permite una estimación de costos más precisa
Cuando cada elemento de un diseño se modela y visualiza, desde las lámparas específicas hasta el número exacto de tirones del gabinete, se vuelve mucho más fácil crear un presupuesto preciso. Este inventario visual detallado ayuda a prevenir costos inesperados y garantiza que el proyecto permanezca en el camino financieramente.
9. Colaboración del equipo de línea de línea
Un render 3D sirve como una sola fuente de verdad para todo el equipo del proyecto. El diseñador de interiores, el arquitecto, el constructor, y los diversos subcontratistas pueden referirse al mismo conjunto de imágenes. Esto asegura que todos estén alineados en el gol final, Minimizar errores y falta de comunicación entre diferentes operaciones.
10. Aumenta la participación y satisfacción del cliente
El proceso de representación es inherentemente colaborativo. Los clientes pueden ver que su espacio tome forma y proporcione comentarios en el camino. Esta participación los hace sentir como socios activos en el viaje de diseño., no solo destinatarios pasivos. Este compromiso lleva a un producto final que realmente refleja su visión., resultando en una mayor satisfacción y una mayor probabilidad de referencias.
Parte 3: El espectro de la visualización: Tipos clave de representaciones interiores
No todas las representaciones se crean iguales. El tipo que elija depende de la etapa de su proyecto, Tus objetivos, y tu presupuesto. Explore el espectro de opciones, Desde bocetos simples hasta mundos virtuales totalmente inmersivos.
El estándar de la industria: 3D Presentaciones de imágenes Still
Esta es la forma más común y versátil de representación 3D. Es un solo, Imagen estática de alta resolución, como una fotografía digital, del espacio propuesto. Dentro de esta categoría, Hay dos estilos principales:

Representaciones conceptuales
A menudo hecho en un “arcilla” o estilo monocromático, Estos renders se centran en el panorama general: forma, disposición, escala, y el volumen total del espacio. Omiten deliberadamente colores y texturas detalladas para permitir discusiones sobre los elementos arquitectónicos y espaciales centrales.. Son perfectos para las primeras etapas de un proyecto..
Representaciones fotorrealistas
Este es el objetivo final de la mayoría de los proyectos.. El objetivo es crear una imagen que sea indistinguible de una fotografía real.. Cada detalle, desde los sutiles reflejos en la ventana hasta las suaves arrugas de un cojín de lino, está meticulosamente elaborado.. Se utilizan para presentaciones finales de clientes., materiales de marketing, y asegurar la aprobación del proyecto.
Experiencias inmersivas: 360° Panorámicas y Tours Virtuales
Un paso adelante respecto de una imagen fija, Un panorama de 360° permite al espectador “pararse” en un lugar fijo dentro de la sala virtual y mirar a su alrededor en cualquier dirección: hacia arriba, abajo, y por todas partes. Vinculando varios de estos puntos panorámicos juntos, Puedes crear un recorrido virtual simple.

“Un panorama de 360 ° ya no le muestra a su cliente una foto de la habitación; Les dejas pararse dentro de él.”
Este formato es fantástico para ayudar a los clientes a tener un verdadero sentido del espacio y sus proporciones.. Es especialmente efectivo para clientes remotos que no pueden visitar un sitio en persona.
Narración dinámica: Tutoros animados y flythroughs
Si una imagen fija es una fotografía, Un tutorial animado es una película. Este es un video pre-renderizado que guía al espectador en un viaje cinematográfico a través del espacio diseñado. La cámara puede suavemente “caminar” De habitación a habitación, Pan a través de hermosos detalles, y “volar” sobre el diseño para mostrar las conexiones entre espacios. Estos son ideales para proyectos a gran escala como hoteles, restaurantes, o casas de lujo, donde comprender el flujo y la experiencia de moverse a través del espacio es crítico.
La vanguardia: Realidad virtual (VR) y realidad aumentada (Arkansas)
Aquí es donde la visualización del diseño se vuelve verdaderamente interactiva.
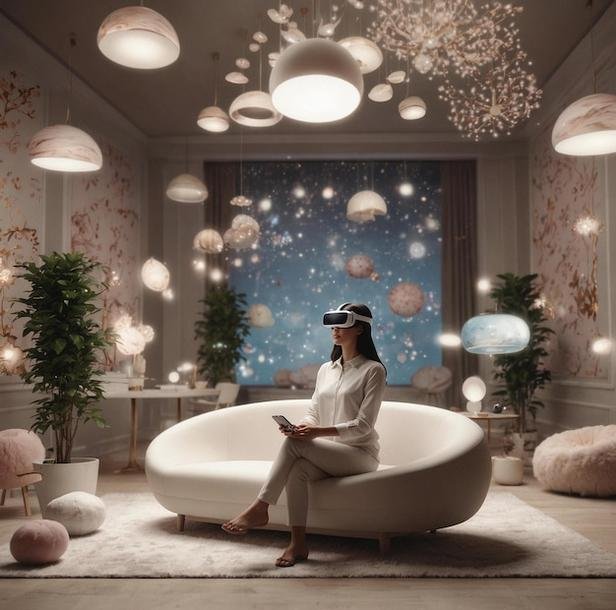
Realidad virtual (VR) Representación
Esta es la experiencia más inmersiva posible. El cliente se pone un auricular VR y se transporta digitalmente al modelo 3D. Ellos pueden “caminar” alrededor del espacio libremente, en un 1:1 escala, Como si realmente estuvieran allí. Pueden ver los detalles de cerca, Obtenga una verdadera sensación de alturas de techo, y experimentar el espacio de una manera profundamente personal. Es una herramienta poderosa que está revolucionando las presentaciones de clientes de alto nivel..
Realidad aumentada (Arkansas) Representación
La RA no crea un mundo completamente virtual; en cambio, superpone elementos digitales al mundo real, visto a través de un teléfono inteligente o tableta. Para diseño de interiores, Esto significa que un cliente puede usar la cámara de su teléfono para ver su imagen real., sala de estar existente y colocar digitalmente un modelo 3D de un nuevo sofá en el espacio para ver cómo encaja. Es una forma práctica y accesible de probar muebles y decoración nuevos en un contexto del mundo real..
| Tipo de renderizado | Descripción | Mejor caso de uso |
|---|---|---|
| 3Imagen fija | un solo, fotorrealista “fotografía digital.” | Presentaciones finales, marketing, cartera, aprobaciones del cliente. |
| 360° Panorama | Una imagen interactiva que permite al espectador mirar a su alrededor desde un punto fijo.. | Brindar a los clientes una mejor sensación de espacio, presentaciones remotas. |
| Animación/Tutorial | Un recorrido cinematográfico en vídeo por el espacio.. | Proyectos a gran escala (hoteles, casas de lujo) para mostrar fluidez y experiencia. |
| Realidad virtual (VR) | Una inmersión total, experiencia caminable usando un auricular. | Presentaciones de clientes de alto nivel., validación del diseño en un 1:1 escala. |
Parte 4: El flujo de trabajo profesional: Cómo se crea un renderizado 3D, Paso a paso
Crear un renderizado 3D impresionante es un proceso meticuloso que combina habilidad técnica con visión artística.. Si bien los detalles pueden variar, La mayoría de los estudios profesionales siguen un sistema estructurado., Flujo de trabajo de varias etapas para garantizar la eficiencia y la calidad.. Recorramos el viaje desde la idea inicial hasta la imagen final..
Paso 1: La sesión informativa & Recopilación de información
Esta es la etapa más crítica.. La calidad del render final depende enteramente de la calidad de la información inicial.. Un diseñador proporciona al artista o estudio 3D un resumen completo del proyecto., que normalmente incluye:
- Planos Arquitectónicos: 2planos de planta D, elevaciones, y los planos de techo con medidas precisas son el mínimo absoluto. Si ya existe un modelo 3D, eso es incluso mejor.
- Tableros de humor & Referencias: Una colección de imágenes que definen el estilo deseado, atmósfera, y paleta de colores.
- FF&Horario E: Una lista de muebles específicos., Accesorios, y equipo.
- Sugerencias de ángulos de cámara: El diseñador a menudo sugerirá las vistas clave que desea ver..
Cuanto más detallado sea el informe, más fluido será el proceso.
Paso 2: 3D Modelado – Construyendo la arquitectura digital
Con el escrito en la mano, el artista 3D comienza a construir la escena digital. Comienzan utilizando los planos 2D para “extrudir” las paredes, creando la estructura básica de la habitación. Luego modelan todos los elementos arquitectónicos fijos., como gabinetes y chimeneas, y luego modelar o importar todos los muebles y elementos decorativos..
Paso 3: Configuración de la cámara – Definiendo la vista
Temprano en el proceso, el artista configurará los ángulos de cámara propuestos y enviará simples “arcilla” Vistas al diseñador para su aprobación.. Este paso crucial garantiza que el render final se encuadre perfectamente para capturar la esencia del diseño..
Paso 4: Textura & Materiales – Aplicar las superficies realistas
Aquí es donde la escena comienza a cobrar vida.. El artista aplica meticulosamente los materiales digitales especificados a cada superficie del modelo 3D., propiedades de ajuste para imitar cómo se comportarían en el mundo real.
Paso 5: Iluminación – Creando el estado de ánimo y la atmósfera
El artista instala un sofisticado sistema de iluminación, usar un sol y un cielo digitales para la luz natural y colocar versiones digitales de lámparas y colgantes para luz artificial. Esto crea el ambiente y el realismo de la escena..
Paso 6: Añadiendo “Séquito” – Dando vida a la escena
La magia de un render creíble a menudo reside en la “séquito”—el pequeño, Detalles cuidadosamente colocados que sugieren presencia humana., como una manta drapeada o una pila de libros. Estos elementos hacen que el espacio se sienta habitado..
Paso 7: El proceso de renderizado – Del modelo 3D a la imagen 2D
Este es un proceso puramente computacional donde la computadora calcula las interacciones de la luz con cada superficie para generar la imagen final.. Esto puede tardar desde unos pocos minutos hasta muchas horas..
Paso 8: Postproducción & Revisiones – El esmalte final
El “crudo” El renderizado se lleva a un programa de edición de fotografías para realizar ajustes finales como corrección de color y ajuste de contraste.. Después de una revisión del cliente y cualquier revisión menor., la resolución completa, Se entrega imagen pulida..
Parte 5: La decisión práctica: Bricolaje versus bricolaje. Subcontrata tus renderizados 3D
Entonces, estás convencido del poder del renderizado 3D. La siguiente gran pregunta es: ¿Deberías aprender a hacerlo tú mismo?, o deberías contratar a un profesional? Ambos caminos tienen sus méritos., y la elección correcta depende de tu tiempo, presupuesto, y objetivos a largo plazo.
La ruta del bricolaje: ¿Deberías crear tus propias representaciones??
Para los creativos curiosos y con inclinaciones técnicas, aprender a crear tus propias representaciones puede ser una habilidad increíblemente gratificante. Sin embargo, es esencial entender el compromiso involucrado.
El software requerido
Necesitará una combinación de software de modelado 3D y un motor de renderizado.. Estas son algunas de las opciones más populares.:
| Tipo de programa | Programas populares | Mejor para |
|---|---|---|
| 3D Modelado | Bosquejo, Autodesk 3ds max, Licuadora, Cinema 4D | Construyendo el modelo 3D central del espacio y el mobiliario.. SketchUp es ideal para principiantes, mientras que Blender es una poderosa opción gratuita. |
| Motor de renderizado | Rayos, Renderizador de corona, Lumión, Abatimiento | Conectándose a su software de modelado para agregar materiales realistas, iluminación, y generar la imagen final. |
Tenga en cuenta que el software profesional puede conllevar importantes costes de suscripción, a menudo miles de dólares al año.
La inversión en hardware
3El renderizado D es una de las tareas más exigentes que le puedes pedir a una computadora. Necesitarás un ordenador de sobremesa potente y con una tarjeta gráfica de alta gama. (GPU) y una gran cantidad de RAM para manejar escenas complejas. Esto puede ser una inversión de varios miles de dólares..
El compromiso de tiempo y habilidad
“Roma no se construyó en un día, y tampoco lo es la habilidad de renderizado fotorrealista.. Es un oficio que requiere cientos de horas para aprender y miles de horas para dominarlo.”
Este es el factor más significativo. Lograr un resultado verdaderamente fotorrealista es una curva de aprendizaje pronunciada. Para un profesional del diseño ocupado, El tiempo dedicado a aprender software es a menudo tiempo que se le quita al trabajo principal de diseño y a la gestión de clientes..
El veredicto: El camino del bricolaje es más adecuado para estudiantes o diseñadores que desean hacer de la visualización 3D una parte central de su conjunto de habilidades profesionales.. Para la mayoría de los diseñadores que trabajan, La subcontratación es más eficiente..
La ruta de la subcontratación: Cómo elegir un socio de renderizado 3D
La gran mayoría de los diseñadores de interiores optan por subcontratar sus necesidades de renderizado a estudios especializados o artistas autónomos.. Esto les permite acceder a resultados de clase mundial sin los gastos generales.. Pero, ¿cómo se encuentra el socio adecuado??

Aquí hay una lista de verificación para guiar su selección.:
- ✅ Revise su cartera: ¿La calidad de su trabajo cumple con sus estándares?? ¿Su estilo artístico se alinea con la estética de su diseño??
- ✅ Busque especialización en diseño de interiores: Un estudio con experiencia en interiores comprenderá mejor la escala., decoración, e iluminacion.
- ✅ Evalúe su flujo de trabajo y comunicación: Un estudio profesional debe tener un proceso claro y un director de proyecto dedicado..
- ✅ Consultar tiempos de respuesta: Asegúrese de que su cronograma de entrega se alinee con los plazos de su proyecto..
- ✅ Confirmar Garantías y Seguridad: Asegúrese de que el estudio esté dispuesto a firmar un acuerdo de confidencialidad. (Acuerdo de confidencialidad) para proteger tu trabajo.
Tomarse el tiempo para examinar sus opciones y encontrar el socio adecuado dará sus frutos en la calidad de sus imágenes y la fluidez de su proyecto..
Parte 6: La inversión: ¿Cuánto cuestan los servicios de renderizado de interiores 3D??
Esta es a menudo la primera pregunta que todos nos hacemos.. El coste de un render 3D puede variar drásticamente según varios factores.. Comprender estos factores le ayudará a presupuestar de forma eficaz.
¿Cuál es el costo promedio de un renderizado interior??
Aunque los precios siempre son específicos del proyecto, Podemos proporcionar algunos rangos de precios generales para una sola imagen fija para darle una idea aproximada..
| Nivel de calidad de renderizado | Costo estimado por imagen (Dólar estadounidense) | Descripción |
|---|---|---|
| Básico / Conceptual | $350 – $750 | Bueno para la exploración de diseño en etapas iniciales, a menudo con modelos e iluminación más simples. |
| gama media / Profesional | $750 – $1,500 | El nivel más común. Alta calidad, Resultados fotorrealistas adecuados para presentaciones de clientes.. |
| De gama alta / Hiperrealista | $1,500 – $5,000+ | Calidad de primer nivel, a menudo indistinguible de una fotografía. Utilizado para proyectos de lujo y publicidad de alto nivel.. |
Las animaciones y las experiencias de realidad virtual se cotizan por proyecto y, por lo general, comienzan en unos pocos miles..
¿Cuáles son los factores clave que influyen en los precios de renderizado??
Entonces, ¿Qué hace que un render cueste? $500 y otro $5,000? Todo se reduce a la cantidad de trabajo y experiencia necesarios.. Estos son los principales impulsores del costo.:
1. Complejidad del Diseño y Geometría
un sencillo, Una sala de estar minimalista es más barata de modelar que un gran comedor con molduras de techo intrincadas y muebles ornamentados..
2. Nivel de detalle y fotorrealismo
Lograr eso último 10% del realismo requiere una cantidad desproporcionada de tiempo y habilidad, lo que aumenta el costo.
3. Resolución de imagen
Una imagen de resolución web estándar es menos costosa que una imagen de resolución ultra alta necesaria para una impresión de gran formato..
4. Número de vistas y revisiones
Solicitar varias vistas de la misma habitación suele conllevar un descuento. Rondas adicionales de revisiones más allá de lo incluido aumentarán el costo.
5. Tiempo de respuesta
Un trabajo urgente que requiere que los artistas trabajen horas extras casi siempre tendrá una tarifa prioritaria..
6. Calidad de los materiales proporcionados
Proporcionando una información muy detallada, Un informe bien organizado puede reducir el tiempo del artista y potencialmente reducir el costo..
Parte 7: Aplicaciones en la práctica: Ejemplos de representaciones interiores por tipo de habitación
El poder del renderizado 3D se comprende mejor a través de ejemplos del mundo real. Los objetivos de un render pueden cambiar dependiendo del espacio específico que se esté diseñando..
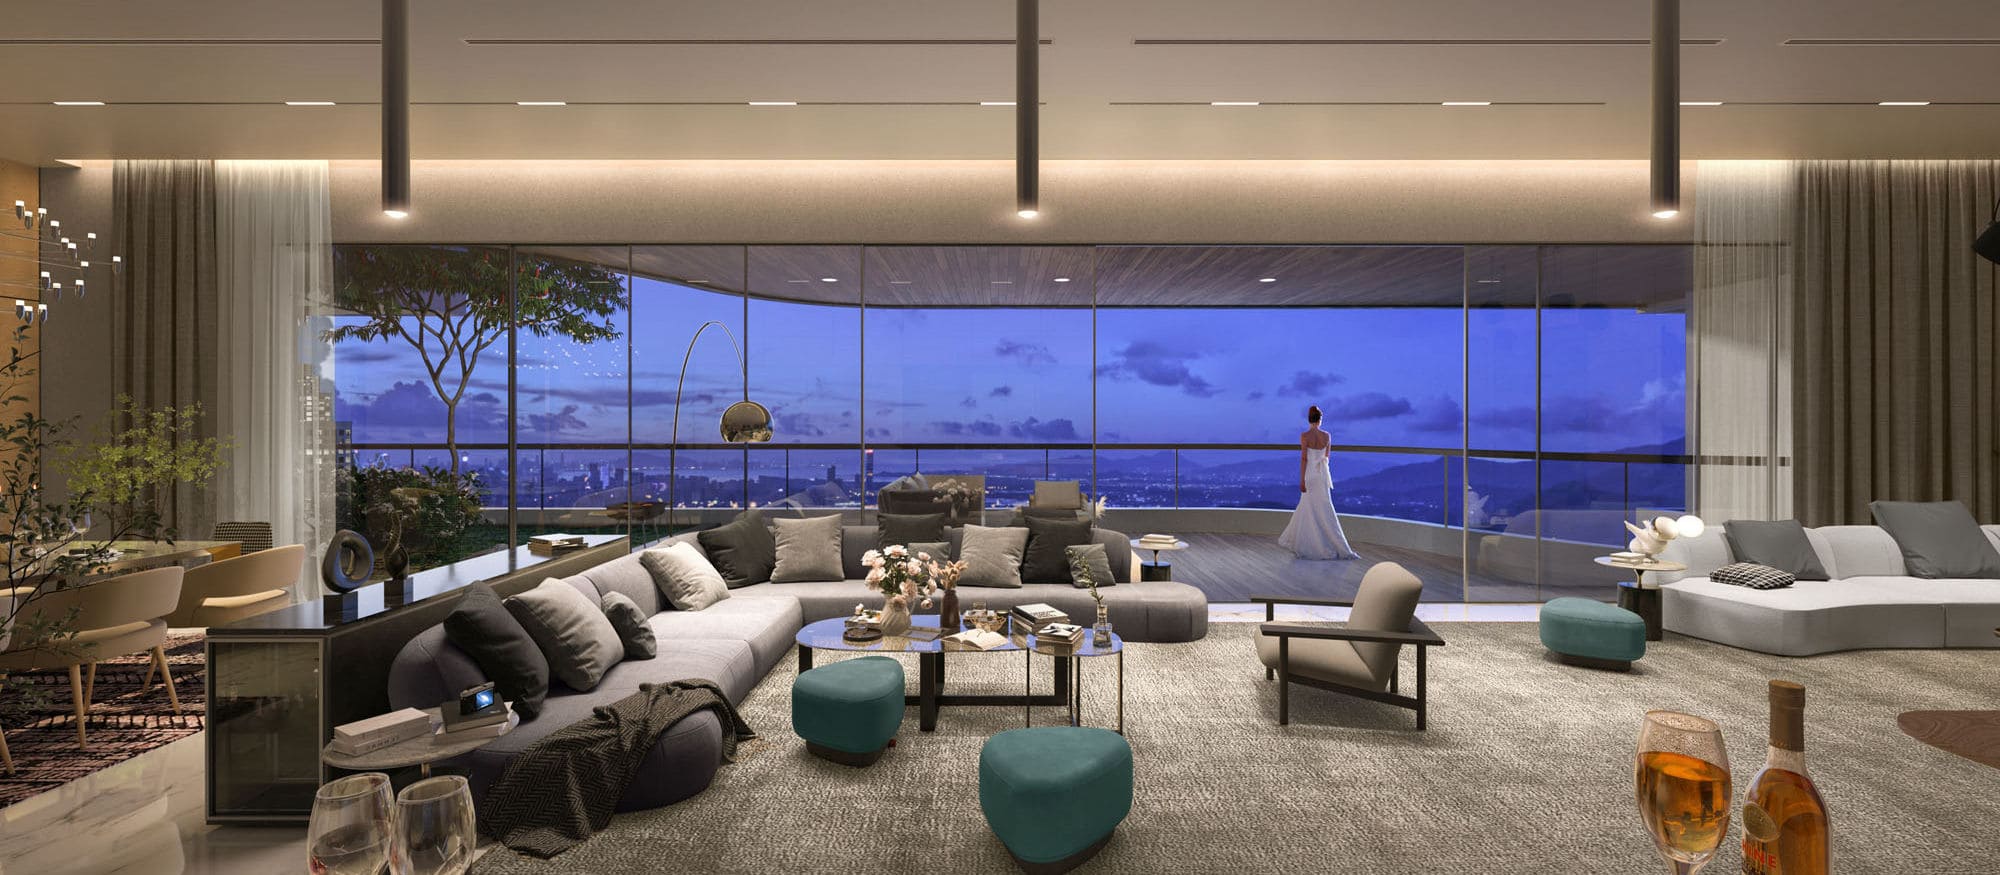
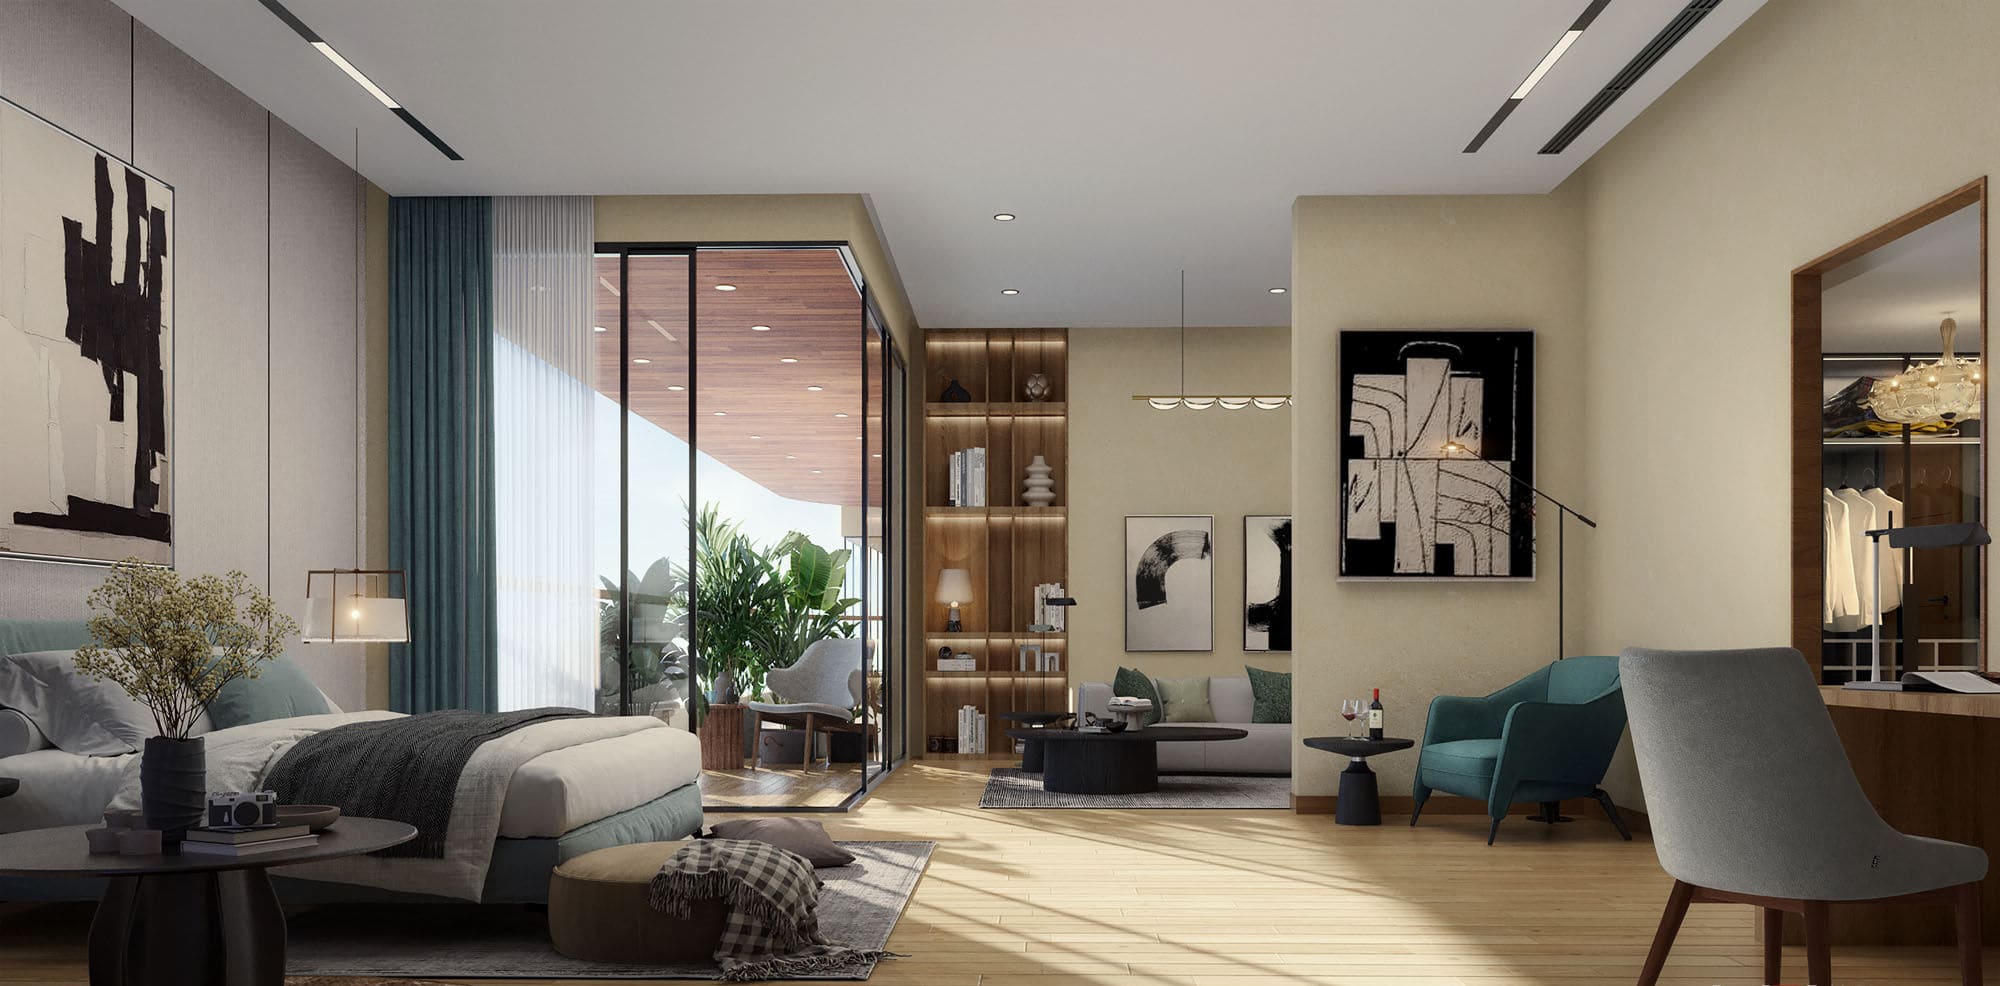
Representaciones de sala de estar
Como el corazón del hogar, la sala de estar se centra en crear una sensación de confort, estilo, y personalidad, mostrando muebles bien dispuestos y un ambiente acogedor.
Representaciones de cocina
Las cocinas tratan del equilibrio entre belleza y función.. Una representación es esencial para visualizar el diseño., flujo de trabajo, y opciones de materiales para gabinetes y encimeras.

Representaciones de dormitorios
Un dormitorio es un santuario personal. Estas imágenes muestran textiles., paletas de colores, y el suave, iluminación en capas que hace que un dormitorio se sienta como un refugio acogedor.
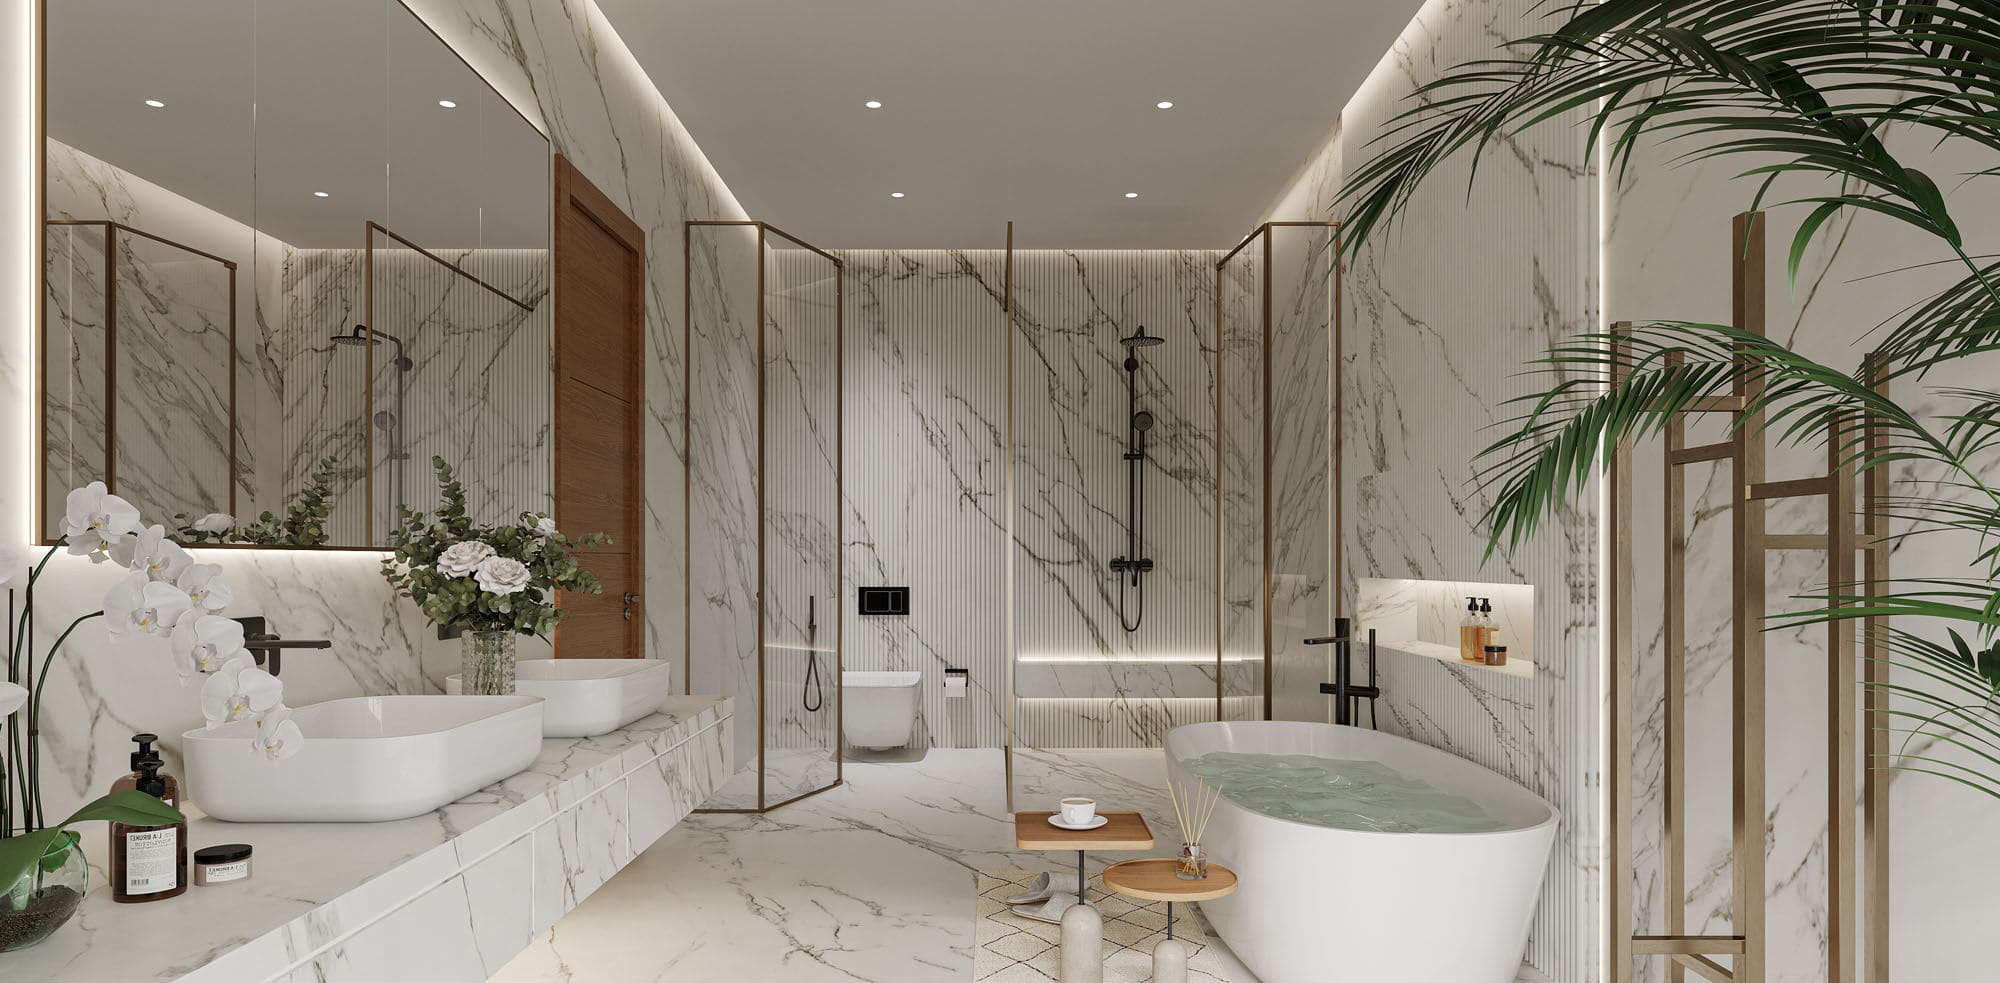
Representaciones de baño
En un espacio más pequeño, cada detalle cuenta. Los renderizados de baños son perfectos para resaltar los intrincados azulejos, accesorios, y una sensación de tranquilidad similar a la de un spa.
Representaciones de la oficina en casa
Una oficina en casa moderna debe ser a la vez inspiradora y funcional. Las representaciones de estos espacios equilibran la estética sofisticada con la comodidad ergonómica..

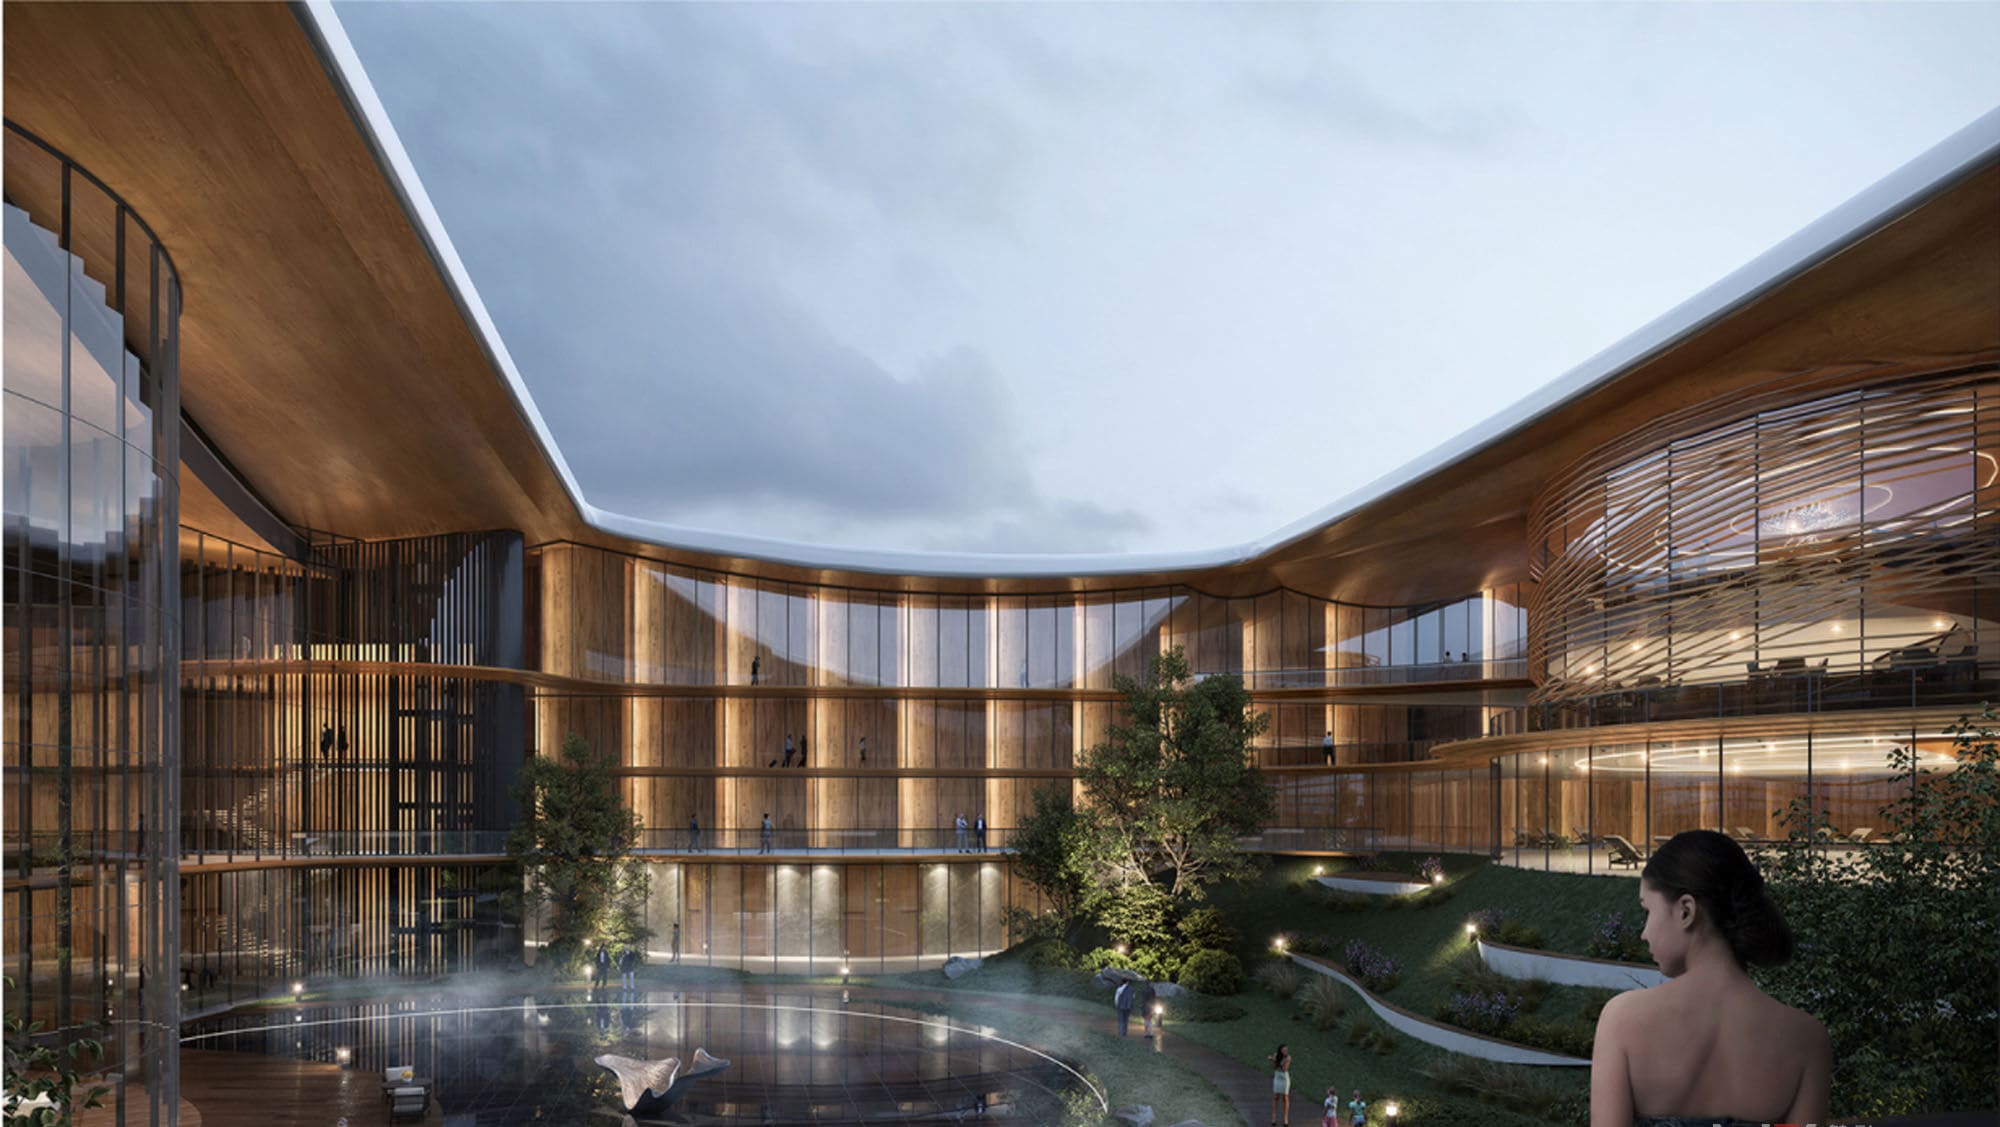
Representaciones de espacios comerciales (Restaurantes, Minorista, Hoteles)
Para proyectos comerciales, El renderizado visualiza la marca y la experiencia del cliente., desde la disposición de los asientos en un restaurante hasta la exhibición de productos en una tienda minorista.
Parte 8: El horizonte: ¿Cuál es el futuro del renderizado de diseño de interiores??
El mundo de la visualización 3D no se detiene. La tecnología evoluciona a un ritmo vertiginoso, y las herramientas disponibles para los diseñadores son cada año más poderosas e inteligentes.

¿Cómo dará forma la tecnología al futuro de la visualización??
El papel de la inteligencia artificial (AI) y aprendizaje automático
La IA ya está empezando a agilizar el proceso de renderizado. Impulsado por IA “quitar ruido” puede reducir drásticamente los tiempos de renderizado. En un futuro próximo, podemos esperar que la IA desempeñe un papel aún más importante, potencialmente sugerir diseños o generar paletas de materiales basadas en un panel de estado de ánimo.
Representación en tiempo real y mayor interactividad
El auge de los potentes motores de renderizado en tiempo real, A menudo tomado prestado de la industria de los videojuegos., está cambiando el juego. Estas herramientas permiten a los diseñadores y clientes navegar en un espacio 3D fotorrealista en tiempo real.. Imagine una presentación en la que pueda cambiar el color de la pared o cambiar el piso y ver los resultados al instante.. Este nivel de interactividad es el futuro de la colaboración con el cliente..
Sostenibilidad y Diseño Ecológico en Visualización
A medida que la sostenibilidad se vuelve más crítica, El renderizado será una herramienta clave para visualizar opciones ecológicas.. Los diseñadores pueden simular la eficiencia energética de un espacio o crear imágenes atractivas que muestren la belleza de los materiales sostenibles., Ayudar a los clientes a tomar decisiones más conscientes del medio ambiente..
Conclusión: Tu visión, Visualizado
Hemos viajado a través del qué, por qué, y cómo del renderizado de diseño de interiores 3D. Hemos visto que es mucho más que una simple herramienta para crear una imagen bonita.. Es un pilar fundamental de la práctica del diseño moderno: un catalizador para una comunicación clara., toma de decisiones segura, marketing eficaz, y el éxito final del proyecto.
El valor central del renderizado 3D radica en su capacidad única de alinear perfectamente la visión creativa del diseñador con las aspiraciones más profundas del cliente.. quita dudas, genera entusiasmo, y garantiza que el resultado final, El espacio construido es exactamente lo que todos soñaron que sería..
Ya sea que se esté embarcando en una simple renovación de la habitación o desarrollando una propiedad comercial a gran escala, Aprovechar el poder de la visualización 3D es la clave para desbloquear todo el potencial de su diseño.. Es hora de parar solo describiendo tu visión y comienzo demostración en todo su impresionante, gloria fotorrealista.
Listo para dar vida a su propia visión de diseño? Explora profesional 3D servicios de prestación hoy y da el primer paso para transformar tus conceptos en una realidad impresionante.