Bienvenido! Alguna vez se preguntó cómo los arquitectos y los diseñadores dan vida a sus planos antes de que se ponga un solo ladrillo? Esa es la magia de 3D representación arquitectónica. Es como echar un vistazo al futuro.. Esta guía desglosa todo lo que necesita saber sobre esta increíble tecnología., desde su funcionamiento básico hasta su impacto en el mundo del diseño y el inmobiliario.
Tabla de contenido
Comprender los conceptos básicos del renderizado arquitectónico 3D
¿Qué es la representación arquitectónica 3D??
Simplemente poner, 3El renderizado arquitectónico es el arte de crear imágenes o animaciones realistas que muestran un edificio o espacio antes de su construcción.. Imagínese poder caminar por su nuevo hogar incluso antes de que se hayan colocado los cimientos.! no es solo dibujar; está elaborando una vista previa digital utilizando software informático especializado. Estos no son tus planos promedio. Estamos hablando de detalles, Imágenes fotorrealistas que pueden hacerte sentir como si estuvieras allí.. Es posible que también escuches a la gente llamarlo visualización arquitectónica., archivo de visualización, o incluso CGI en arquitectura.¿Cómo funciona el renderizado arquitectónico 3D??
Podrías estar pensando, “Esto suena complejo.” Pero analicémoslo paso a paso.. Todo comienza con un plano digital, Entonces ocurre algo de magia informática., y auge! Tienes una imagen impresionante..- Modelado: Primero, Se crea un modelo digital 3D del edificio o espacio.. Piense en ello como construir con LEGO virtuales..
- Textura: Próximo, agregamos colores, patrones, y materiales a las superficies. Aquí es donde comienza a verse un muro de hormigón., Bueno, concreto!
- Iluminación: Como un set de película, Necesitamos preparar el escenario con luz.. Esto incluye la luz del sol., luces interiores, y todas las sombras que proyectan.
- Configuración de la cámara: Elegimos los mejores ángulos para lucir el diseño., como un fotógrafo.
- Representación: Aquí es donde la computadora hace el trabajo pesado, convertir todos esos datos en una hermosa imagen o video.
- Postprocesamiento: Finalmente, un poco de pulido en el software de edición para agregar esos toques finales que hacen que la imagen destaque.

Una breve historia de la visualización arquitectónica
De las pinturas rupestres a los gráficos por ordenador
Por extraño que parezca, Nuestros antepasados fueron los visualizadores arquitectónicos originales.. Desde simples bocetos en las paredes de las cuevas hasta modelos detallados construidos por romanos y griegos., los humanos siempre han buscado visualizar sus creaciones.- Primeros días: Piense en pinturas rupestres y modelos antiguos hechos de arcilla o madera..
- Era del Renacimiento: La introducción del dibujo en perspectiva cambió las reglas del juego., hacer que las imágenes sean más realistas.
- 20Siglo XIX: Las computadoras entraron en escena. La década de 1970 vio nacer el Sketchpad., el primer verdadero programa de diseño asistido por computadora.
- 80s y 90: El software comenzó a volverse sofisticado, y la visualización 3D se volvió más accesible.
- Hoy: Tenemos renderizado en tiempo real., realidad virtual, e incluso la IA se une a la fiesta. Es un mundo completamente nuevo!

Tipos de renders arquitectónicos 3D
3Las representaciones D vienen en todas las formas y tamaños.. Cada tipo tiene un propósito diferente., Es muy parecido a tener diferentes herramientas para diferentes trabajos.. Echemos un vistazo!
Categorizado por Vista/Propósito
Hay varias maneras de mirar un edificio., y cada uno cuenta una parte diferente de la historia.
| Tipo de renderizado | Descripción | Casos de uso típicos |
|---|---|---|
| Representaciones exteriores | Muestre el exterior del edificio desde varios ángulos.. | Marketing, desarrollo de diseño, aprobaciones de planificación. |
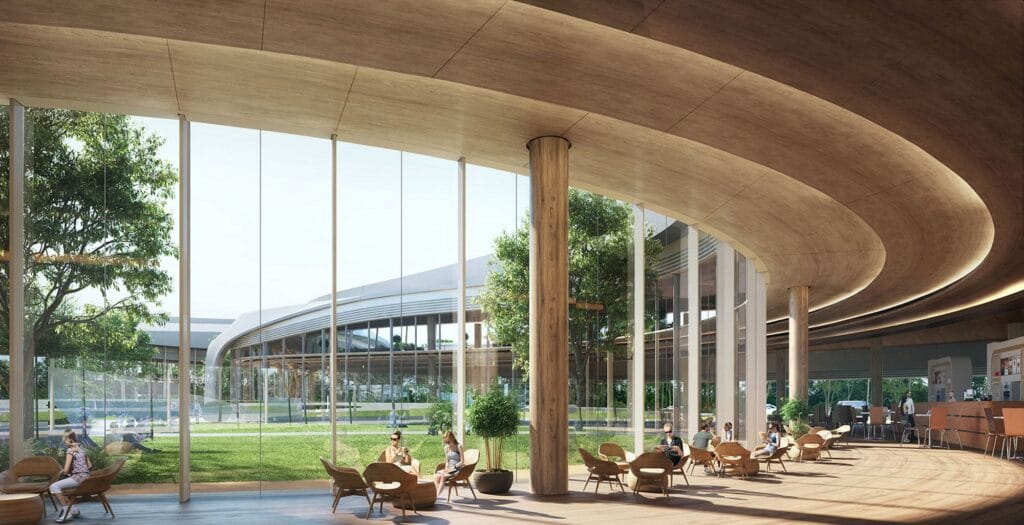
| Representaciones interiores | Representar los espacios interiores., muebles, y acabados. | Diseño de interiores, mostrando cualidades espaciales, selección de materiales. |
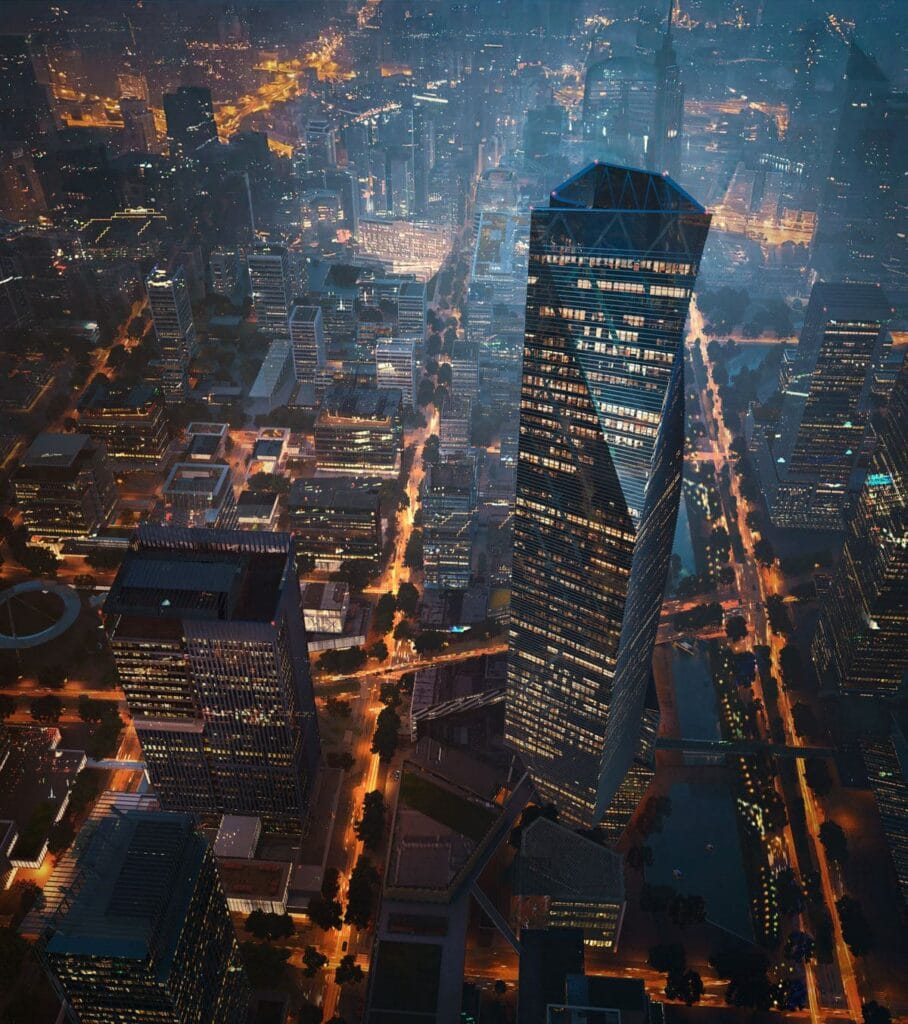
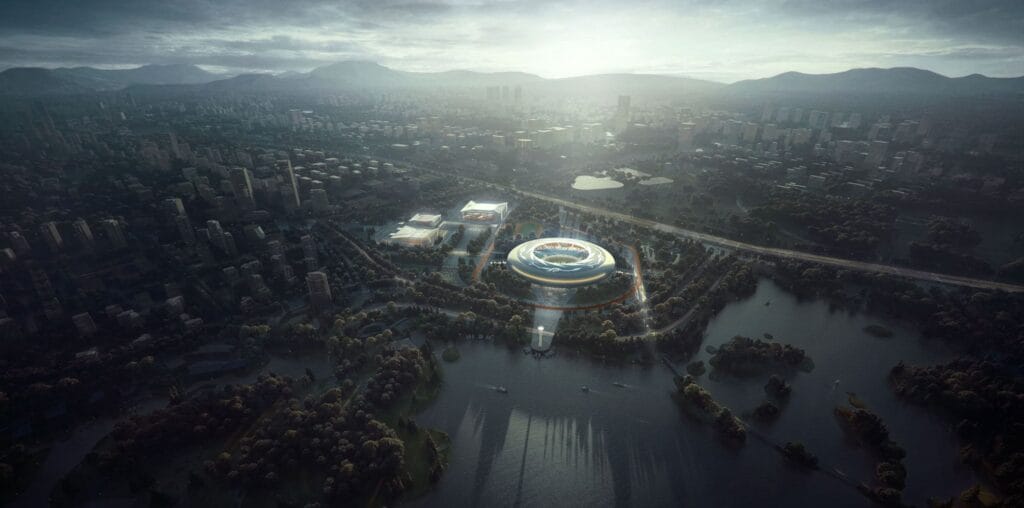
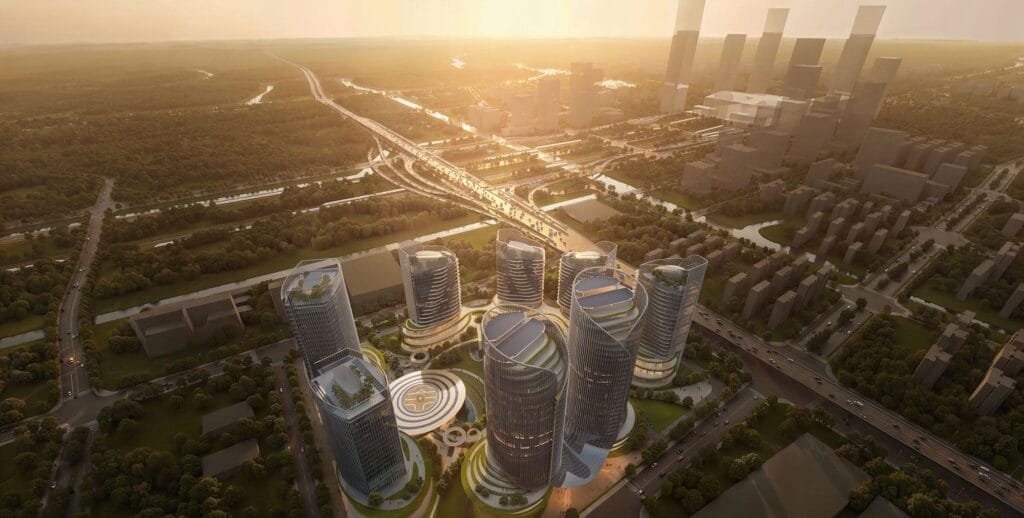
| Representaciones aéreas | Muestra el proyecto desde arriba., incluyendo el sitio circundante. | Planificación urbana, mostrando el diseño del paisaje, mercadeo inmobiliario. |
| Representaciones de planos de planta | 3Representaciones D de planos de planta 2D.. | Comprensión más fácil para los clientes, materiales de marketing. |
| Visitas virtuales y tutoriales | Experiencias interactivas que permiten la navegación virtual del diseño.. | Presentaciones inmersivas para clientes, mercadeo inmobiliario. |
| Animación | Vídeos animados que muestran el proyecto.. | Ofrezca a los clientes la oportunidad de experimentar el diseño en su punto de vista. |
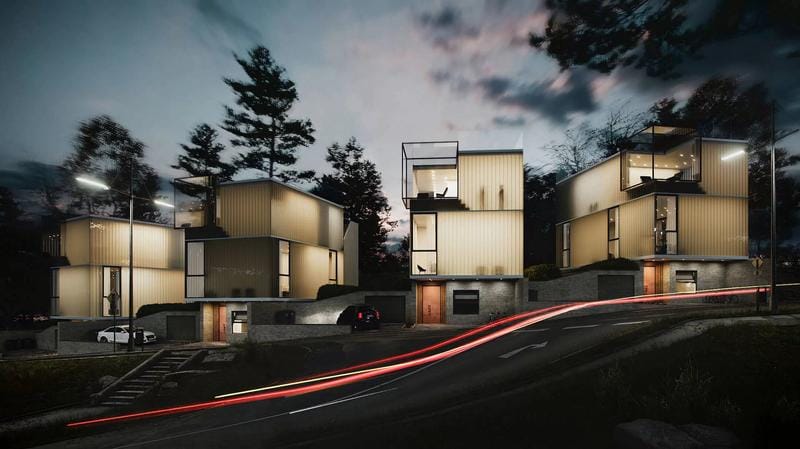
- Representaciones exteriores: Estos muestran la fachada del edificio., cómo se asienta en su entorno, y como se ve desde la calle. Perfecto para obtener aprobaciones de planificación o sorprender a compradores potenciales.
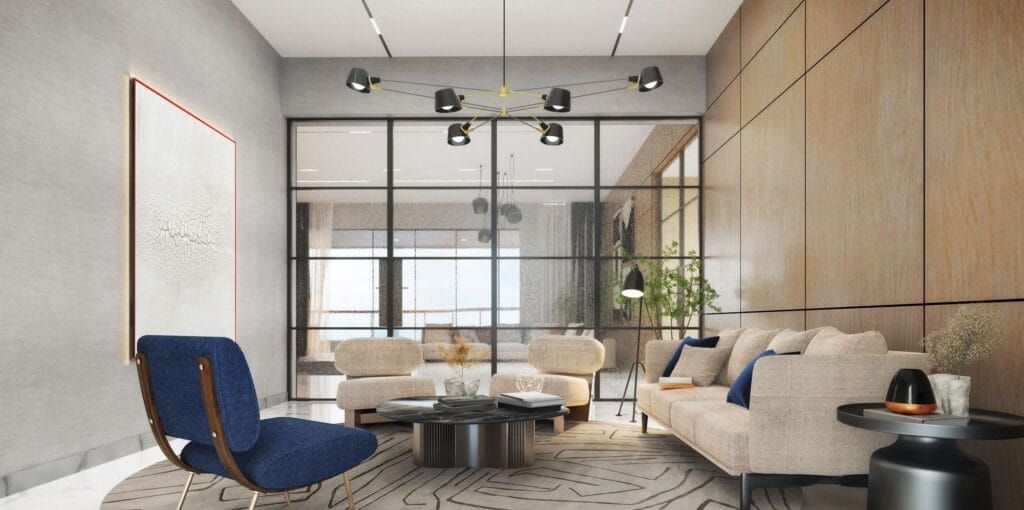
- Representaciones interiores: ¿Alguna vez quisiste ver cómo se verían tus muebles en un espacio nuevo?? Estas representaciones te dan un vistazo al interior., destacando detalles de diseño y vibraciones espaciales.
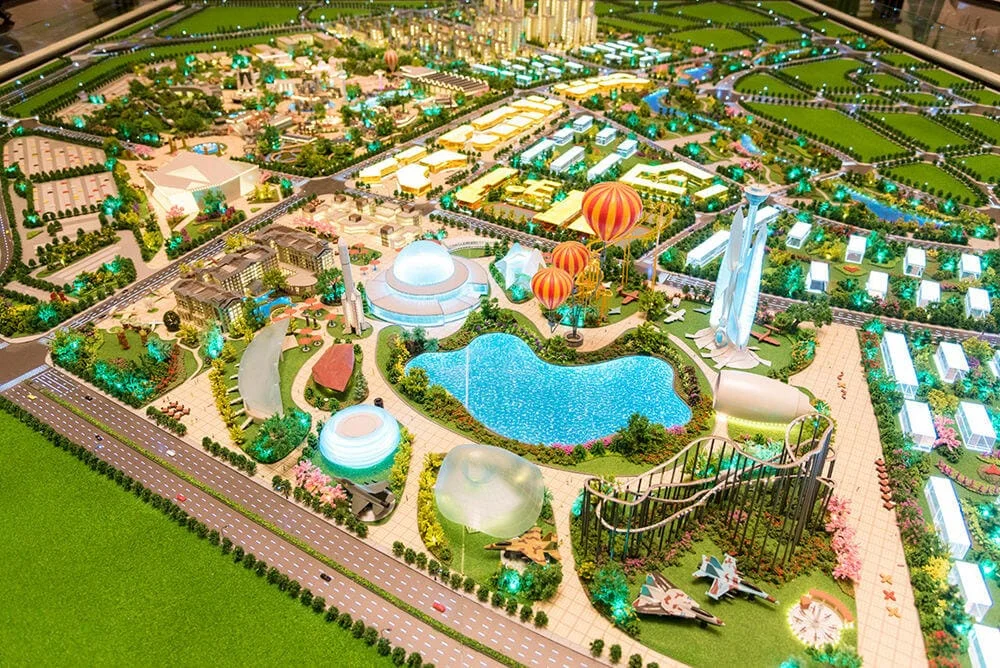
- Representaciones aéreas (Vista de pájaro): Es como tener la vista de un dron. Son excelentes para mostrar el diseño completo del proyecto., especialmente para grandes desarrollos o planificación urbana.
- Representaciones de planos de planta: Estos toman sus planos de planta 2D estándar y los colocan en 3D.. Es una forma sencilla de ayudar a todos a comprender el diseño sin necesidad de un título en arquitectura..
- Visitas virtuales y tutoriales: Imagínate caminar por un edificio que aún no ha sido construido.. Estas experiencias interactivas cambian las reglas del juego para las presentaciones y el marketing de los clientes..
- Animación: Proporciona una experiencia más realista del proyecto a través de un tutorial.. Es la opción de visualización preferida por muchos arquitectos..
Categorizado por estilo
como el arte, Las representaciones pueden tener diferentes estilos., cada uno con su propio sabor.
| Estilo de renderizado | Descripción | Casos de uso típicos |
|---|---|---|
| Representación fotorrealista | Apuntando al realismo, imitando fotografías de la vida real. | Marketing, Presentaciones para clientes donde el realismo es crucial.. |
| Representación artística/ilustrativa | Incorporando estilos artísticos (P.EJ., acuarela, bosquejo). | Diseño conceptual, competiciones, transmitir un estado de ánimo específico. |
| Representación de collage | Combinando diferentes elementos y texturas de forma artística. | Representando diversas narrativas, expresando cualidades espaciales. |
| Representación de medios mixtos | Combinando dos o más estilos (P.EJ., fotorrealista + bosquejo). | Destacar elementos o ideas específicas.. |
| Modo blanco/Representaciones de arcilla | Mostrando el modelo en un color neutro. (a menudo blanco). | Centrándose en la forma y la luz, primeras etapas de diseño. |
- Representación fotorrealista: Este es el estándar de oro si quieres mostrar las cosas exactamente como serán.. Todo es cuestión de realismo., haciendo que las imágenes se vean como fotos.
- Representación artística/ilustrativa: Piense en esto como la versión pictórica del renderizado.. Se trata menos de replicación exacta y más de estado de ánimo y concepto., A menudo se utiliza en las primeras fases de diseño o en concursos..
- Representación de collage: Un poco como una página de álbum de recortes., este estilo mezcla diferentes elementos y texturas para transmitir una narrativa o expresar cualidades espaciales de una manera única.
- Representación de medios mixtos: ¿Por qué elegir uno cuando puedes tener ambos?? Este estilo combina dos o más estilos de renderizado., como fotorrealista con una superposición de boceto, para resaltar ciertas características.
- Modo blanco/Representaciones de arcilla: Reducido a lo básico, Estos muestran el modelo en un color uniforme., generalmente blanco. Es como mirar el modelo de arcilla de un escultor antes de agregarle los detalles.. Ideal para centrarse en la forma y la luz..
Elementos clave de representaciones arquitectónicas 3D de alta calidad
Entonces, lo que separa a un “yo” renderizado de un “Guau” representación? Todo está en los detalles. Analicemos los ingredientes clave de las representaciones arquitectónicas 3D de primer nivel..
¿Qué caracteriza a un buen render arquitectónico??
Una buena representación no es sólo una imagen bonita. Es una pieza cuidadosamente elaborada que equilibra la habilidad técnica con la visión artística.. Esto es lo que debe buscar:
Iluminación y sombras realistas
- Todo es cuestión de luz: Como en la fotografía., la iluminación lo es todo. Las buenas representaciones resaltan la interacción de la luz natural y artificial..
- Juego de sombras: Las sombras deben ser precisas, añadiendo profundidad y realismo. Técnicas como la iluminación global y la oclusión ambiental ayudan a lograrlo..
“La iluminación es el elemento clave que da vida a un render.”
Texturas y materiales de alta calidad
- Sintiendo la textura: Casi deberías poder “sentir” los materiales. Una pared de ladrillos debe verse rugosa, y una ventana de cristal debería brillar.
- Reflexiona sobre esto: Los materiales deben interactuar con la luz de manera realista.. Las superficies brillantes deben reflejar, mientras que las superficies mate deben difundir la luz.
Modelos 3D precisos
- La precisión es clave: El modelo digital debe ser acertado. Cada elemento arquitectónico, de paredes a ventanas, debe ser modelado con precisión.
- La escala importa: Todo debe estar en la proporción correcta.. Una puerta debe tener el tamaño adecuado en comparación con una persona., Por ejemplo.
Composición y ángulos de cámara efectivos
- Encontrar la mejor vista: El ángulo puede hacer o deshacer una representación.. Se trata de elegir la perspectiva que mejor muestre el diseño..
- Reglas de composición: Como en el arte., reglas como la “regla de los tercios” ayudar a crear imágenes visualmente agradables.
Contexto y entorno
- Preparando la escena: Un edificio no existe en el vacío. Las buenas representaciones lo muestran en su entorno previsto., ya sea un bullicioso paisaje urbano o una tranquila calle suburbana.
- Pequeños detalles, Gran impacto: Agregar personas, vegetación, y otros detalles hacen que la escena sea más identificable y realista.
Narración y estado de ánimo
- Más allá de lo visual: Una gran interpretación cuenta una historia.. Te da una idea de cómo sería estar en ese espacio..
- Establecer el tono: La combinación correcta de color, iluminación, y la composición puede crear un estado de ánimo específico, ya sea tranquilo y sereno o vibrante y enérgico.
El proceso de renderizado arquitectónico 3D
Flujo de trabajo paso a paso
Crear una representación arquitectónica 3D es un proceso de varias etapas. Cada paso es crucial para lograr ese objetivo final., imagen asombrosa. Piense en ello como una carrera de relevos donde cada miembro del equipo (o paso) tiene un papel vital.1. Reunión informativa y recopilación de información sobre el proyecto
- Estar en la misma página: Aquí es donde el artista y el cliente discuten los objetivos del proyecto., visión, y alcance. Es como la sesión inicial de lluvia de ideas..
- Reunir los bienes: El artista recoge todos los materiales necesarios., como planos arquitectónicos, dibujos CAD, bocetos, y cualquier imagen de referencia.
2. 3D Modelado
- Construyendo la base: Usando software especializado, el artista crea un modelo digital 3D del edificio o espacio.
- Atención al detalle: La precisión es primordial. cada puerta, ventana, y la pared debe ser modelada con precisión.
3. Aplicación de materiales y texturas
- Agregar la piel: Se aplican texturas y materiales realistas a las superficies del modelo.. Aquí es donde un piso, La pared gris comienza a parecerse a un ladrillo., madera, o vidrio.
- Ajustes de propiedad: El artista modifica las propiedades de los materiales como la reflectividad y la rugosidad para que se vean perfectos..
4. Configuración de iluminación
- Que haya luz: El artista simula fuentes de luz naturales y artificiales., estableciendo el estado de ánimo de la escena.
- Sintonia FINA: Intensidad de la luz, color, y la dirección se ajustan para lograr el efecto deseado.
5. Posicionamiento y composición de la cámara
- Encontrar el ángulo perfecto: El artista elige los mejores ángulos de cámara para mostrar el diseño., como un fotógrafo encuadrando una toma.
- Composición 101: Se aplican principios de composición para crear imágenes visualmente atractivas..
6. Representación de prueba y comentarios
- Primer vistazo: Se generan renderizados iniciales de baja resolución para su revisión.. Es como un borrador.
- Bucle de retroalimentación: El cliente proporciona retroalimentación., y el artista hace los ajustes necesarios.
7. Representación final
- El evento principal: Se producen imágenes o animaciones de alta resolución.. Esto puede llevar tiempo, dependiendo de la complejidad del proyecto.
- La paciencia es una virtud.: Este paso a menudo implica esperar a que la computadora haga su trabajo..
8. Postprocesamiento y refinamiento
- Agregando el toque mágico: Las imágenes renderizadas se pulen utilizando software de edición de imágenes como Photoshop..
- Trabajo detallado: Los colores se ajustan, se agregan efectos, y cualquier problema menor se corrige.
9. Entrega y Presentación
- Tiempo de la funcion: Los renders finales se presentan al cliente..
- El formato importa: Los archivos están preparados para el uso previsto., si es para imprimir, web, o un recorrido virtual.
Beneficios del renderizado arquitectónico 3D
¿Por qué pasar por todo este problema?? Bien, Resulta que el renderizado arquitectónico 3D ofrece una gran cantidad de beneficios en todos los ámbitos.. No se trata sólo de imágenes bonitas; se trata de hacer que todo el proceso de diseño y construcción sea más fluido y eficiente. Veamos cómo ayuda a las diferentes personas involucradas..
Para arquitectos y diseñadores
Para las mentes creativas que imaginan estos espacios, 3El renderizado D es como un superpoder..
- Visualización de diseño mejorada:
- Experimentar libremente: Los arquitectos pueden jugar con diferentes diseños., materiales, y diseños sin el costo de cambios físicos.
- Detecte los defectos a tiempo: Es más fácil detectar problemas de diseño antes de que se conviertan en dolores de cabeza en la construcción..
- Comunicación mejorada:
- Habla el mismo idioma: Los renderizados ayudan a todos: a los clientes, ingenieros, contratistas: comprender claramente el diseño.
- El trabajo en equipo hace que el sueño funcione: La colaboración se vuelve más fluida cuando todos pueden visualizar el proyecto..
- Proceso de diseño simplificado:
- Salta los modelos físicos: No es necesario construir modelos físicos costosos y que requieren mucho tiempo..
- Iteraciones más rápidas: Los cambios se pueden realizar rápida y fácilmente en el modelo digital..
- Mejor resolución de problemas:
- Visualizar desafíos: Los problemas de diseño complejos se vuelven más fáciles de ver y resolver.
- Encuentre soluciones creativas: 3La visualización D puede generar soluciones innovadoras.
- Diseño preciso del sitio de construcción:
- Vea el panorama general: 3Las representaciones D pueden mostrar cómo encaja un edificio en su entorno., incluyendo paisajismo y estructuras circundantes.
- Planifique hasta el más mínimo detalle: Incluso se pueden visualizar las líneas de servicios públicos y la ubicación de los muebles de jardín..
Conclusión clave: Para arquitectos y diseñadores, 3El renderizado D es como una bola de cristal que les permite ver el futuro de su proyecto., hacer que su trabajo sea más eficiente e impactante.
Para desarrolladores y comercializadores de bienes raíces
Cuando se trata de vender propiedades, una imagen vale más que mil palabras, y una representación 3D podría valer aún más.
- Herramienta eficaz de marketing y ventas:
- Imágenes llamativas: Impresionantes representaciones llaman la atención en los folletos, sitios web, y redes sociales.
- Atraer compradores e inversores: Las imágenes de alta calidad pueden marcar la diferencia entre una “tal vez” y un “Sí.”
- Preventa de Propiedades:
- Vender antes de construir: Los compradores pueden comprometerse con una propiedad incluso antes de que comience la construcción..
- Ofrezca una vista previa realista: Los clientes pueden ver exactamente lo que obtienen, reduciendo la incertidumbre.
- Mayor compromiso del cliente:
- Experiencias inmersivas: Los recorridos virtuales y las animaciones permiten a los clientes explorar la propiedad de una manera completamente nueva..
- Genere entusiasmo: Ver el producto terminado con anticipación genera anticipación y conexión emocional..
Conclusión: Para profesionales inmobiliarios, 3El renderizado D es como una potente herramienta de marketing que ayuda a vender propiedades de forma más rápida y eficaz..
Para clientes
Si está encargando un proyecto de construcción, 3El renderizado D es como tener una línea directa con la visión de su arquitecto..
- Comprensión más clara del diseño:
- Visualiza tu sueño: Vea exactamente cómo será su nuevo hogar u oficina.
- Tome decisiones informadas: Tome mejores decisiones sobre los diseños, materiales, y acabados.
- Riesgo reducido de falta de comunicación:
- Evite sorpresas: Asegúrese de que el producto final coincida con sus expectativas..
- Minimizar cambios costosos: Menos malentendidos significan menos modificaciones costosas durante la construcción.
- Satisfacción mejorada:
- Siéntete involucrado: Sea parte activa del proceso de diseño..
- Generar confianza: Siéntete más seguro y entusiasmado con tu inversión.
En una palabra: Para clientes, 3El renderizado D ofrece tranquilidad, asegurándose de que lo que ven es lo que obtendrán.
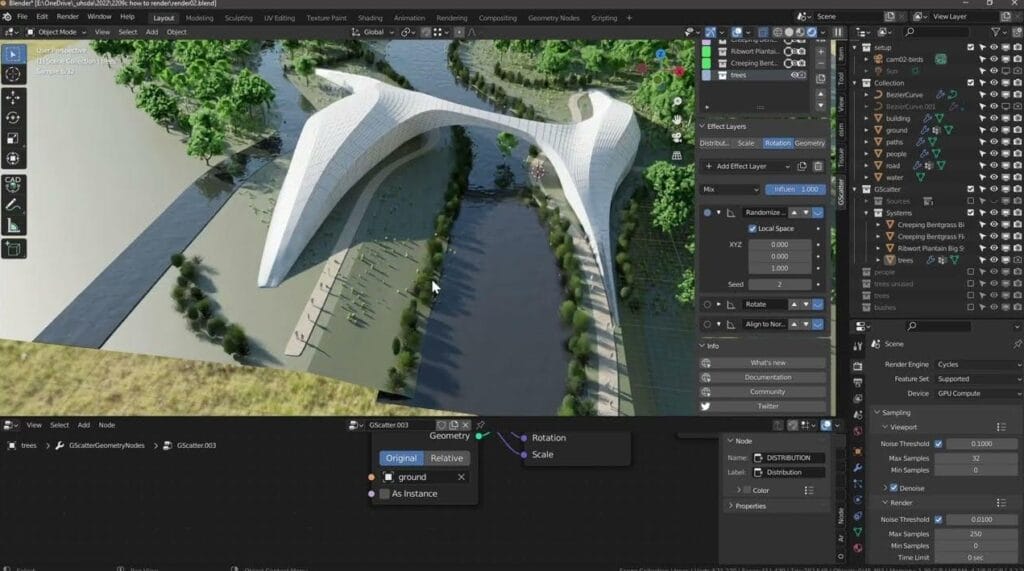
Software popular para renderizado arquitectónico 3D
Descripción general de las herramientas estándar de la industria
Elegir el software adecuado es crucial. Es como elegir el instrumento adecuado para una sinfonía.. Estos son algunos de los grandes bateadores:| Software | Características clave | Mejor para |
|---|---|---|
| 3ds max | Modelado versátil, animación, potentes motores de renderizado (Rayos, Corona). | Proyectos complejos, visualizaciones detalladas, animaciones. |
| Revit | Software bim, se integra bien con otros productos de Autodesk. | diseño arquitectónico, documentación, colaboración. |
| Bosquejo | Fácil de usar, fácil de aprender, bueno con complementos de renderizado como V-Ray. | Modelado rápido, diseño conceptual, presentaciones. |
| Lumión | Representación en tiempo real, rápido, fácil de usar. | Crear animaciones y visualizaciones rápidamente.. |
| Rayos | Potente motor de renderizado, funciona con varios software, Resultados fotorrealistas. | Alta calidad, representaciones realistas. |
| Twinmotion | Representación en tiempo real, características ambientales inteligentes, Soporte de realidad virtual. | Visualizaciones rápidas, experiencias de realidad virtual. |
| Abatimiento | Complemento de renderizado en tiempo real, integrado en el software de diseño. | Comentarios en tiempo real durante el diseño, presentaciones. |
| Licuadora | Código abierto, gratis, capaz de modelar, animación, representación. | Proyectos económicos, aprendiendo 3D, varias tareas. |
| Photoshop | Edición de imágenes, posprocesamiento, agregando detalles y efectos. | Mejora de renderizados, componiendo, toques finales. |
- 3ds max:
- La potencia: Esto es como la navaja suiza del software 3D.. hace modelaje, animación, y renderizado.
- Opciones de motor: Funciona con motores de renderizado de primer nivel como Rayos y Corona, conocido por sus resultados fotorrealistas.
- Mejor para: Proyectos complejos, visualizaciones detalladas, y aquellos que necesitan todas las comodidades.
- Revit:
- La elección del arquitecto: Esto es BIM (Modelado de información de construcción) software, Popular entre los arquitectos.
- Jugador de equipo: Juega bien con otros Autodesk productos, facilitando la colaboración.
- Mejor para: diseño arquitectónico, documentación, y proyectos donde la gestión de datos es crucial.
- Bosquejo:
- El más fácil de usar: Conocido por su facilidad de uso., SketchUp es ideal para principiantes y para modelado rápido..
- Poder del complemento: Funciona bien con complementos de renderizado como V-Ray para mejorar sus capacidades..
- Mejor para: Diseño conceptual, presentaciones, y aquellos que quieren una curva de aprendizaje suave.
- Lumión:
- El velocista: Este software tiene que ver con la renderización en tiempo real., lo que significa que ves cambios al instante.
- As de animación: Es fantástico para crear animaciones rápidamente..
- Mejor para: Proyectos de ritmo rápido, visualizaciones rápidas, y los que valoran la velocidad.
- Rayos:
- El rey del realismo: V-Ray no es un software independiente sino un motor de renderizado que funciona con otros como 3ds Max y SketchUp..
- Fotorrealismo: Es conocido por crear imágenes increíblemente realistas..
- Mejor para: Alta calidad, Representaciones fotorrealistas donde el detalle y la precisión son primordiales..
- Twinmotion:
- El inteligente: Esta herramienta de renderizado en tiempo real incluye funciones inteligentes como entornos dinámicos..
- Listo para la realidad virtual: Es conocido por su fuerte apoyo a la realidad virtual..
- Mejor para: Proyectos donde la velocidad y las experiencias de realidad virtual son importantes.
- Abatimiento:
- El Integrador: Enscape es un complemento de renderizado en tiempo real que funciona directamente dentro de su software de diseño..
- Comentarios instantáneos: Le permite ver los cambios a medida que los realiza en su diseño..
- Mejor para: Visualización de diseños en tiempo real y presentaciones de clientes..
- Licuadora:
- El regalo de promoción: Blender es de código abierto, lo que significa que es de uso gratuito. No dejes que eso te engañe; es poderoso.
- Todo terreno: Puede manejar el modelado., animación, y renderizado.
- Mejor para: Proyectos económicos, aquellos que aprenden 3D, y una amplia gama de tareas 3D.
- Photoshop:
- El rematador: Aunque no es software 3D, Photoshop es crucial para el posprocesamiento.
- Mejorador de detalles: Se utiliza para agregar detalles., ajustar colores, e imágenes compuestas.
- Mejor para: Mejora de renderizados, añadiendo los toques finales, y creando una apariencia pulida.
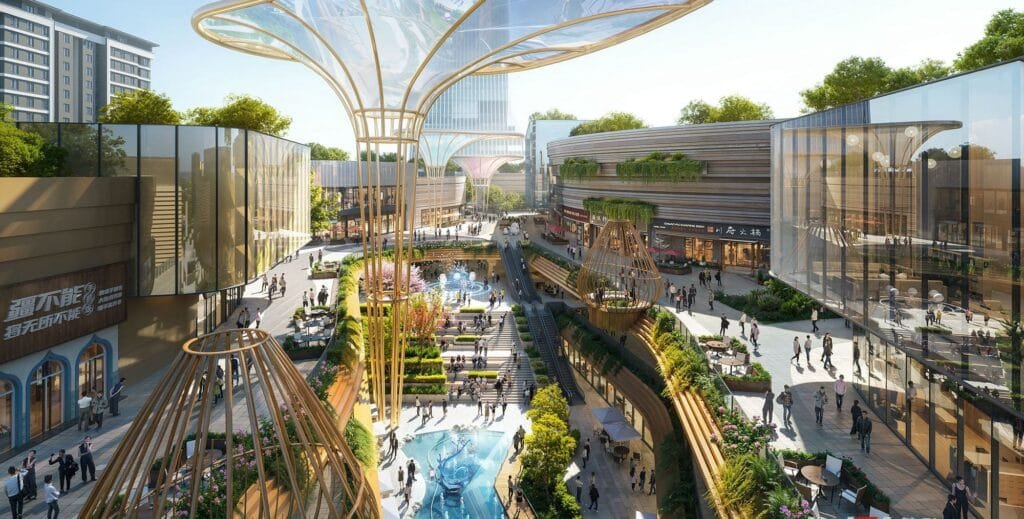
Elegir el estudio de renderizado arquitectónico 3D adecuado
Factores a considerar
Elegir un estudio es una gran decisión. Aquí hay una lista de verificación para ayudarlo a tomar la decisión correcta:- Portafolio y Experiencia:
- Mira su trabajo: Mira sus proyectos pasados.. ¿Te gusta su estilo?? ¿Tienen experiencia con proyectos como el tuyo??
- La variedad es clave: Una cartera diversa demuestra que pueden manejar diferentes tipos de proyectos..
- Experiencia técnica:
- Experto en software: Asegúrese de que dominen el software más reciente.
- Dominio del estilo: Deben ser expertos en el estilo de renderizado que buscas., si es fotorrealista, artístico, o algo más.
- Comunicación y colaboración:
- Buenos oyentes: Deben estar atentos a sus necesidades y responder a sus preguntas..
- Comentarios amigables: Busque un estudio que esté abierto a recibir comentarios y con el que sea fácil trabajar.
- Reseñas y testimonios:
- Lo que otros dicen: Consulte reseñas o solicite referencias para ver qué tienen que decir clientes anteriores.
- La reputación importa: Un estudio con una buena trayectoria tiene más probabilidades de ofrecer un trabajo de calidad..
- Precios y tiempo de respuesta:
- Obtener citas: Compara precios de diferentes estudios., pero recuerda que lo más barato no siempre es lo mejor.
- El tiempo es dinero: Asegúrese de que su cronograma se ajuste al cronograma de su proyecto.
- Primera comunicación:
- Preste atención a los detalles: ¿Qué tan rápido responden a su consulta inicial?? ¿Son minuciosos en sus respuestas??
- Escuche sus necesidades: ¿Se toman el tiempo para comprender sus requisitos específicos y ofrecer soluciones personalizadas??
- Evalúe su servicio:
- Solicitar una cotización: ¿Cuánto tiempo tardan en dar una cotización?? ¿La propuesta es profesional y detallada??
- Hacer las cuestiones: ¿Brindan respuestas claras a sus preguntas sobre el proceso y sus capacidades??
- Prepare sus referencias:
- Reunir materiales: Ten tus planos arquitectónicos, bocetos, y cualquier imagen de referencia lista.
- Comunica tu visión: Cuanta más información proporciones, mejor podrá el estudio comprender y ejecutar su visión.
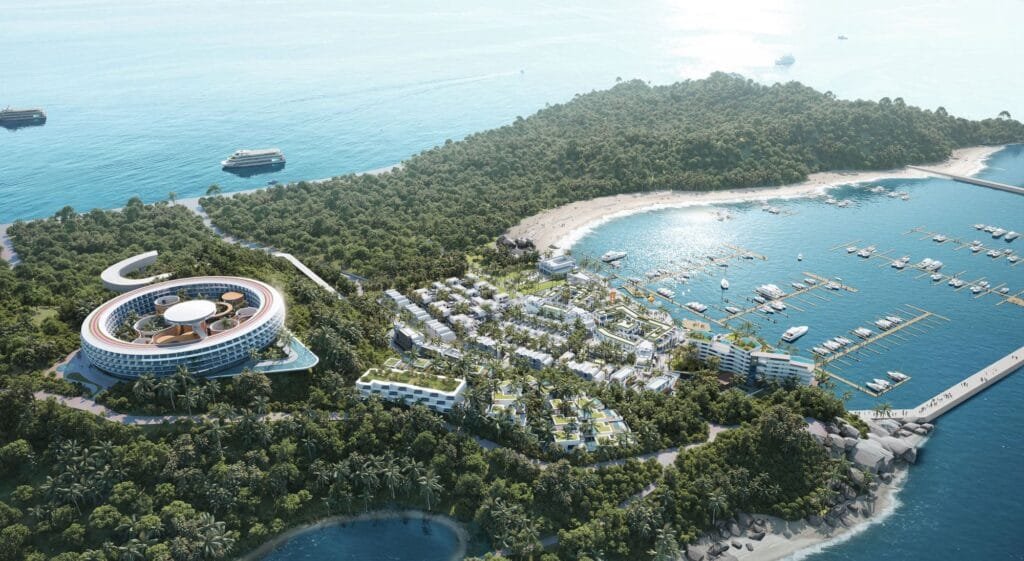
El futuro del renderizado arquitectónico 3D
Agárrate a tus sombreros, porque el mundo del renderizado 3D está evolucionando a la velocidad del rayo! Lo que ayer era vanguardia, mañana puede ser noticia vieja. Echemos un vistazo a la bola de cristal y veamos qué le depara el futuro a este apasionante campo..
Tendencias y tecnologías emergentes
El futuro es brillante, y está lleno de tecnología realmente genial.. Esto es lo que hay en el horizonte:
- Representación en tiempo real:
- Gratificación instantánea: Esta tecnología es cada vez más popular. Imagínese hacer un cambio y verlo instantáneamente en el renderizado..
- Todo más rápido: Acelera el proceso de diseño., permitiendo decisiones y cambios más rápidos.
- Software popular: Twinmotion y Lumion son los representantes.
- Realidad virtual (VR) y realidad aumentada (Arkansas):
- Ingrese a su diseño: La realidad virtual te permite “ensayar” un edificio antes de ser construido. Es como teletransportarse al futuro.!
- Realidad superpuesta: AR puede superponer modelos 3D en el mundo real. Imagínese ver su futuro edificio en su sitio real a través de su teléfono..
- Inteligencia artificial (AI):
- Herramientas inteligentes: La IA está empezando a ayudar con cosas como generar opciones de diseño y automatizar tareas repetitivas..
- Realismo mejorado: La IA puede ayudar a que las representaciones sean aún más realistas, aprender de datos del mundo real.
- Representación basada en la nube:
- Poder para el pueblo: Los servicios en la nube están haciendo que el renderizado potente sea accesible para más personas, incluso sin computadoras de alta gama.
- Renderizar en cualquier lugar: Ya no estás atado a tu estación de trabajo. Renderiza desde cualquier lugar con conexión a Internet.
- Diseño Paramétrico y Generativo:
- Diseño con algoritmos: Estos enfoques utilizan algoritmos para crear diseños basados en parámetros específicos..
- Flujo de trabajo integrado: Se están integrando más con el renderizado., permitiendo la exploración dinámica del diseño.
El panorama general: Estas tendencias apuntan a un futuro en el que el renderizado 3D será más rápido, más inmersivo, y más integrado en el proceso de diseño. Ya no se trata sólo de visualizar un diseño; se trata de experimentarlo.
Conclusión
Hemos viajado desde los conceptos básicos del renderizado arquitectónico 3D hasta las apasionantes posibilidades de su futuro.. Está claro que esta tecnología no es sólo una herramienta sofisticada para hacer fotografías bonitas.. Es un cambio de juego en la forma en que diseñamos., construir, y experimenta nuestros espacios. Si eres arquitecto, un desarrollador, un diseñador, o alguien que esté planeando la casa de sus sueños, Comprender el renderizado 3D puede abrir un mundo completamente nuevo de posibilidades..
Esta tecnología permite a los arquitectos perfeccionar sus diseños., ayuda a los profesionales inmobiliarios a vender propiedades de forma más eficaz, y permite a los clientes comprender realmente lo que obtienen incluso antes de que se coloque el primer ladrillo.. Cierra la brecha entre la imaginación y la realidad., haciendo el proceso de diseño y construcción más eficiente, colaborativo, y finalmente, más satisfactorio para todos los involucrados.
Mientras miramos hacia adelante, Los avances en el renderizado en tiempo real., VR, Arkansas, y la IA prometen hacer que el renderizado arquitectónico 3D sea aún más potente y accesible. El futuro del diseño está aquí, y es increíblemente emocionante. Entonces, abrazar las posibilidades, explorar el potencial, y prepárate para ver tus sueños arquitectónicos hacerse realidad de una manera que nunca creíste posible.
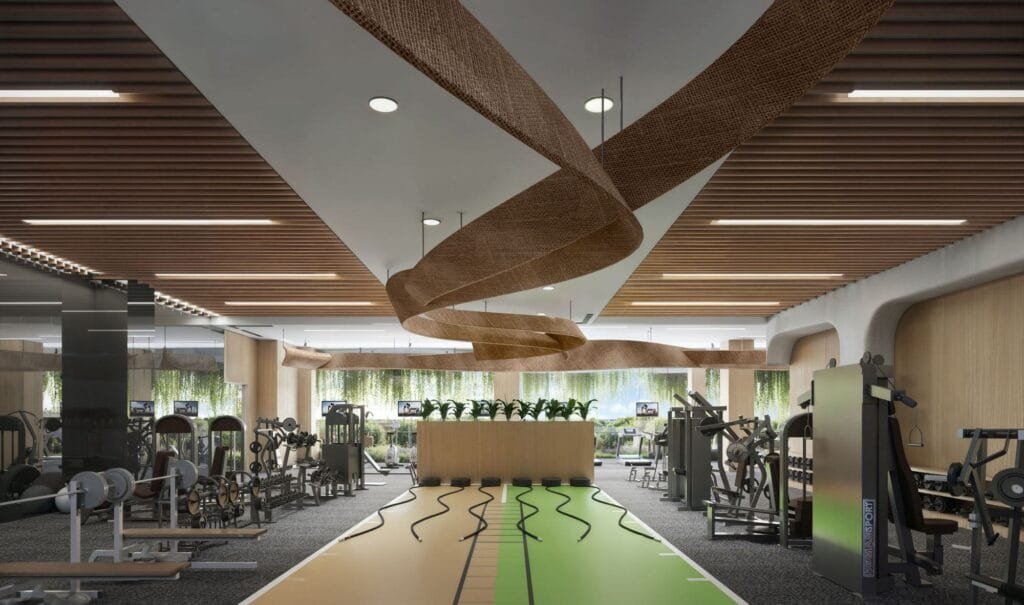
Preguntas frecuentes (Preguntas frecuentes) Acerca del renderizado arquitectónico 3D
¿Cuál es la diferencia entre renderizado y visualización arquitectónica??
Honestamente, poco! Estos términos a menudo se usan indistintamente. Ambos se refieren al proceso de creación de imágenes o animaciones de diseños arquitectónicos.. pensar en “visualización” como el término más amplio, mientras “representación” A menudo se refiere al proceso técnico específico de generar la imagen..¿Cuánto cuesta el renderizado arquitectónico 3D??
varía, así como el costo de construir una casa varía dependiendo de su tamaño y complejidad. Las representaciones simples pueden comenzar alrededor $300, mientras que los proyectos complejos con múltiples vistas y animaciones pueden ascender a miles. Realmente depende de tus necesidades y del nivel de detalle que buscas.. Muchos estudios profesionales ofrecen precios elevados., pero vienen con experiencia en el campo, haciendo el proceso más fluido.¿Cuánto tiempo lleva crear una representación arquitectónica 3D??
De nuevo, Eso depende. Un renderizado básico puede tardar un par de días., mientras que una animación detallada de un gran desarrollo podría tardar varias semanas. Factores como la complejidad del proyecto., el nivel de detalle, y el número de revisiones influyen. Aquí hay una idea general.:- Casa Unifamiliar: 7-10 días
- Casa multifamiliar: 2-3 semanas
- Edificio de gran altura: 3-4 semanas
- Área urbana a gran escala: 6 semanas +
¿Qué software es mejor para el renderizado arquitectónico??
no hay un solo “mejor” software, ya que cada uno tiene sus puntos fuertes. Sección 7 arriba proporciona una buena descripción general. 3ds Max y Revit son populares para modelado detallado, mientras que Lumion y Twinmotion son excelentes para velocidades rápidas., renderizado en tiempo real. V-Ray es un potente motor de renderizado que funciona con muchos programas diferentes.. Al final, el mejor software depende de sus necesidades y preferencias específicas. Se recomienda consultar el portafolio del estudio para tener una buena idea de su trabajo anterior y del tipo de proyectos que son capaces de manejar..¿Puedo aprender renderizado arquitectónico 3D yo mismo??
Absolutamente! Hay toneladas de recursos disponibles en línea., desde tutoriales gratuitos hasta cursos pagos. Blender es un excelente software gratuito para empezar. Se necesita tiempo y dedicación, pero definitivamente es posible. Muchos arquitectos y licenciados en arquitectura se han aventurado en este campo y algunos lo han convertido en una carrera completamente nueva., hacerse conocidos como artistas 3D o visualizadores 3D.¿Por qué necesitamos renderizado arquitectónico??
El renderizado arquitectónico acelera el desarrollo del diseño, revisión de diseño, y toma de decisiones. Permite a los arquitectos visualizar, revisar, refinar, y comunicar fácilmente sus conceptos de diseño. Ayuda a los arquitectos., diseñadores, y los clientes visualizan un proyecto antes de construirlo, reducir malentendidos y cambios costosos en el futuro. También es una poderosa herramienta para la comercialización y venta de propiedades..¿Qué son las técnicas de renderizado arquitectónico??
Hay muchas técnicas involucradas., como el modelado 3D, texturizar, iluminación, y posicionamiento de la cámara, cada uno adaptado a las necesidades específicas del proyecto. Diferentes estilos, como fotorrealista o artístico, Se utilizan dependiendo de los objetivos del proyecto..¿Qué caracteriza a un buen render arquitectónico??
Un buen render es realista., detallado, y representa con precisión el diseño. Los elementos clave incluyen iluminación y sombras precisas., texturas y materiales de alta calidad, modelos 3D precisos, ángulos de cámara efectivos, y un sentido de contexto y entorno.. El render también debe comunicar de manera efectiva las ideas y características clave del diseño., ayudar a todas las partes interesadas a comprender el proyecto.¿Qué es un render arquitectónico??
Un render arquitectónico es una representación visual del diseño de un edificio., presentando detalles como la estructura, materiales, e iluminación para proporcionar una vista previa realista de la construcción final.¿Cuáles son los 4 tipos de renderizado arquitectónico?
Si bien hay muchas maneras de clasificar las representaciones, cuatro tipos comunes son exteriores, interior, aéreo, e interactivo (como recorridos virtuales), cada uno de los cuales sirve para mostrar diferentes aspectos y perspectivas del diseño..¿Los arquitectos hacen renderizado 3D??
Sí, Muchos arquitectos utilizan el renderizado 3D como parte de su proceso de diseño.. Algunos lo manejan internamente, mientras que otros colaboran con estudios de renderizado especializados o artistas 3D para crear visualizaciones detalladas de sus diseños..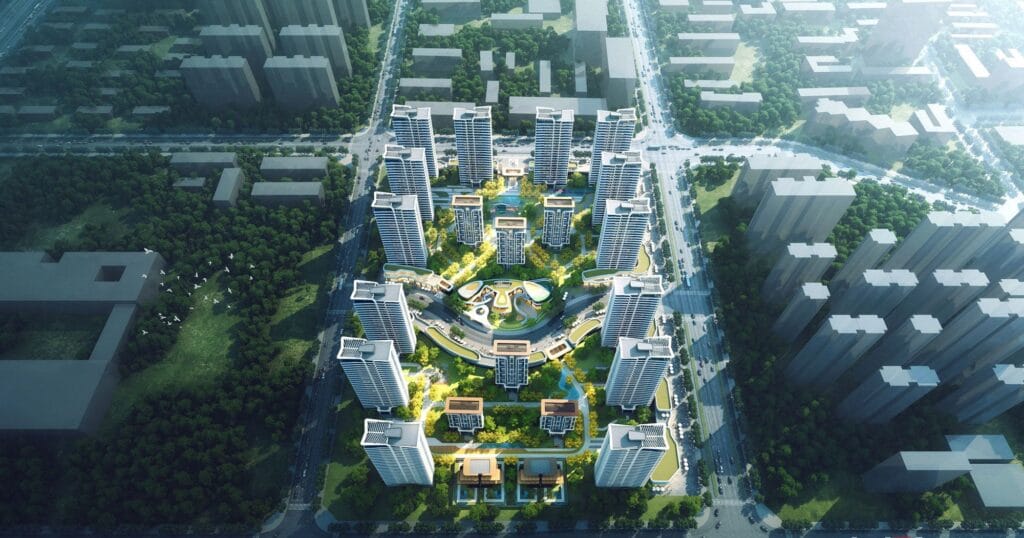
Consejos para un proyecto de renderizado 3D fluido
1. Comience con una base sólida
Como construir una casa, necesitas una base sólida para tu proyecto de renderizado. Esto significa tener claro, Planos arquitectónicos detallados y una visión bien definida del producto final.. Cuanta más información puedas proporcionar por adelantado, Cuanto mejor.2. La comunicación es clave
Mantenga abiertas las líneas de comunicación con su artista o estudio de renderizado.. Los controles periódicos y las sesiones de retroalimentación pueden ayudar a garantizar que todos permanezcan en sintonía y evitar malentendidos.. Recordar, es un proceso colaborativo.3. Esté abierto a sugerencias
Su artista de renderizado es un experto en su campo.. Mientras tú conoces mejor tu proyecto, estar abierto a sus sugerencias y experiencia. Es posible que tengan ideas que puedan mejorar el producto final..4. Plan de revisiones
Las revisiones son una parte normal del proceso.. No esperes la perfección en el primer intento. En cambio, Dedique tiempo para recibir comentarios y revisiones para ajustar las representaciones hasta que sean perfectas..5. Piense en el uso final
¿Dónde se utilizarán estas representaciones?? en un sitio web? en un folleto? Para un recorrido virtual? Conocer el uso final ayudará a determinar el mejor formato., resolución, y estilo para tus renders.6. No tengas miedo de hacer preguntas
Si algo no está claro, no dudes en preguntar. Es mejor aclarar las cosas desde el principio que tener problemas más adelante en el proceso.. Un buen estudio de renderizado estará encantado de responder a tus preguntas y explicarte las cosas de una manera que puedas entender..

