Why Choose 3D Printing for Architectural Models?
The Evolution of Architectural Modeling
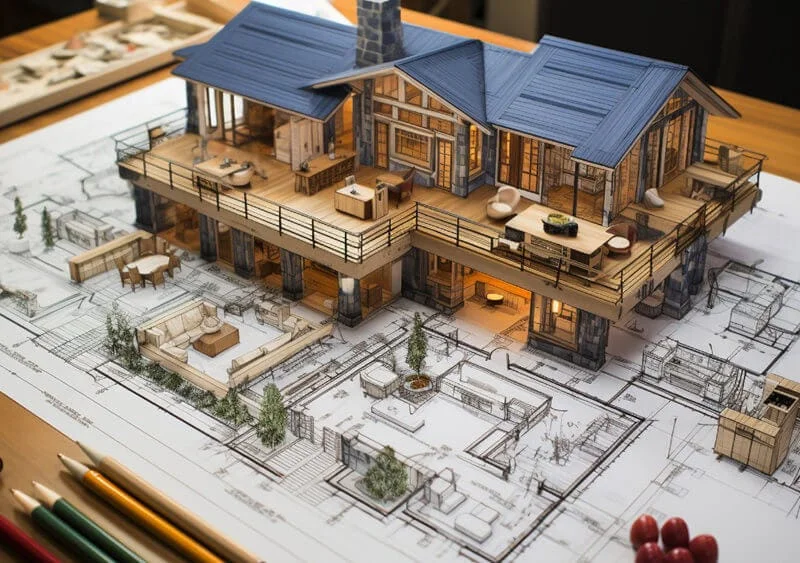
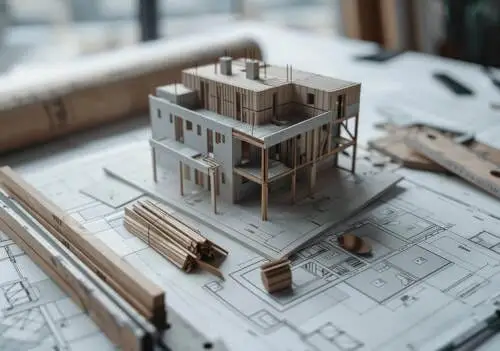
For ages, architects have relied on crafting models by hand. Think of it like sculpting, but with tiny houses! Using materials like wood, foam, and cardboard, skilled artisans would spend weeks, even months, meticulously cutting, gluing, and shaping these miniature structures. While beautiful, these handcrafted models had their drawbacks. They were super time-consuming, required specialized skills, and making changes? Forget about it! A simple tweak to a facade could mean starting all over again. Plus, the cost of all that labor and materials could quickly add up. This delicate balance of techniques is something we explore in our guide on Modern Craft vs. Traditional Handwork.
How were architectural models made before 3D printing?
Before 3D printing, models were painstakingly crafted by hand. Architects and model makers would use various tools like saws, knives, and sanders to cut, shape, and assemble materials like:
- Balsa wood
- Foam board
- Cardboard
- Clay
- Ceramic
This subtractive and manual process, while capable of producing stunning results, was inherently slow and made iterative design changes extremely difficult and expensive.
Advantages of 3D Printing Over Traditional Methods
Now, let’s talk about why 3D printing is turning the world of architectural models upside down. It’s like having a magic wand that can create complex structures with the click of a button! It offers a suite of advantages that address nearly all the pain points of traditional methods.
Speed and Efficiency
Remember those weeks or months spent building models by hand? With 3D printing, you can have a highly detailed model ready in just hours or a few days. These amazing machines can even work around the clock, so you can start a print in the evening and wake up to a finished product. This incredible speed boost is a total game-changer, especially when facing tight project deadlines for client presentations or design competitions.
Can you easily change a 3D printed architectural model?
Absolutely! This is one of the biggest perks of 3D printing. Need to adjust a wall, add a window, or change the roofline? No problem! Just tweak your digital 3D file, and you’re ready to print the new version. This makes it super easy and cost-effective to try out different ideas, incorporate client feedback, and perfect your design without wasting weeks of labor and materials.
Precision and Detail
Imagine capturing every tiny detail of your design, from intricate parametric facades to delicate window frames and ornate latticework. 3D printing makes it possible! With incredible precision (often measured in microns), these machines can create models that are perfectly faithful to your digital design, down to the smallest feature. Think about complex curves, organic shapes, or even realistic material textures—things that would be a true nightmare to achieve with traditional hand-crafting methods.
Design Flexibility and Iteration
Want to experiment with different roof designs or window placements? 3D printing makes it a breeze! You can quickly create multiple versions of your model, tweak designs on the fly, and present clients with several tangible options side-by-side. This is a huge advantage for architects who want to explore various ideas and perfect their designs before construction begins. It’s also fantastic for incorporating client feedback without the dreaded feeling of having to start from scratch.
Cost-Effectiveness
While the initial investment in a professional-grade 3D printer might seem high, the long-term cost savings are significant. Think about it: drastically reduced manual labor, minimal material waste (as it’s an additive process), and the ability to quickly iterate on designs all add up to big savings. Plus, the raw cost of many 3D printing materials is often more affordable than the specialized woods and acrylics used in traditional model making. For a full breakdown of how technology impacts price, see our guide on the 5 Key Factors of Architectural Model Pricing.
Enhanced Communication and Collaboration
Ever tried explaining a complex, three-dimensional design using just 2D drawings? It can be tough! A 3D printed model makes communication a whole lot easier. It provides a tangible representation of your project that anyone can pick up, turn around, and understand intuitively. This shared understanding can lead to better collaboration between architects, engineers, and clients, resulting in fewer misunderstandings and a smoother, more efficient design process.
What are the advantages of 3D printing architectural models?
Here’s a quick recap of the awesome benefits:
| Advantage | Description |
|---|---|
| Speed & Efficiency | Drastically reduces model creation time from weeks to hours, enabling rapid prototyping. |
| Precision & Detail | Captures intricate designs, complex geometries, and fine features with high accuracy. |
| Design Flexibility | Allows for easy, low-cost modifications and multiple design iterations to perfect the outcome. |
| Cost-Effectiveness | Reduces manual labor costs and material waste, leading to significant long-term savings. |
| Enhanced Communication | Improves understanding and collaboration among all project stakeholders, from clients to builders. |
Material Versatility
3D printing isn’t a one-size-fits-all solution. You’ve got options! From sturdy plastics like ABS to clear and detailed resins, there’s a wide range of materials to choose from. This means you can select the perfect material for your project’s specific needs, whether you need something durable for a structural model or something with a flawless, smooth finish for a final presentation piece. You can even experiment with different colors and textures to make your model truly stand out. We explore this topic in detail in our Guide to Model Materials and Finishes.
Types of 3D Printing Technologies for Architectural Models
Alright, so you’re sold on the benefits of 3D printing. But with so many different technologies out there, how do you choose the right one for your architectural model? Let’s break down the most popular options used by professionals.
Stereolithography (SLA)
Imagine a laser beam carefully drawing your design in a pool of liquid resin, hardening it layer by meticulous layer. That’s SLA in a nutshell! This technology uses a UV laser to cure, or harden, liquid photopolymer resin, creating incredibly detailed and accurate models with super smooth surfaces. It’s like magic, but with science! If you need a model with intricate details and a flawless finish for a client presentation—the kind of model that can help you double your property sales—SLA is a fantastic choice. Plus, there are now faster resins and large-format SLA printers available, making it even more versatile. One example of a large-format SLA printer is the Form 3L from Formlabs.
Fused Deposition Modeling (FDM) / Fused Filament Fabrication (FFF)
Think of FDM as a high-tech, computer-controlled hot glue gun. It works by melting and extruding a thermoplastic filament (a spool of plastic string), layer upon layer, to build your model. It’s like building with tiny strands of plastic! FDM is the most common and affordable type of 3D printing, making it a popular choice for architects creating early-stage concept models or larger models where super-fine surface detail isn’t the top priority. While the resolution might not be as high as SLA, FDM is a reliable and cost-effective workhorse.
Selective Laser Sintering (SLS)
SLS is like SLA’s powder-based cousin. Instead of liquid resin, it uses a high-powered laser to fuse together tiny particles of polymer powder, usually nylon, layer by layer. What’s cool about SLS is that the surrounding unfused powder supports the model during printing, so it doesn’t need separate support structures. This makes it ideal for creating highly complex geometries with internal features or undercuts. Plus, the nylon models are strong and durable, making them suitable for functional or structural parts. If you need a robust model with intricate internal details, SLS might be the way to go.
Binder Jetting
Binder Jetting is the colorful one of the bunch! It works by depositing a colored binding agent (like glue) from an inkjet-style printhead onto a layer of powder, solidifying it. The process repeats layer by layer, creating a full-color model right out of the printer. While Binder Jetting is fantastic for creating vibrant, eye-catching models, it does have some limitations. The models tend to be more porous and brittle compared to other technologies, making them better suited for static display models rather than functional prototypes. A leading manufacturer of Binder Jetting printers is 3D Systems.
What is the best 3D printing technology for architectural models?
The truth is, there’s no single “best” technology. It all depends on your specific needs! Here’s a quick comparison to help you decide:
| Technology | Resolution | Accuracy | Surface Finish | Best For |
|---|---|---|---|---|
| SLA | ★★★★★ | ★★★★★ | ★★★★★ | Highly detailed presentation models with smooth surfaces. |
| FDM/FFF | ★★☆☆☆ | ★★★★☆ | ★★☆☆☆ | Basic concept models, larger massing models, early iterations. |
| SLS | ★★★★☆ | ★★★★★ | ★★★★☆ | Complex geometries with internal features, durable structural parts. |
| Binder Jetting | ★★★☆☆ | ★★★☆☆ | ★★★☆☆ | Full-color conceptual or presentation models for static display. |
A Step-by-Step Guide to 3D Printing Architectural Models
Ready to turn your architectural vision into a tangible 3D printed reality? Let’s walk through the professional process, step by step:
Conceptual Design and Planning
Every great project starts with a solid foundation. Before you even touch your 3D modeling software, take some time to brainstorm, gather inspiration, and really understand the project requirements. What’s the purpose of the model? Who’s the audience? What are the key features you want to highlight? Having a clear vision will guide you through the entire process. This is the stage where you also start thinking about finding the perfect balance of scale and detail for your project.
Digital 3D Modeling
Now it’s time to bring your design to life in the digital world! Using computer-aided design (CAD) software, you’ll create a detailed 3D representation of your architectural project. Think of it as building a virtual version of your model, piece by piece.
What software is used to design 3D printed architectural models?
There are many great options out there, each with its own strengths. Here are a few popular choices among architects:
- AutoCAD: A classic for 2D drafting and 3D designing, it offers precise control over dimensions and geometry.
- Revit: Designed specifically for Building Information Modeling (BIM), it allows you to create detailed 3D structures with associated data.
- Rhinoceros (Rhino): Known for its versatility, Rhino is great for creating complex and organic forms, often used with the Grasshopper plugin for parametric modeling.
- SketchUp: User-friendly and intuitive, it’s a popular choice for quick concept modeling and visualization.
- Blender: A powerful open-source tool with advanced sculpting and rendering capabilities, often used for conceptual modeling.
Whichever software you choose, remember to design with 3D printing in mind. This means creating “watertight” models (more on that below) and considering factors like wall thickness and support structures.
Model Preparation for 3D Printing
Before you hit that “print” button, you need to make sure your digital model is ready for its 3D printing debut. This involves a few crucial steps:
Scale Conversion
Most architectural designs are created at a 1:1 scale, meaning they represent the actual size of the building. But your 3D printed model will likely be much smaller! You’ll need to convert your design to the desired model scale, such as 1:50, 1:100, or 1:200. This ensures that your model is the right size for your needs and fits within your printer’s build volume.
Model Optimization
This is where you become a 3D printing detective, looking for any potential issues that could affect the printing process. Here’s what to watch out for:
- Overhangs: These are parts of your model that extend outward without any support underneath. Too much overhang can lead to drooping or printing failures.
- Unsupported parts: Similar to overhangs, these are areas that are not adequately supported and could collapse during printing.
- Excessive complexity: While 3D printing can handle intricate details, overly complex models can be challenging to print and may require significant post-processing.
How do I prepare my architectural model for 3D printing?
Here are some techniques to optimize your model:
- Splitting models into parts: If your model is too large or complex, consider breaking it down into smaller, more manageable sections that can be printed separately and assembled later. This is especially important when thinking about the logistics covered in our Guide to Packaging and Transporting Models.
- Designing for assembly: When splitting models, think about how the parts will fit together. Adding mating features, like interlocking tabs or slots, can make assembly a breeze. You can also split models by seams or by individual components.
- Ensuring watertight models: This is crucial! A watertight (or manifold) model is like a sealed container with no holes or gaps in its digital surface. Your 3D modeling software likely has tools to check for and fix any errors. Use them!
- Choosing appropriate wall thickness: Walls that are too thin can be fragile and may warp or break during printing. Make sure your walls are thick enough to provide structural integrity, especially at the base of the model.
File Export
Once your model is optimized, it’s time to export it in a format that your 3D printer can understand. The most common file formats for 3D printing are STL (Stereolithography) and OBJ (Object File). These formats essentially describe the surface geometry of your model as a mesh of triangles, telling the printer where to deposit material.
 Choosing the Right 3D Printing Technology and Material
We’ve already covered the different types of 3D printing technologies, but let’s reiterate the key factors to consider when making your choice:
- Detail requirements: How intricate does your model need to be? SLA is great for high detail, while FDM is better for larger, less detailed models.
- Budget: FDM is generally the most affordable option, while SLA and SLS can be more expensive.
- Model purpose: Is it for a client presentation, a structural analysis, or a quick concept model?
What materials are used to 3D print architectural models?
The material you choose will impact the look, feel, and durability of your model. Here’s a closer look at some popular options:
| Material | Description | Pros | Cons |
|---|---|---|---|
| PLA (Polylactic Acid) | Biodegradable thermoplastic derived from cornstarch. | Easy to use, affordable, wide range of colors, good for detailed models. | Less durable and heat-resistant than ABS; can be brittle. |
| ABS (Acrylonitrile Butadiene Styrene) | Common thermoplastic known for its strength and durability. | Stronger and more heat-resistant than PLA, good for functional models. | Prone to warping during printing, requires a heated print bed. |
| Resin | Liquid photopolymer cured by UV light in SLA printers. | Extremely high resolution, smooth surface finish, ideal for intricate details. | More expensive than PLA or ABS, requires careful handling and post-curing. |
| Nylon (Polyamide) | Strong and durable plastic powder used in SLS printers. | Excellent strength and durability, slightly flexible, good for structural parts. | Requires higher printing temperatures, can absorb moisture if not stored properly. |
Slicing and Print Settings
Before your 3D printer can start working its magic, it needs a detailed set of instructions. That’s where slicing software comes in. This software takes your 3D model and digitally slices it into hundreds or thousands of thin, horizontal layers, generating the G-code that tells the printer how to move and where to deposit material for each layer.
What is slicing in 3D printing?
Slicing is like creating a turn-by-turn roadmap for your 3D printer. It breaks down your complex 3D model into a series of simple, two-dimensional instructions that the printer can follow, layer by layer. Popular slicing software options include:
- Ultimaker Cura: A free, user-friendly slicer that’s great for beginners and professionals alike.
- PrusaSlicer: Another free and open-source option, known for its advanced features and robust community support.
- Simplify3D: A paid software with powerful customization options, often preferred by professionals for its control over support structures.
Within the slicing software, you’ll need to adjust various print settings to optimize the printing process. Here are some key settings to consider:
- Layer Height: This determines the thickness of each layer. A lower layer height (e.g., 0.1mm) results in finer detail and smoother surfaces but significantly longer print times. For architectural models, a lower layer height is often used for detailed parts, while a thicker height (0.2mm or more) can be used for faster prints of less detailed sections.
- Print Speed: This controls how fast the printer’s nozzle moves while extruding material. Slower speeds generally result in better print quality and accuracy, which is especially important for intricate models.
- Supports: These are temporary, lattice-like structures that hold up overhangs and prevent them from collapsing during printing. Your slicing software can automatically generate supports, but you can also manually adjust their placement and density. Remember, supports will need to be carefully removed during post-processing, so it’s a good idea to orient your model to minimize their use where possible.
3D Printing the Model
With your model sliced and your print settings dialed in, it’s finally time to hit that “print” button! The 3D printer will now start building your model, layer by layer, following the G-code generated by the slicing software. Depending on the size, complexity, and layer height of your model, this process can take anywhere from a few hours to several days.
It’s a good idea to keep an eye on your printer, especially during the crucial first few layers, to make sure everything is adhering properly to the print bed. If you notice any issues, such as warping or poor adhesion, you may need to stop the print, adjust your settings, and start again.
Post-Processing
Once your model is finished printing, it’s not quite ready for its close-up. Most 3D printed models require some degree of post-processing to remove supports, smooth out surfaces, and enhance their appearance for a professional finish.
How do you finish a 3D printed architectural model?
Here are some common post-processing techniques:
- Support Removal: If your model was printed with supports, you’ll need to carefully remove them using pliers, flush cutters, or other small tools. Be patient and take your time to avoid breaking delicate parts of the model.
- Sanding and Smoothing: Sanding with fine-grit sandpaper can help smooth out any rough edges or visible layer lines. For PLA and ABS prints, you can also use acetone vapor smoothing to achieve a glossy finish. This advanced technique involves exposing the model to acetone vapor, which slightly melts the outer surface, creating a smooth, shiny appearance.
- Priming and Painting: Applying a high-quality model primer before painting helps the paint adhere better and creates a uniform surface. You can then use acrylic paints with an airbrush or fine brushes to add color and detail to your model. Finally, clear coats can be applied to protect the paint and give a polished, professional look.
- Bonding: If you printed your model in multiple parts, you’ll need to bond them together. Cyanoacrylate (super glue) or specialized liquid resins are commonly used for this purpose.
| Post Processing Technique | SLA | FDM | SLS | BINDER JETTING |
|---|---|---|---|---|
| Sanding | Light sanding is recommended to remove support marks. | Sanding is often required to get a smooth finish and remove layer lines. | No sanding is required due to the quality of the finished parts. | No sanding is required. |
| Bonding | Bonding of SLA components is done with super glue or more liquid resin. | FDM components can be assembled using adhesives such as super glue. | SLS components can be assembled using adhesives such as super glue. | Components printed using binder jetting printers can be bonded using super glue. |
| Priming and painting | SLA components can be painted to achieve the desired finish. | FDM components can be painted to achieve the desired finish. | SLS components can be painted to achieve the desired finish. | No painting is required for full-color parts. |
Real-World Applications and Case Studies
3D printing is not just a futuristic concept – it’s already making waves and delivering significant value in the architectural world. Let’s explore some real-world applications and see how leading firms are using this technology to their advantage:
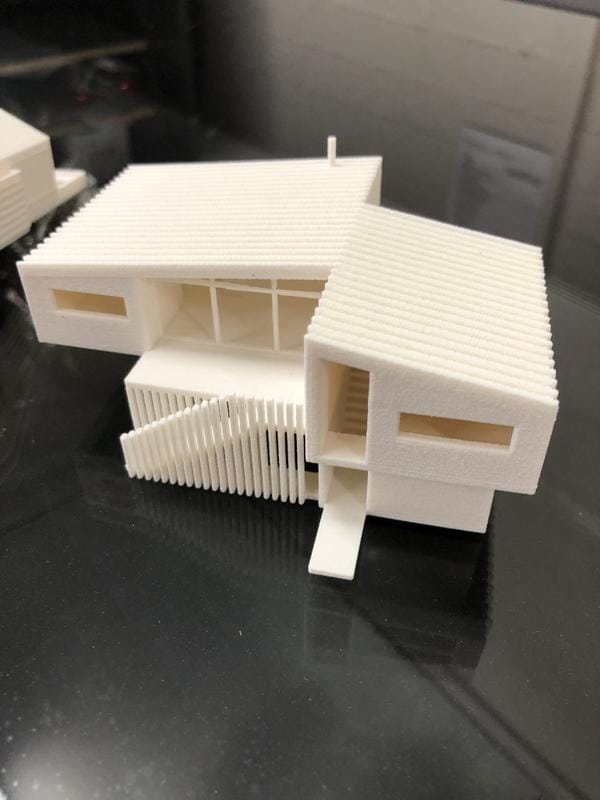
Concept Models
In the early stages of design, architects often create concept models to explore different ideas and visualize the overall form of a building. 3D printing is perfect for this purpose, as it allows for rapid prototyping and quick iterations. Architects can print multiple variations of a design overnight and compare them side-by-side in a morning meeting, helping them make informed decisions early on.
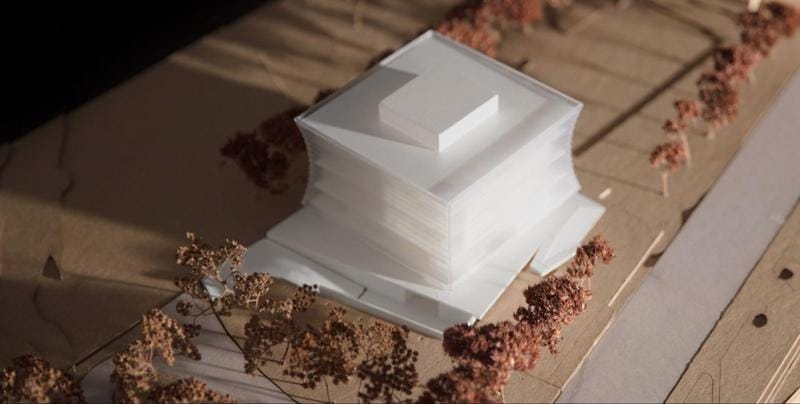
Site Planning
Understanding how a building interacts with its surroundings is crucial. Architects can create detailed site models by combining 3D printed buildings with CNC-milled topographical maps of the surrounding area. This allows them to assess the building’s relationship to the landscape, analyze sunlight and shadows, and make adjustments to optimize the design for its context.
Structural Prototypes
For complex or unconventional structural elements, 3D printing can be used to create prototypes for testing and analysis. Architects can print scaled-down versions of intricate structures, such as cantilevered beams or unique geometric shapes, and evaluate their stability and load-bearing capacity. This helps identify potential structural challenges long before they become expensive problems on a construction site.
Customized Components
Beyond scale models, 3D printing can also be used to create actual building components. Think intricate facades, decorative panels, or even customized furniture. This opens up exciting possibilities for creating unique and personalized architectural elements that would be difficult or expensive to produce using traditional methods. IAAC has used 3D printers to fabricate intricate decorative panels, façade elements, and even entire walls.
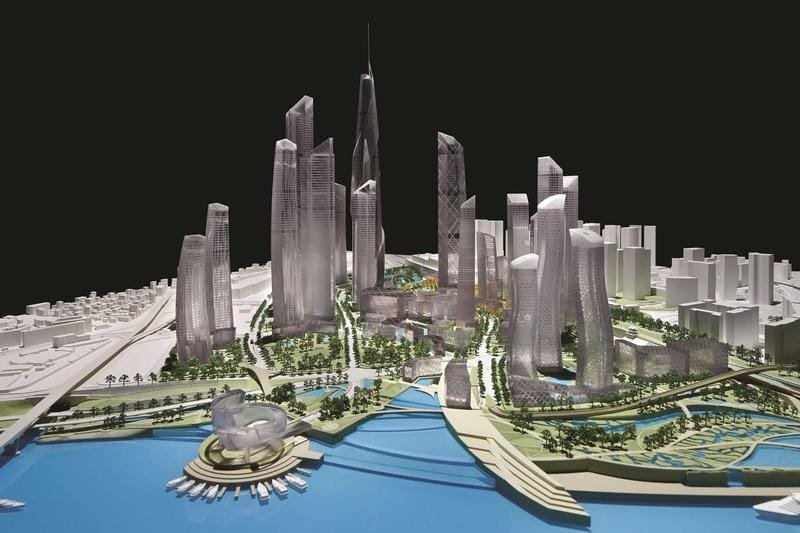
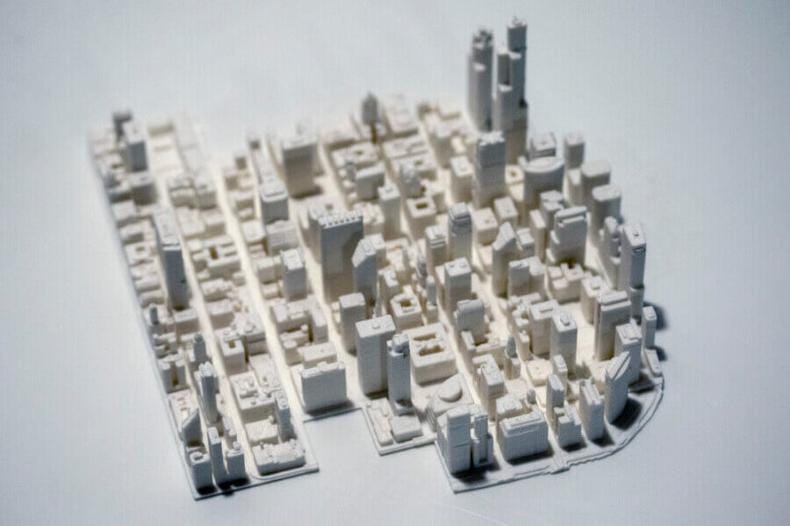
Urban Planning and Development
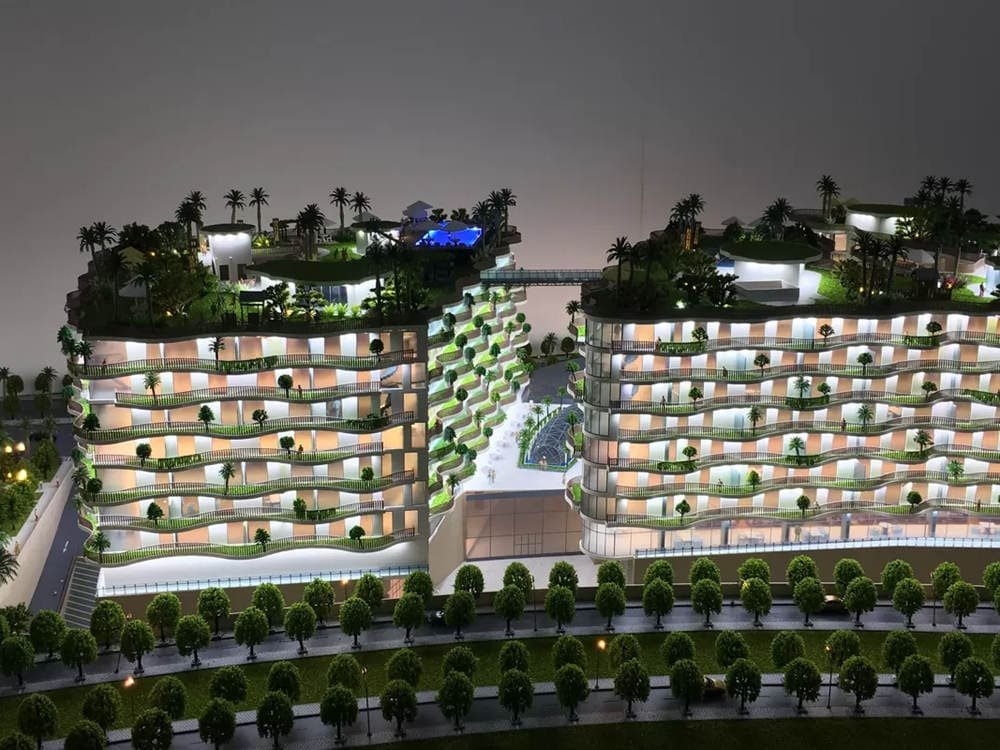
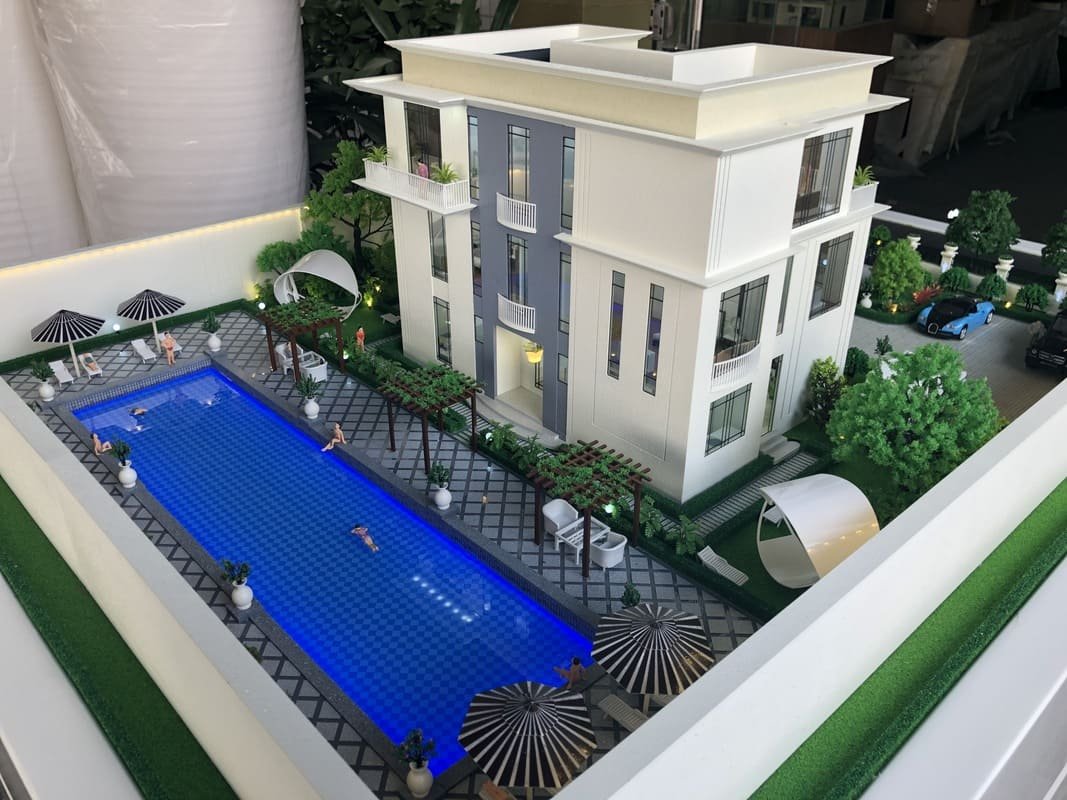
3D printed models are invaluable tools for urban planners and developers. They can be used to create comprehensive models of cityscapes, allowing stakeholders to visualize the impact of new developments, analyze traffic flow, and study the relationship between buildings and public spaces. These models are often the centerpiece of public consultations and investor presentations.
Case Studies
- Sagrada Família: This iconic basilica in Barcelona, designed by Antoni Gaudí, has been under construction for over a century. In recent years, 3D printing has been used to create complex models of the remaining sections, helping architects and engineers understand Gaudí’s intricate designs and plan the construction process.
“Given the complexity of surfaces and shapes of Gaudi’s original project, working in 2D makes no sense from an architectural point of view.” – JODI COLL, CHIEF ARCHITECT
- Henning Larsen Architects (HLA): This Copenhagen-based firm has embraced 3D printing as a key tool for design exploration. They use it to create detailed models of their projects, allowing them to experiment with different forms, materials, and spatial configurations.
“This machine has created a much closer link between the physical world and the digital world by allowing us to print color elements and build 3D models of buildings from the beginning of the process.” – MORTEN STEFFENSEN, HLA ENGINEER
- Renzo Piano Building Workshop (RPBW): Known for their innovative designs, RPBW uses 3D printing to create complex joints and intricate components for their models. For example, they 3D printed the intricate joints for the columns of the San Giorgio Bridge model in Genoa.
The Future of 3D Printing in Architecture
The applications of 3D printing in architecture are only going to expand in the coming years. We cover this topic in depth in our article, The Future of Model Making: Interactive Tech and AR. Here are some exciting developments to watch out for:
Full-Scale Construction
Imagine entire buildings being 3D printed on-site! This is not science fiction – it’s already happening. Concrete 3D printing and robotic additive manufacturing are emerging technologies that could revolutionize the construction industry, promising faster build times, lower costs, and less waste. Companies like Apis Cor and COBOD are leading the way in this field.
AI and Generative Design
Artificial intelligence (AI) can be used to optimize designs for 3D printing, taking into account factors like structural integrity, material usage, and cost. Generative design algorithms can even create thousands of entirely new design options based on a specific set of parameters, pushing the boundaries of architectural creativity beyond human intuition.
Sustainable Materials
As environmental concerns grow, the development of eco-friendly 3D printing materials is becoming increasingly important. Researchers are exploring the use of recycled plastics, bio-based materials like bamboo and mycelium (the root structure of mushrooms), and even innovative materials like sand in 3D printing.
Increased Accessibility
As 3D printing technology continues to evolve and mature, it’s becoming more affordable and accessible to a wider range of architects and designers. This democratization of the technology will likely lead to even more innovative applications and a greater integration of 3D printing into the daily architectural workflow.
Challenges and Considerations
While 3D printing offers incredible potential, it’s important to acknowledge the challenges and limitations that still exist. Successfully navigating these is often a matter of partnering with an experienced firm, a process we outline in 10 Critical Questions to Ask Your Model Maker.
Technical Constraints
- Print Size Limitations: Most desktop 3D printers have relatively small build volumes, which can be a constraint when printing large architectural models. While larger industrial printers exist, they come with a much higher price tag.
- Resolution and Surface Quality: While 3D printing technology has come a long way, layer lines and slight imperfections can still be visible, especially on models printed with FDM technology. Achieving a perfectly smooth finish may require significant additional post-processing.
- Material Performance: Not all 3D printing materials can perfectly replicate the properties of traditional building materials. It’s important to carefully consider the strength, durability, and other characteristics of the chosen material to ensure it meets the requirements of the project.
Economic Considerations
- Initial Investment: High-quality 3D printers capable of producing detailed architectural models can be a significant investment, particularly for smaller firms or individual architects.
- Material Costs: Specialized 3D printing materials, such as high-resolution resins or engineering-grade filaments, can be more expensive than traditional modeling materials.
Sustainability and Environmental Impact
- Energy Consumption: 3D printing can be energy-intensive, particularly for large or complex models that require long print times.
- Material Waste: While 3D printing generally produces less waste than traditional subtractive methods, failed prints and support structures can still contribute to waste. It’s important to use materials responsibly and explore recycling options where possible.
What are the limitations of 3D printing in architecture?
Here’s a quick summary of the challenges:
| Challenge | Description |
|---|---|
| Technical Constraints | Limitations in print size, resolution, and material properties can affect the final outcome. |
| Economic Considerations | High initial investment in professional-grade equipment and potentially higher material costs. |
| Sustainability | Concerns about energy consumption and plastic waste from supports and failed prints. |
| Skill and Training | Requires specialized knowledge in 3D modeling, slicing software, and printer operation to achieve high-quality results. |
Skill and Training
- Expertise Needed: Effectively using 3D printing for architectural modeling requires specialized knowledge and skills. Architects and designers need to be proficient in 3D modeling software, understand the intricacies of different 3D printing technologies, and master the nuances of slicing software and print settings.
- Software and Hardware Proficiency: Beyond basic operation, a deeper understanding of printer calibration, troubleshooting, and maintenance is essential for consistent and high-quality results. This often involves a significant learning curve and ongoing training to stay updated with the latest advancements.
Tips for Success
To make the most of 3D printing for your architectural models, keep these tips in mind:
- Calibrate Your Printer Regularly: Proper calibration is the foundation of accurate and consistent prints.
- Use High-Quality Materials: The quality of your filament or resin can significantly impact the strength, detail, and finish of the final result.
- Optimize Print Settings: Experiment with different settings to find the best combination for your specific model and material.
- Master Post-Processing Techniques: Learn how to effectively remove supports, sand surfaces, and paint your models to achieve a professional finish.
- Experiment and Iterate: Don’t be afraid to try new things and learn from your mistakes. The flexibility of 3D printing is its greatest strength.
Conclusion
3D printing is a powerful, transformative tool that’s fundamentally changing the field of architectural modeling. It empowers architects to create detailed, accurate, and cost-effective models with unprecedented speed and flexibility. By embracing this technology, architects can enhance their design process, improve communication with clients, and push the boundaries of creativity. While challenges remain, the ongoing advancements in 3D printing technology, materials, and software promise an even more exciting future for its application in architecture. As the technology becomes more accessible and user-friendly, we can expect to see even more innovative uses of 3D printing in the design and construction of the buildings and cities of tomorrow.
Ready to take your architectural models to the next level? Explore the world of 3D printing and discover how it can revolutionize your design process. Whether you’re considering investing in a 3D printer or partnering with a 3D printing service provider like FacFox, the possibilities are endless. Start experimenting, unleash your creativity, and watch your architectural visions come to life in stunning 3D printed detail! You can also check out online communities like the r/3Dprinting subreddit to connect with other enthusiasts, share tips, and learn from their experiences.