Bayangkan memegang kunci ke rumah baru, atau berjalan melalui ruang kantor yang ramping, Sebelum satu batu bata diletakkan. Itulah kekuatannya 3D Rendering arsitektur. Itu adalah keajaiban yang mengubah arsitek’ bermimpi menjadi menakjubkan, Visual fotorealistik, mengizinkan klien, investor, dan masyarakat umum untuk mengalami proyek sebelum konstruksi bahkan dimulai. Panduan ini menyelam jauh ke dunia rendering arsitektur 3D, Menjelajahi prosesnya, alat, biayanya, Dan, yang terpenting, bagaimana itu bisa menghidupkan visi arsitektur Anda. Dari konsep awal ke presentasi akhir, 3D Rendering adalah kunci untuk keberhasilan komunikasi dan realisasi proyek. Mari kita jelajahi bagaimana teknologi yang mengubah permainan ini mengubah bidang arsitektur, memungkinkan kami untuk membuat arsitektur yang luar biasa.
Daftar isi
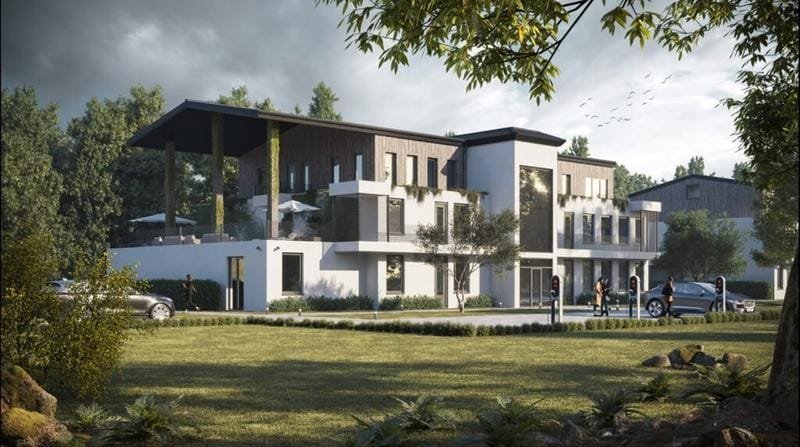 Membuka Kunci Rahasia: Menyelam mendalam ke dalam render arsitektur 3D
Jadi, Apa sebenarnya rendering arsitektur 3D? Pada intinya, Ini adalah proses digital. Itu adalah seni membuat gambar atau animasi yang terlihat seperti foto (atau bahkan lebih baik!), bangunan, interior, lanskap, dan lebih banyak lagi. Ini bukan hanya sketsa; Mereka adalah representasi yang sangat rinci dan realistis dari seperti apa bangunan atau ruang nantinya begitu selesai. Ini memungkinkan Anda untuk mendapatkan ide yang jelas tentang output akhir. Anggap saja sebagai intip masa depan Anda!
Tujuannya sederhana: untuk membuat visual yang sangat realistis, mereka bisa disalahartikan untuk foto yang sebenarnya. Tingkat akurasi ini dicapai melalui kombinasi teknik canggih, termasuk pencahayaan yang realistis, tekstur, dan penempatan objek yang tepat dalam adegan. Inilah yang kami maksud dengan kekuatan fotorealisme, menghidupkan proyek dengan cara yang tidak bisa tidak bisa dilakukan oleh gambar. Di masa lalu, Butuh waktu lama untuk membuat render, Saat ini waktu pemrosesan jauh lebih baik.
Tidak seperti metode tradisional, 3Rending arsitektur D menawarkan arsitek dan desainer kebebasan untuk bereksperimen, memodifikasi, dan memamerkan desain mereka dengan fleksibilitas yang tak tertandingi. Anda dapat menjelajahi variasi material, penerangan, Dan bahkan desain keseluruhan itu sendiri, Semua sebelum sekop pertama menyentuh tanah. Apakah Anda siap untuk menyelami fase berikutnya? Tertarik untuk belajar lebih banyak? Lihat bagian kami di berbagai jenis rendering untuk mendapatkan pemahaman yang lebih baik.
Proses rendering 3D: Breakdown langkah demi langkah
Membuat render arsitektur 3D yang menakjubkan bukan hanya tentang menekan tombol; Ini adalah proses terperinci yang melibatkan beberapa langkah kunci. Inilah rincian dari bagaimana semuanya datang bersama:
- Pengarahan dan perencanaan: Langkah pertama adalah pemahaman yang jelas tentang persyaratan proyek, termasuk rencana, ketinggian, Ide Desain, sampel material, dan preferensi klien. Tahap ini adalah dasar dari suatu proyek dan harus dilakukan dengan tepat, dan itu menetapkan panggung untuk sukses. Brief juga harus mencakup elemen desain spesifik yang ingin disoroti oleh arsitek, seperti fasad yang unik atau pandangan tertentu. Pertimbangkan audiens target, karena membantu membentuk gaya visual. Misalnya, Jika audiens target adalah keluarga, Rendering mungkin fokus pada menciptakan suasana yang ramah dan hangat.
- 3D pemodelan: Di sinilah konstruksi digital dimulai. 3D Artist menggunakan perangkat lunak khusus seperti Revit, 3DS Max, atau SKETCHUP untuk membangun model 3D yang terperinci. Model ini dibangun dengan mengambil informasi dari tahap pengarahan dan mengubahnya menjadi representasi 3D. Model ini mencakup semua elemen struktural, dinding, windows, pintu, dan fitur arsitektur lainnya. Pengukuran dan perhatian terhadap detail yang tepat adalah kunci pada tahap ini. Model yang dibangun dengan baik memastikan representasi desain yang akurat. Kualitas model sangat penting.
- Tekstur dan aplikasi material: Sekarang, Saatnya membuat segalanya terlihat nyata. Seniman menerapkan tekstur dan bahan pada permukaan model. Di sinilah bangunan menjadi hidup. Pikirkan tentang perbedaan antara beton halus dan batu bata kasar. Di Sini, Seniman menambahkan detail ini. Mereka menggunakan pustaka material yang datang standar dengan perangkat lunak. Mereka juga menggunakan PBR (Rendering berbasis fisik) Bahan untuk menciptakan kembali cara cahaya berinteraksi dengan berbagai permukaan. Ini membuat gambar benar -benar seperti hidup. Penggunaan tekstur yang tepat membuat proyek tampak nyata.
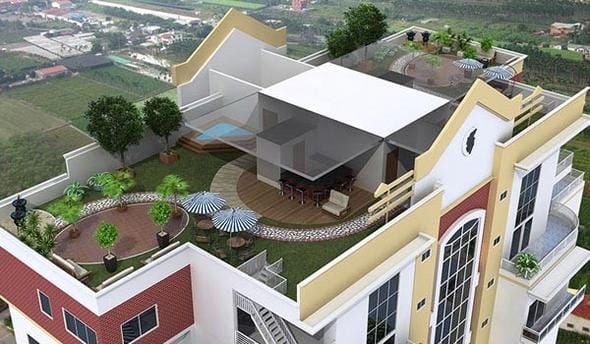
- Pencahayaan dan Pengaturan Lingkungan: Pencahayaan sangat penting. Itulah yang membuat suasana hati, menyoroti fitur bangunan, dan menciptakan rasa realisme. 3D Artis dengan cermat mengatur sumber pencahayaan, termasuk sinar matahari alami dan lampu buatan seperti lampu dan sorotan. Lingkungan, termasuk langit dan lanskap, juga ditambahkan pada tahap ini. Mereka perlu mempertimbangkan waktu. Anda dapat menemukan informasi yang sangat baik tentang pencahayaan dari sumber seperti Sekolah pencahayaan.
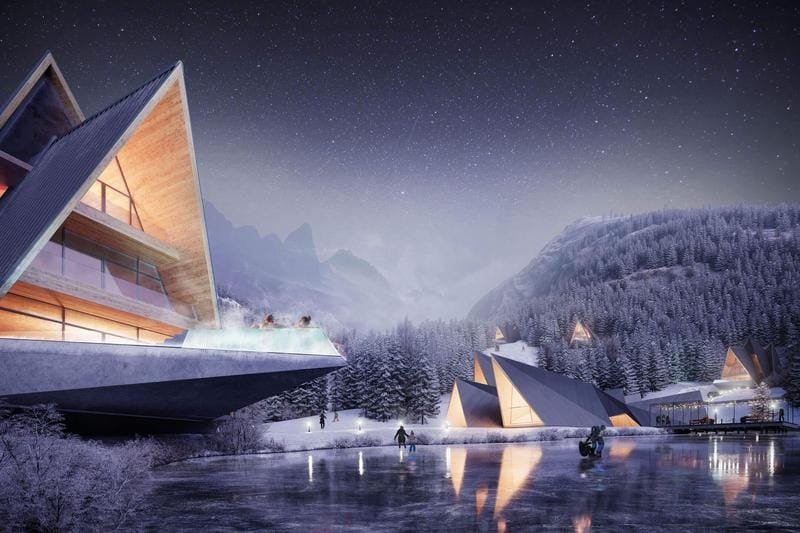
- Rendering: Di sinilah keajaiban terjadi! Artis itu membuat model 3D, Mengubahnya menjadi gambar atau animasi 2D. Langkah ini intensif secara komputasi, membutuhkan komputer yang kuat dan mesin rendering untuk memproses data dan menghasilkan visual berkualitas tinggi. Waktu rendering dapat bervariasi tergantung pada kompleksitas model dan tingkat detail yang diinginkan. Alat, seperti V-Ray, Mahkota, dan yang lainnya dibahas nanti, membantu mencapai berbagai tingkat detail dan realisme. Pengaturan render yang dipilih menentukan kualitas gambar.
- Pasca produksi: Pikirkan ini sebagai cat terakhir. Setelah proses rendering selesai, Gambar mengalami pasca pemrosesan. Artis menggunakan perangkat lunak seperti Photoshop untuk memperbaiki gambar (Koreksi Warna, efek, dll.). Sentuhan akhir melibatkan penyesuaian warna, Meningkatkan detail, dan menambahkan efek khusus. Di sinilah ketidaksempurnaan diperbaiki dan tampilan keseluruhan disempurnakan. Langkah ini sering memberikan efek yang paling diinginkan pada produk akhir.
Ingin mempelajari lebih lanjut tentang berbagai jenis perangkat lunak yang digunakan dalam proses ini? Lompat ke depan ke bagian kami di perangkat lunak dan alat.
Untuk memperkuat informasi ini, Diagram berikut memberikan representasi visual dari seluruh proses rendering 3D.
Seperti yang Anda lihat, Prosesnya terperinci dan membutuhkan banyak keterampilan. Mari kita sampai pada titik untuk menjelaskan aspek penting lainnya: Perbedaan antara pemodelan 3D dan rendering.
3D Pemodelan vs.. 3D Rendering: Memahami perbedaannya
Istilah -istilah ini sering digunakan secara bergantian, Tetapi mereka menggambarkan dua tahap berbeda dalam proses pembuatan. Mereka terkait tetapi melayani peran yang berbeda. Mari kita jelaskan tentang perbedaannya:
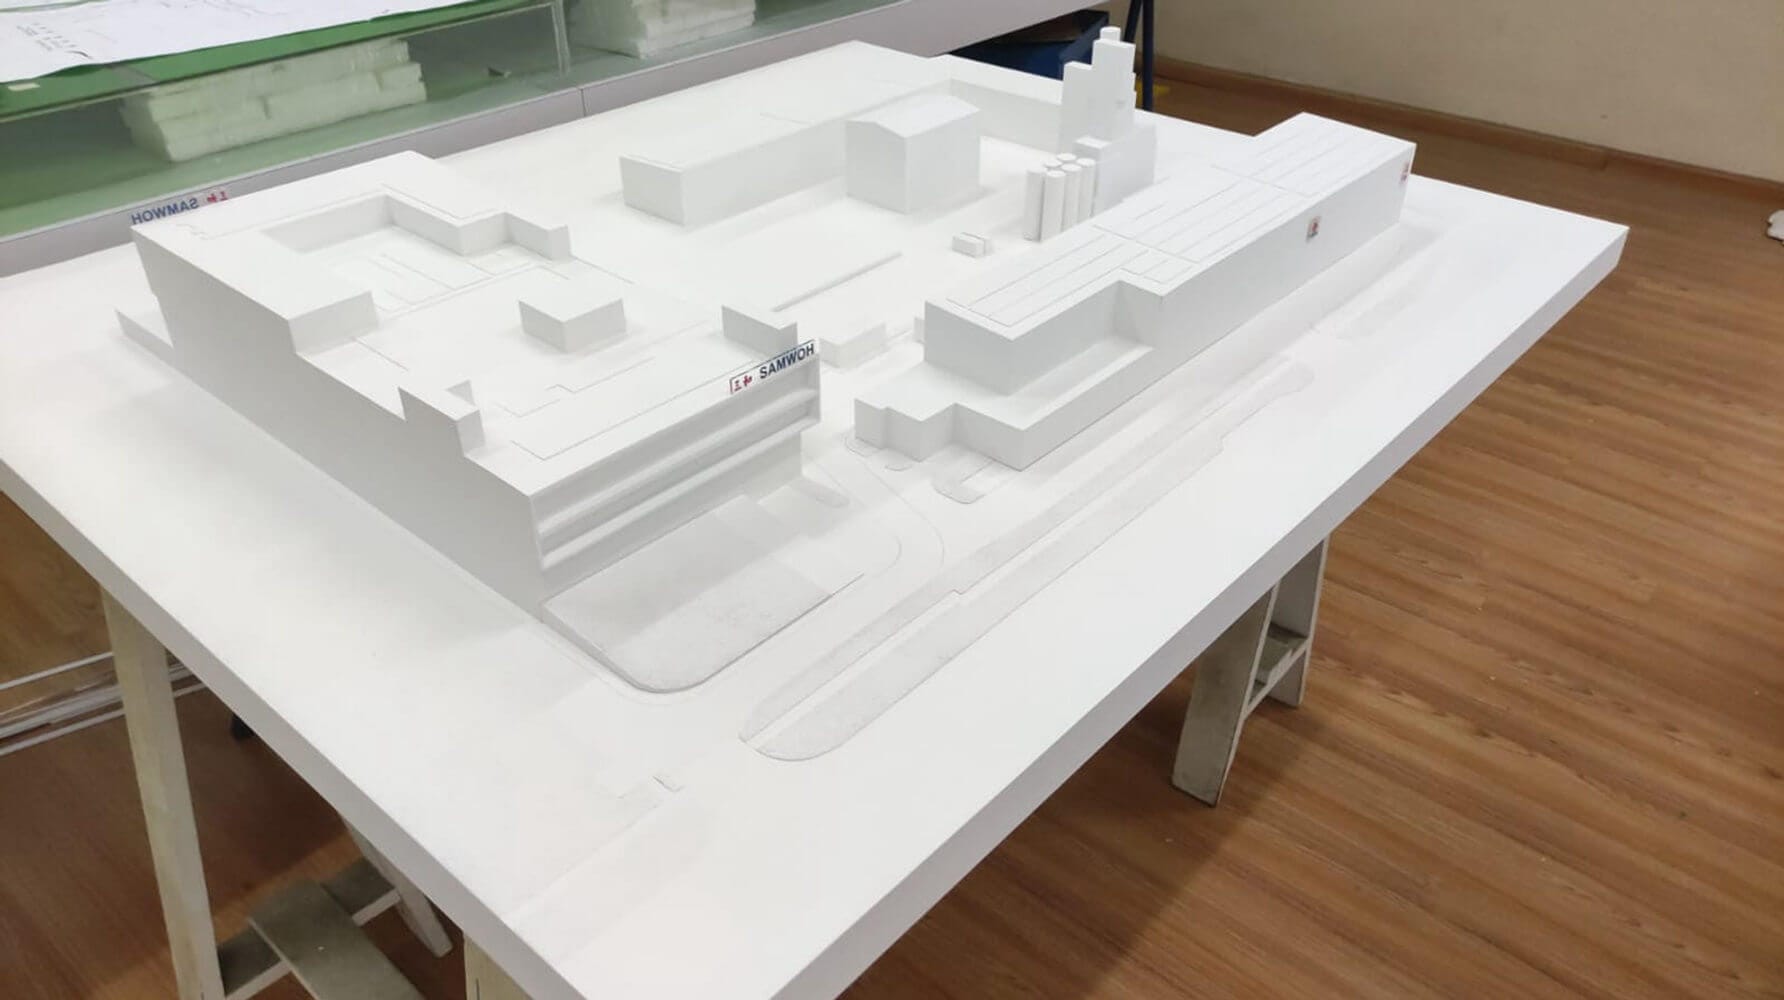
- 3D pemodelan: Ini adalah konstruksi fase. Ini adalah penciptaan representasi 3D digital dari desain, Mulai dari awal. Pikirkan itu seperti membangun model dari batu bata Lego. Model 3D mencakup semua geometri, yang, Setelah dibangun, kemudian dikirim ke fase rendering. Perangkat lunak pemodelan yang digunakan sama pentingnya, seperti Revit, 3DS Max, dll.. Detail lebih lanjut ditambahkan, semakin banyak model yang akan dikenakan biaya.
- 3D Rendering: Ini adalah Visualisasi fase. Ini adalah proses mengambil model 3D itu dan menerapkan pencahayaan, tekstur, dan efek lain untuk menciptakan realistis (atau bergaya) gambar atau animasi. Menggunakan mesin rendering diperlukan untuk membuat model menjadi hidup. Mesin rendering itulah yang menyatukan semuanya, dan memberikan apa yang kita semua kenal sebagai hasil akhir fotorealistik.
Pendeknya, 3D pemodelan menciptakan objek, sementara rendering 3D memvisualisasikan dia. Mereka bekerja sama, dan sama pentingnya!
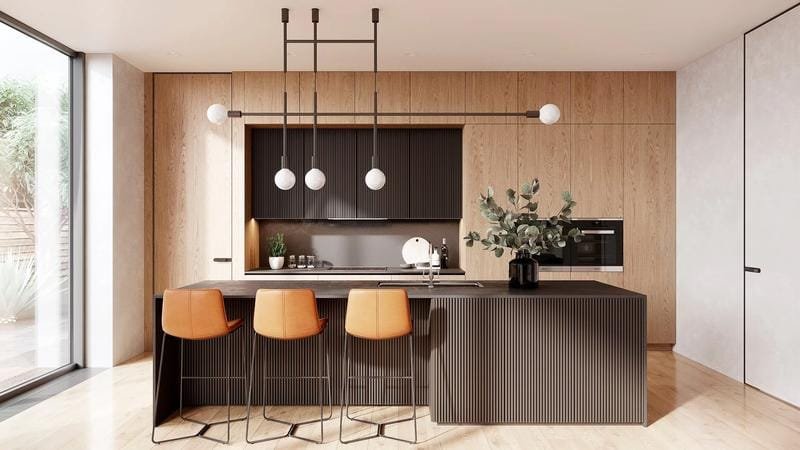 Menghidupkan: Menjelajahi Dunia Beragam Jenis Render Arsitektur 3D
Keindahan rendering arsitektur 3D adalah keserbagunaannya. Berbagai jenis rendering melayani tujuan yang berbeda, dari pemasaran hingga analisis desain. Apa pilihan terbaik? Itu tergantung pada kebutuhan proyek Anda!
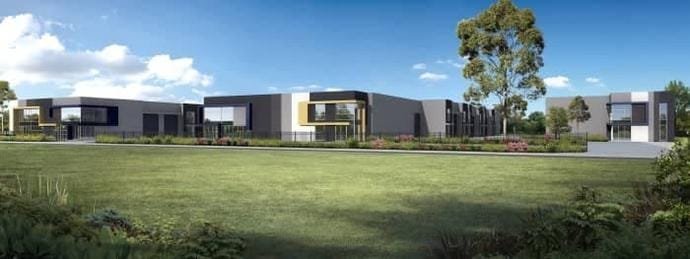
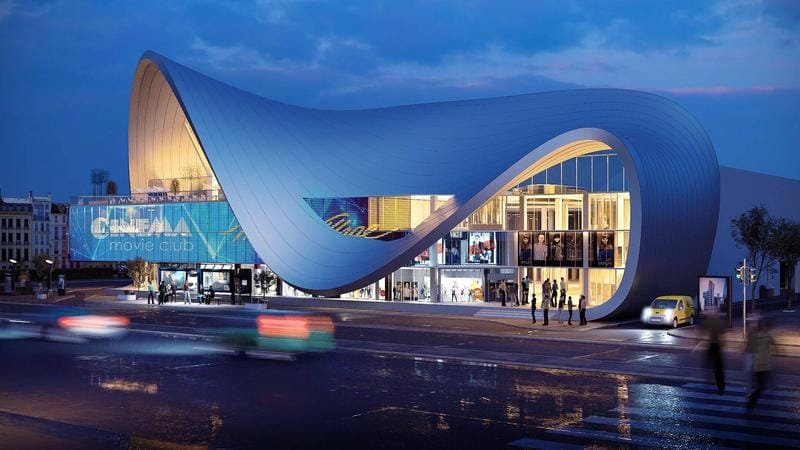
Rendering eksterior
Tujuan: Rendering ini fokus pada bagian luar bangunan. Mereka menampilkan desain arsitektur, bahan, lansekap, dan bagaimana bangunan berinteraksi dengan lingkungannya. Mereka sangat efektif untuk tujuan pemasaran, Membantu calon pembeli atau investor memvisualisasikan produk jadi. Eksterior proyek juga membantu pembeli potensial melihat bagaimana bangunan itu cocok dengan lingkungan sekitarnya. Mereka dapat digunakan untuk ditampilkan kepada para pemangku kepentingan dan mendapatkan umpan balik dan masalah potensial dapat ditangkap terlebih dahulu.
Aplikasi: Ini sempurna untuk materi pemasaran (brosur, situs web), presentasi, dan mendapatkan persetujuan perencanaan. Mereka juga digunakan untuk menciptakan kesan pertama yang kuat.
Fitur utama:
- Pamerkan keseluruhan desain dan estetika.
- Sorot material dan selesai.
- Menunjukkan hubungan bangunan dengan lingkungan.
Berikut adalah beberapa perspektif berbeda yang membantu menyampaikan pesan yang ditawarkan eksterior:
- Tampilan tingkat mata: Menawarkan perspektif tingkat dasar yang realistis, seolah -olah Anda berdiri di depan gedung.
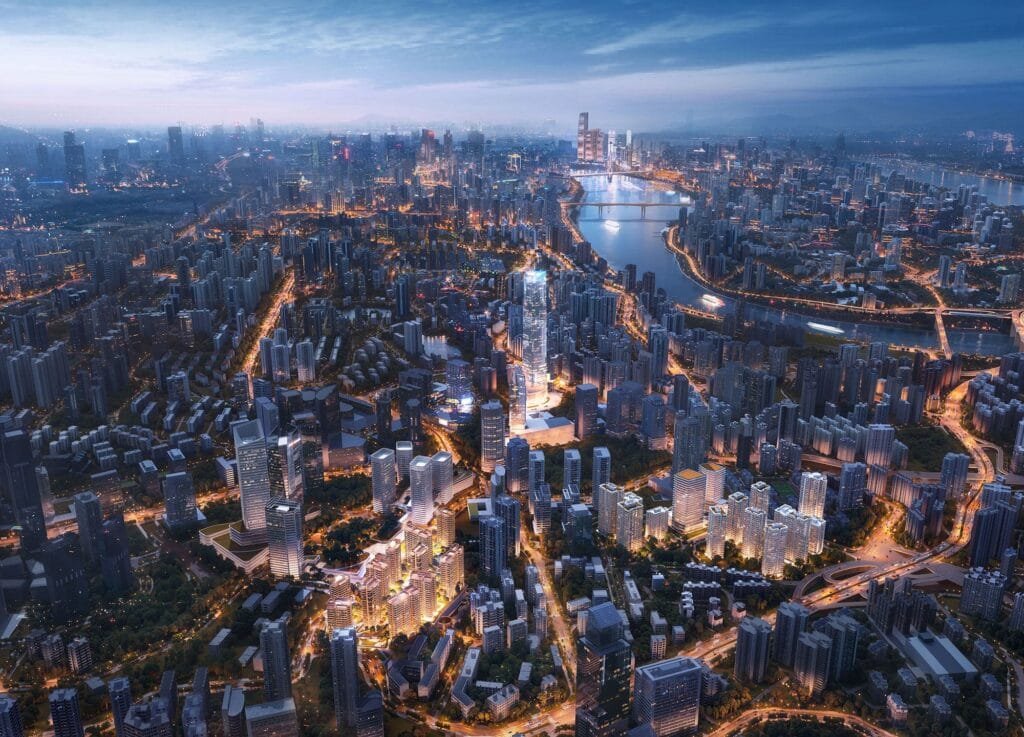
- Udara (Mata Burung) melihat: Memberikan tampilan situs yang lebih luas, Berguna untuk menunjukkan lokasi dan konteks bangunan di dalam area yang lebih luas.
- Pemandangan jalanan: Menggambarkan bangunan seperti yang terlihat dari jalan, menunjukkan bagaimana ia berinteraksi dengan lingkungan terdekatnya.
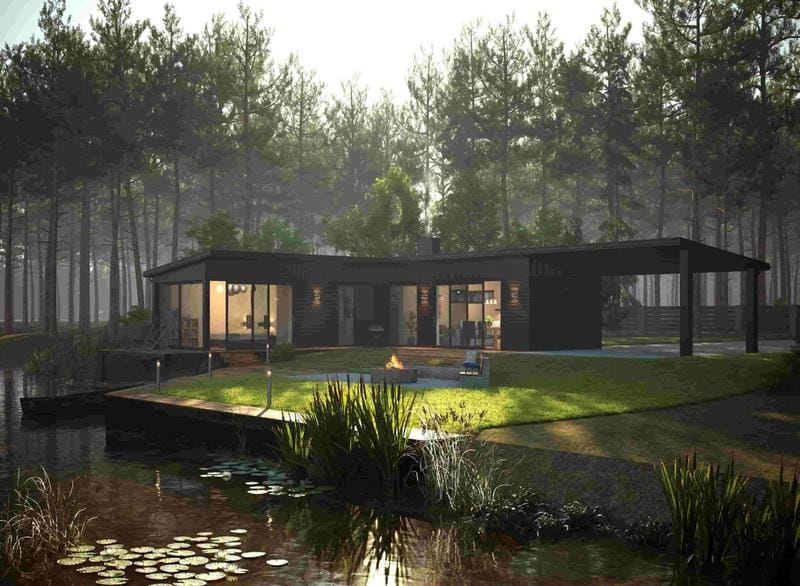
Ingin melihat perspektif ini sedang beraksi? Cari contoh online menggunakan istilah pencarian seperti “contoh rendering arsitektur eksterior” atau “rendering eksterior terbaik.” Sumber informasi terbaik dapat ditemukan di ArchDaily.
Rendering interior
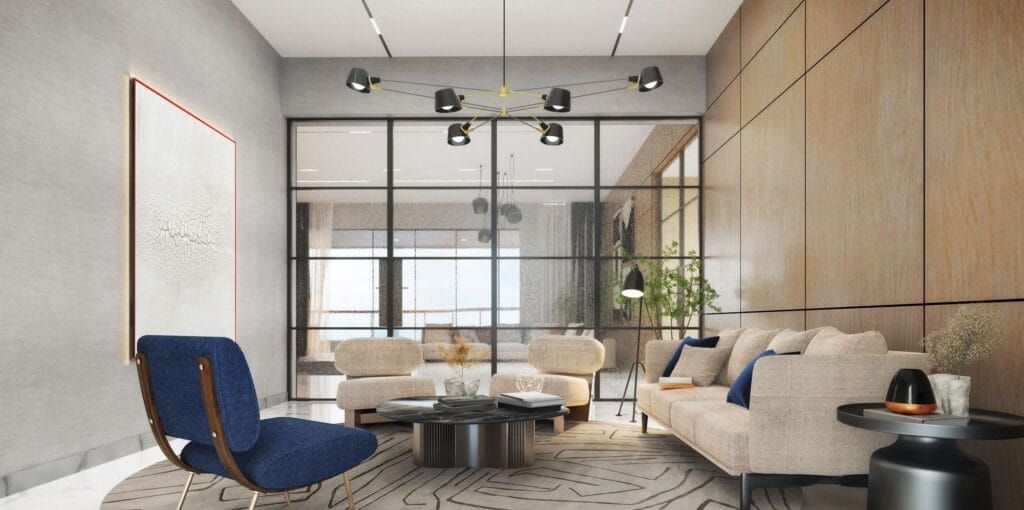
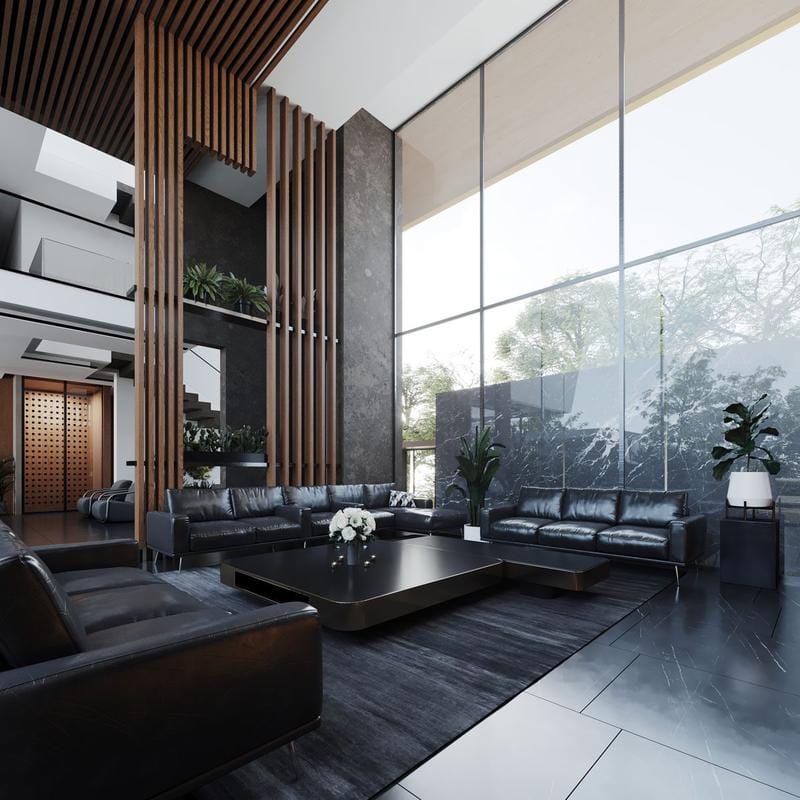
Tujuan: Rendering interior fokus pada bagian dalam bangunan. Mereka memvisualisasikan tata letaknya, elemen desain, mebel, penerangan, dan tekstur di dalam ruang interior.
Aplikasi: Ini sangat berharga bagi desainer dan arsitek interior untuk menyajikan visi mereka kepada klien. Mereka memastikan bahwa setiap detail memenuhi kebutuhan klien. Ini memungkinkan komunikasi yang lebih baik dan pemahaman klien yang lebih baik.
Fitur utama:
- Pamerkan desain ruang interior.
- Sorotan furnitur, selesai, dan dekorasi.
- Menunjukkan fungsionalitas dan aliran ruang.
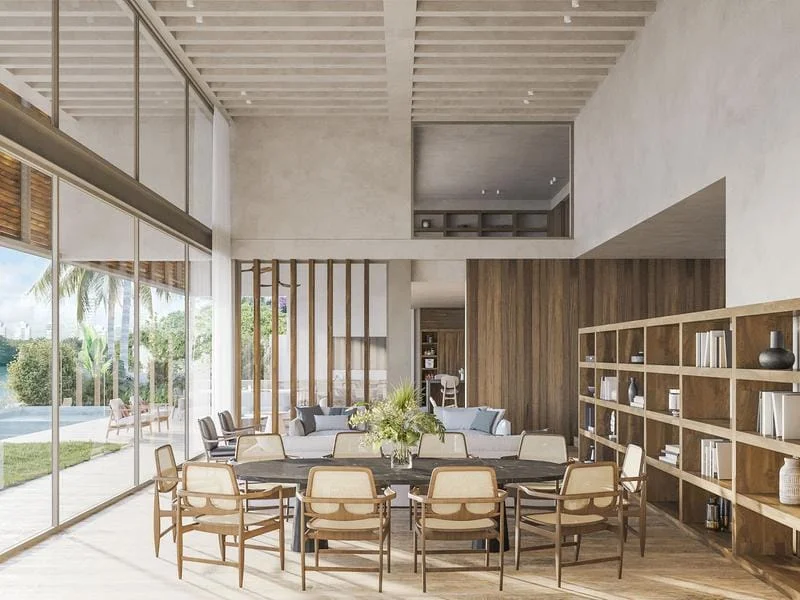
Rendering interior memberi klien kesempatan untuk memahami ruang mereka dengan lebih baik. Berikut adalah contoh rendering interior:
Rendering udara
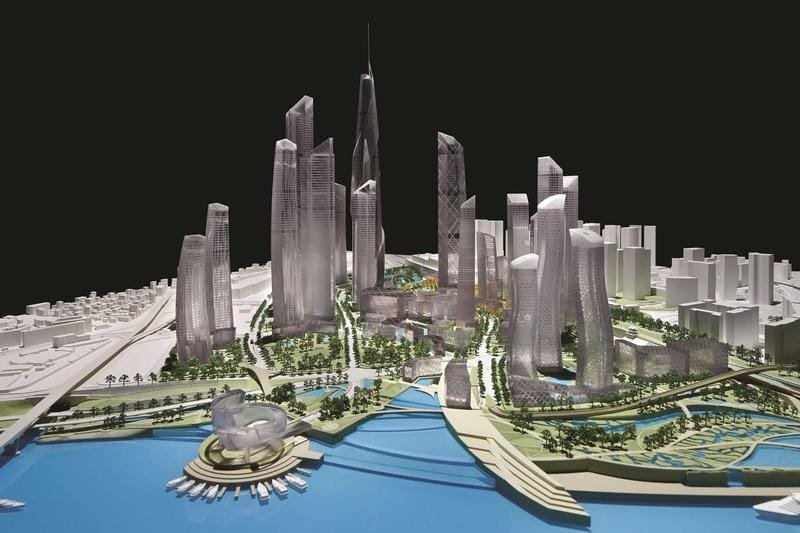
Tujuan: Rendering udara memberikan pandangan mata burung dari suatu proyek. Mereka menunjukkan bangunan dalam konteks yang lebih besar, seperti rencana lokasi atau rencana pengembangan kota.
Aplikasi: Rendering ini memberikan gambaran komprehensif dari situs ini, termasuk infrastruktur di sekitarnya, fitur lansekap, dan bangunan lainnya. Ini akan membuat perbedaan dalam perencanaan dan pengembangan.
Fitur utama:
- Memberikan gambaran umum yang komprehensif tentang proyek tersebut.
- Menunjukkan dampak proyek pada lingkungannya.
- Membantu pemangku kepentingan memahami skala dan konteks proyek.
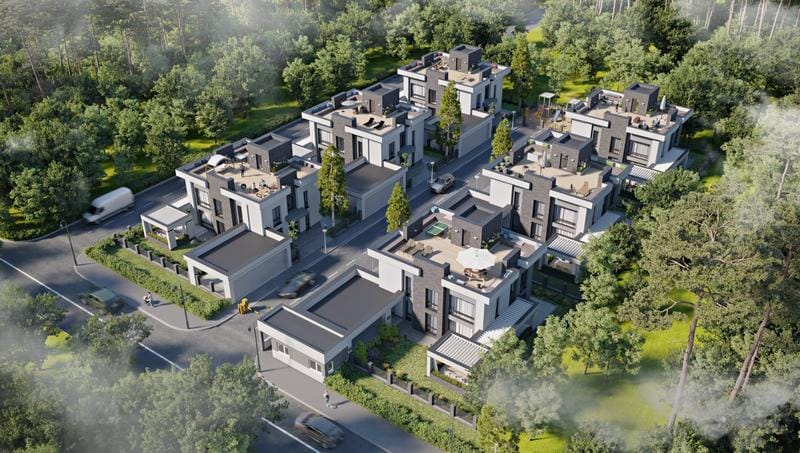
Untuk perincian lebih lanjut, melihat:
- Manfaat rendering udara: Pelajari Lebih Lanjut
Rendering denah lantai
Tujuan: Rendering denah lantai mengubah denah lantai 2D menjadi representasi 3D terperinci. Ini memberikan pemahaman yang lebih jelas tentang tata letak dan ruang.
Aplikasi: Sangat berguna pada tahap awal desain dan perencanaan, karena memungkinkan klien untuk memvisualisasikan ukuran kamar, Pengaturan furnitur, dan fungsi keseluruhan ruang.
Fitur utama:
- Pemahaman spasial yang ditingkatkan.
- Representasi tata letak yang jelas.
- Visualisasi ukuran kamar dan penempatan furnitur.
Ini perbandingan berdampingan:

Animasi arsitektur dan walkthrough
Tujuan: Ambil render 3D ke tingkat berikutnya dengan menciptakan pengalaman yang dinamis dan mendalam. Ini menciptakan pengalaman yang dinamis dan mendalam.
Aplikasi: Membantu memvisualisasikan proyek untuk menunjukkan bagaimana itu dalam kehidupan nyata.
Fitur utama:
- Pamerkan berbagai kondisi pencahayaan dan perubahan musiman.
- Izinkan klien untuk melakukan tur ke gedung.
Berikut adalah beberapa dari berbagai jenis fitur ini:
- Tur virtual: 360-Tampilan gelar yang memungkinkan pemirsa “berjalan” melalui ruang.
- Video flythrough: Animasi dinamis yang menampilkan bangunan dari berbagai sudut.
- Video animasi: Animasi yang lebih kompleks yang mungkin termasuk elemen seperti orang, kendaraan, atau mengubah kondisi cuaca.
Untuk melihat seperti apa ini, Lihatlah video seperti ini:
Ingin mendapatkan informasi lebih lanjut? Pertimbangkan untuk mengeksplorasi sumber daya yang tersedia tentang masalah ini. Misalnya, mengunjungi Bagian video ArchDaily Untuk melihat bagaimana proyek dunia nyata mendapat manfaat dari pandangan tersebut.
Rendering berdasarkan gaya
Di luar tipe dasar, rendering juga dapat dikategorikan berdasarkan gaya. Kategori -kategori ini memungkinkan pengguna untuk mengkomunikasikan konsep unik
- Rendering fotorealistik: Seperti namanya, Tujuan utamanya adalah menghasilkan gambar yang hampir identik dengan foto. Gaya ini menggunakan pencahayaan lanjutan, tekstur, dan bahan. Ini menawarkan penggambaran yang sebenarnya dari proyek akhir. Ini adalah salah satu layanan yang lebih mahal.
- Render artistik: Render artistik sering digunakan untuk memberikan representasi desain yang lebih unik. Gaya ini mungkin termasuk sketsa yang berbeda, tekstur, dan elemen yang berbeda. Teknik ini biasanya digunakan untuk presentasi dan mungkin tidak termasuk banyak detail.
- Rendering foto-montage: Teknik ini memungkinkan model 3D untuk digabungkan ke foto untuk membuat hasil yang unik. Ini memberi proyek tampilan yang lebih realistis, dan itu memberi pemirsa pemahaman yang lebih baik.
Memilih jenis rendering yang tepat sangat penting untuk komunikasi yang efektif dan mencapai tujuan proyek Anda.
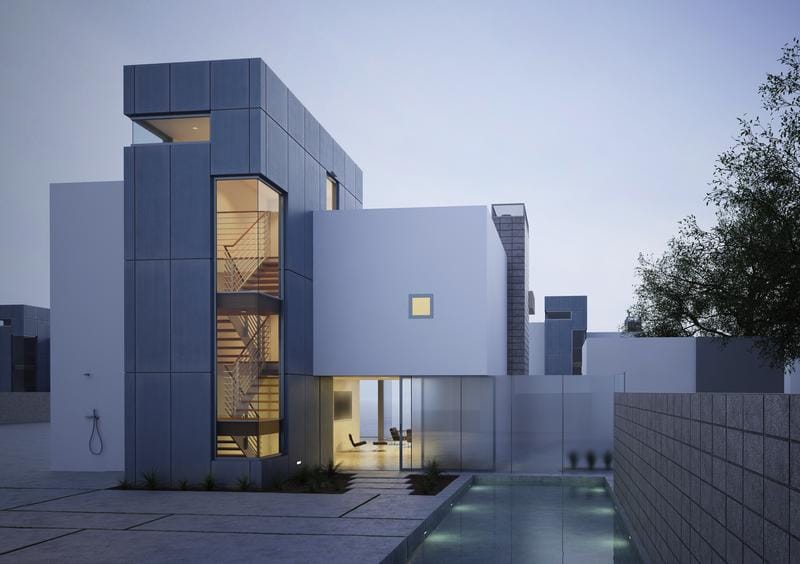 Kotak alat arsitek: Perangkat lunak dan alat untuk render arsitektur 3D
Sama seperti kerajinan apa pun, 3Rending arsitektur D bergantung pada alat yang tepat. Beberapa opsi perangkat lunak tersedia, Dan pilihan terbaik tergantung pada faktor -faktor seperti kompleksitas proyek, tingkat detail yang diinginkan, Dan pengalaman pengguna. Dari desainer pemula hingga profesional berpengalaman, Bagian ini menawarkan peta jalan untuk menavigasi lanskap perangkat lunak.
3D Perangkat Lunak Pemodelan (Yayasan)
Jenis perangkat lunak ini digunakan untuk membuat model 3D desain Anda. Pemilihan perangkat lunak pemodelan yang tepat adalah langkah pertama. Ini tergantung pada persyaratan proyek dan rangkaian keterampilan desainer.
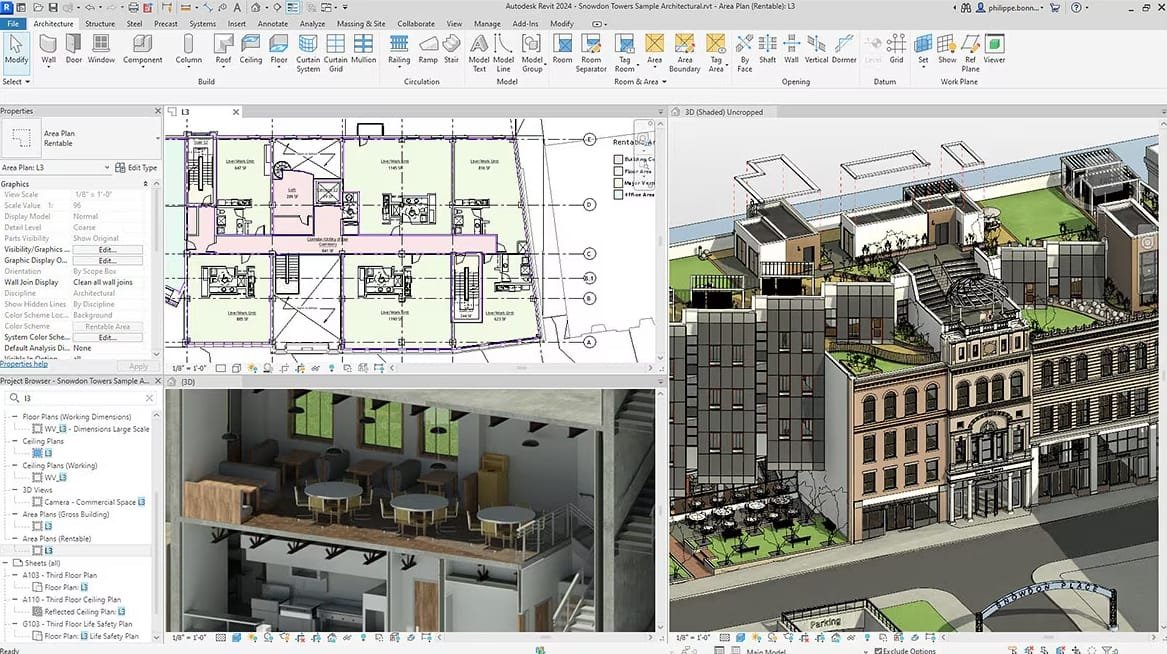
- Autodesk Revit: Pelajari Lebih Lanjut
- Manfaat: Bim ini (Membangun Pemodelan Informasi) Perangkat lunak dikenal dengan desain bangunannya yang terperinci dan akurat. Ini sangat disukai oleh arsitek karena desain dan kemampuan dokumentasinya yang terintegrasi.
- Fitur utama: Itu dirancang untuk pemodelan parametrik, yang berarti perubahan apa pun secara otomatis memperbarui model. Ini juga merupakan alat yang hebat untuk menghasilkan dokumen konstruksi. Ini adalah alat yang sangat populer dalam ruang arsitektur.
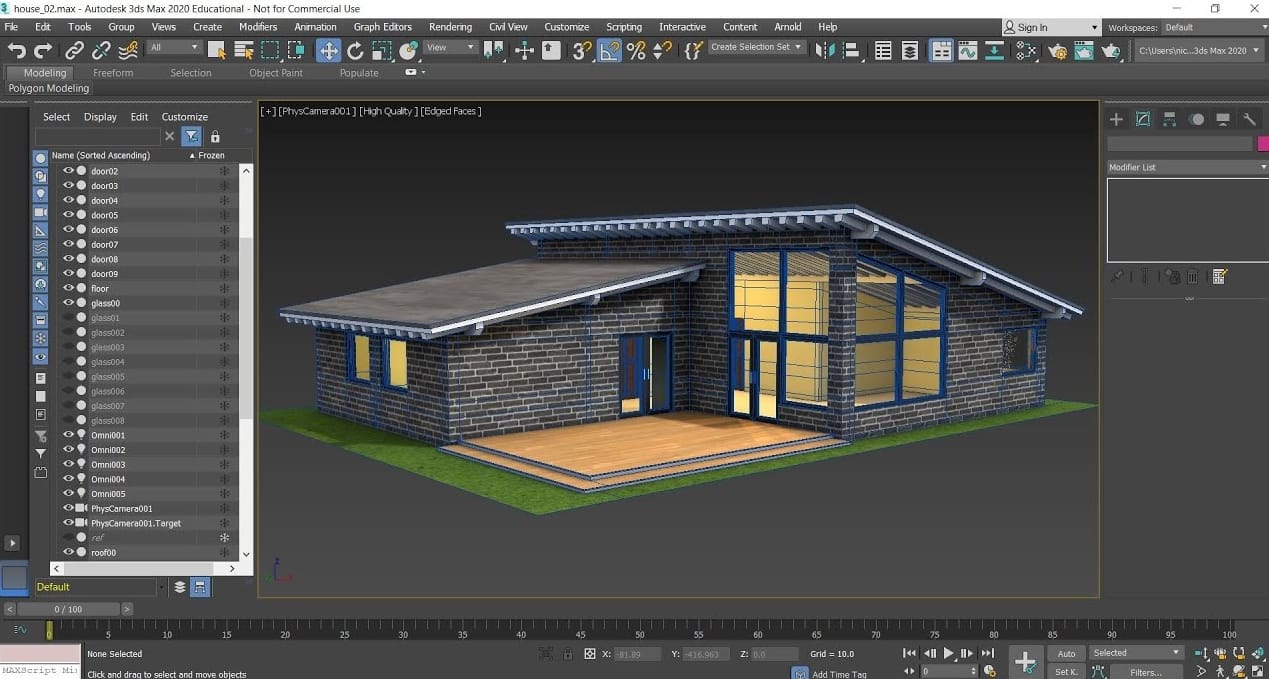
- Autodesk 3ds Max: Pelajari Lebih Lanjut
- Manfaat: Pemodelan 3D serbaguna, rendering, dan perangkat lunak animasi. Itu dikenal karena kemampuannya yang kuat, membuatnya cocok untuk proyek yang kompleks.
- Fitur utama: Penciptaan visualisasi terperinci, simulasi, dan animasi. Menawarkan beragam alat dan plugin.
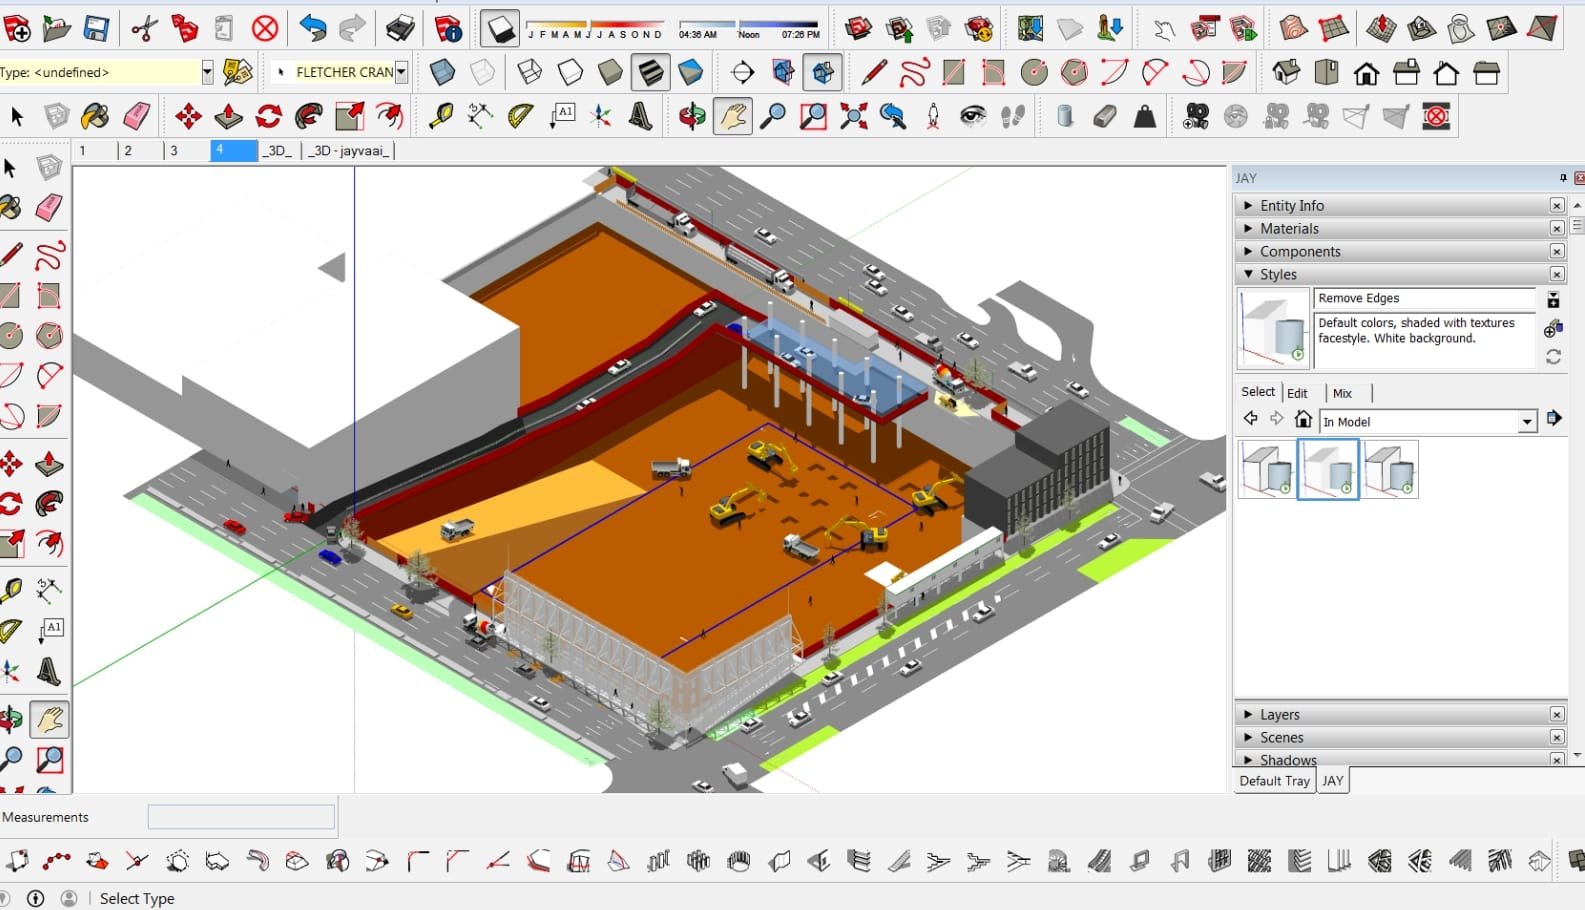
- Sketsa: Pelajari Lebih Lanjut
- Manfaat: Ramah pengguna, dapat diakses untuk pemodelan 3D cepat. Mudah dipelajari, menjadikannya pilihan populer bagi mereka yang baru untuk desain 3D.
- Fitur utama: Pemodelan drag-and-drop yang mudah, Gudang 3D yang luas, kompatibilitas dengan mesin rendering. Komunitas besar dan banyak tutorial.
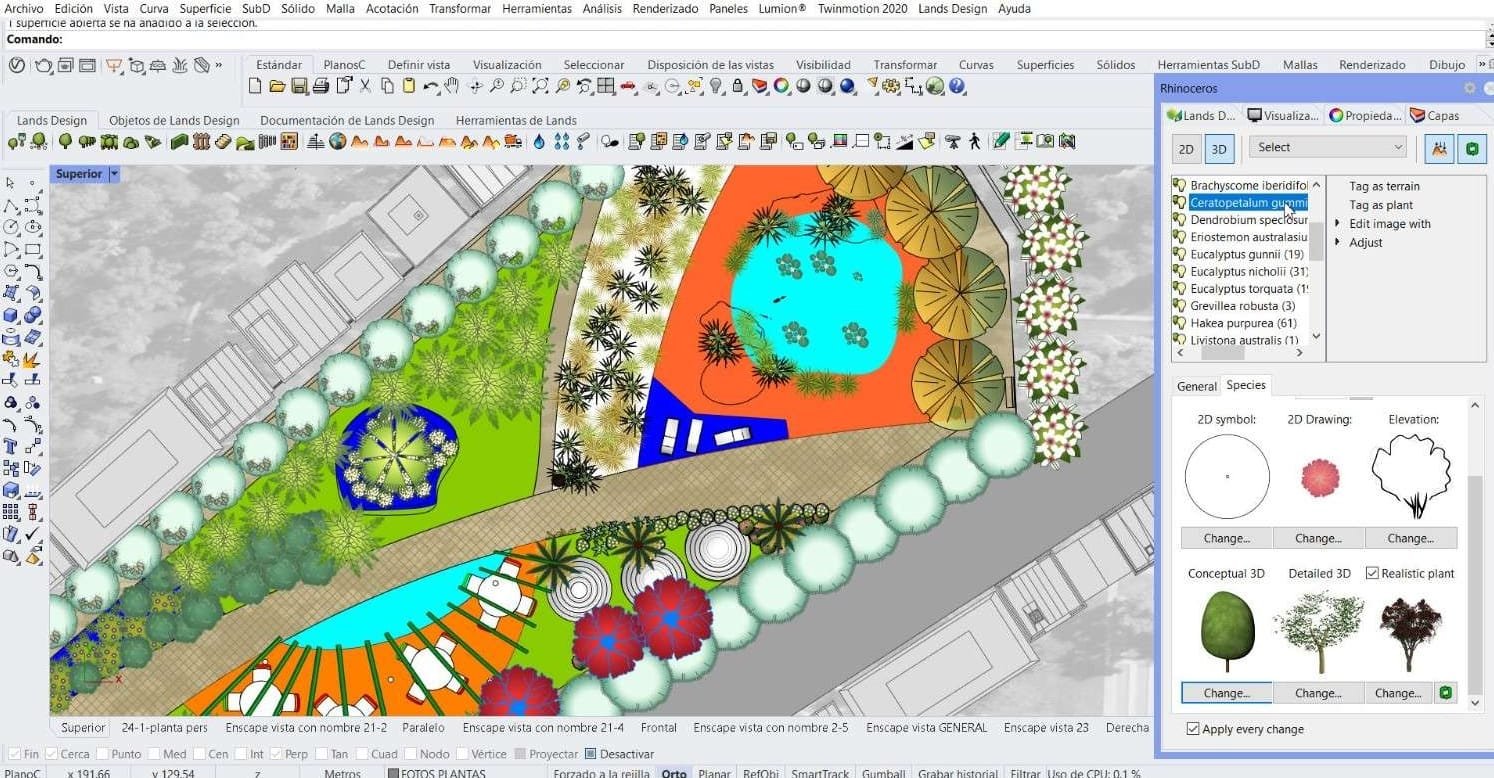
- Badak 3d: Pelajari Lebih Lanjut
- Manfaat: Memberikan presisi karena kemampuan pemodelan berbasis NURBS. Sangat baik untuk menciptakan bentuk organik dan desain yang kompleks.
- Fitur utama: Fleksibilitas dengan berbagai plugin rendering. Kuat dalam desain arsitektur dan pemodelan produk.
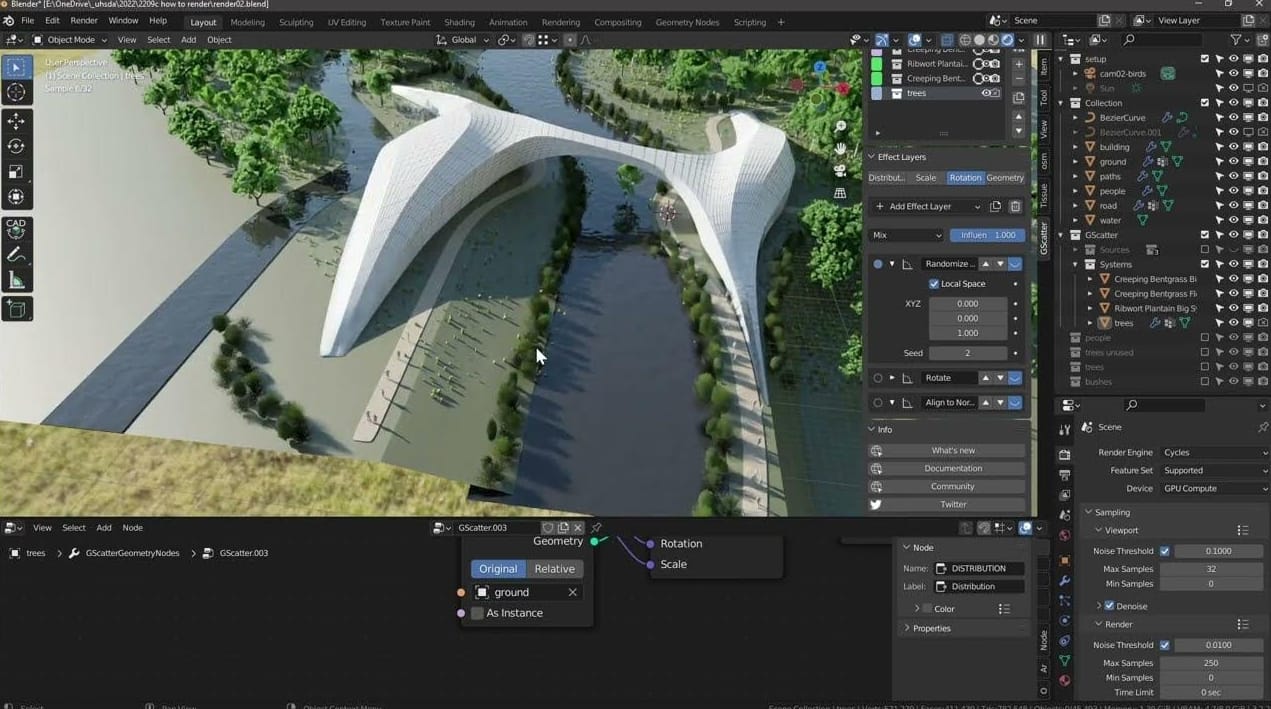
- Blender: Pelajari Lebih Lanjut
- Manfaat: Gratis dan open-source, tetapi menyediakan toolset yang komprehensif.
- Fitur utama: Sangat fleksibel dan mendukung rendering fotorealistik, Pemodelan Prosedural, dan memahat. Sangat baik untuk pemula dan pengguna tingkat lanjut.
- Perangkat lunak pemodelan lainnya: Pertimbangkan opsi lain, seperti sidefx houdini, Zbrush, dan desainer yang luar biasa, Tergantung pada kebutuhan proyek Anda.
Mesin rendering (Menghidupkan model)
Mesin ini “menerjemahkan” Model 3D menjadi gambar visual. Mereka mensimulasikan cahaya. Pemilihan mesin yang tepat juga penting, dan tergantung pada tingkat realisme yang diperlukan dan perangkat keras yang tersedia.
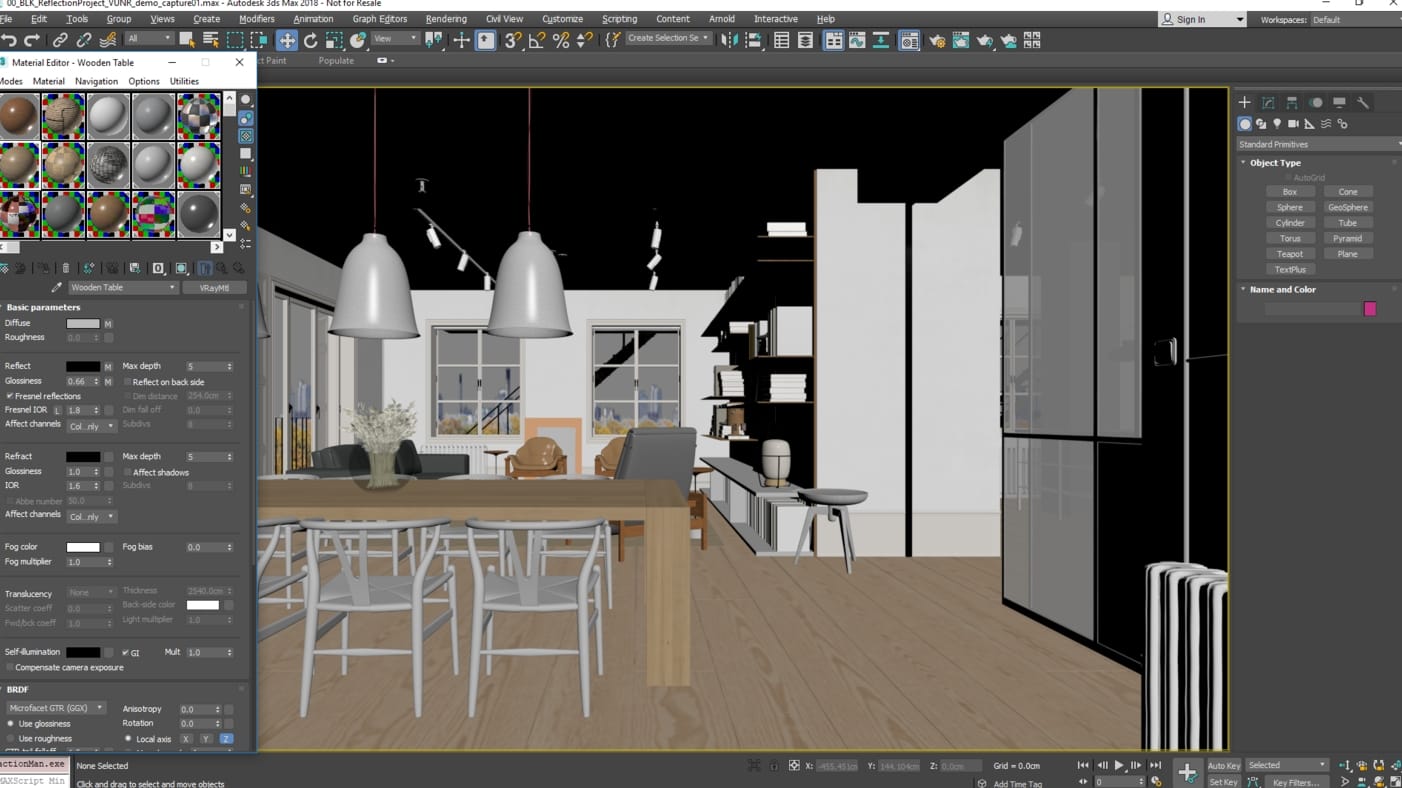
- V-Ray: Pelajari Lebih Lanjut
- Manfaat: Kuat, Hasil fotorealistik, Integrasi dengan perangkat lunak pemodelan populer. Itu dikenal untuk membuat visualisasi tingkat atas.
- Fitur utama: Pencahayaan lanjutan, bayangan, dan opsi material.
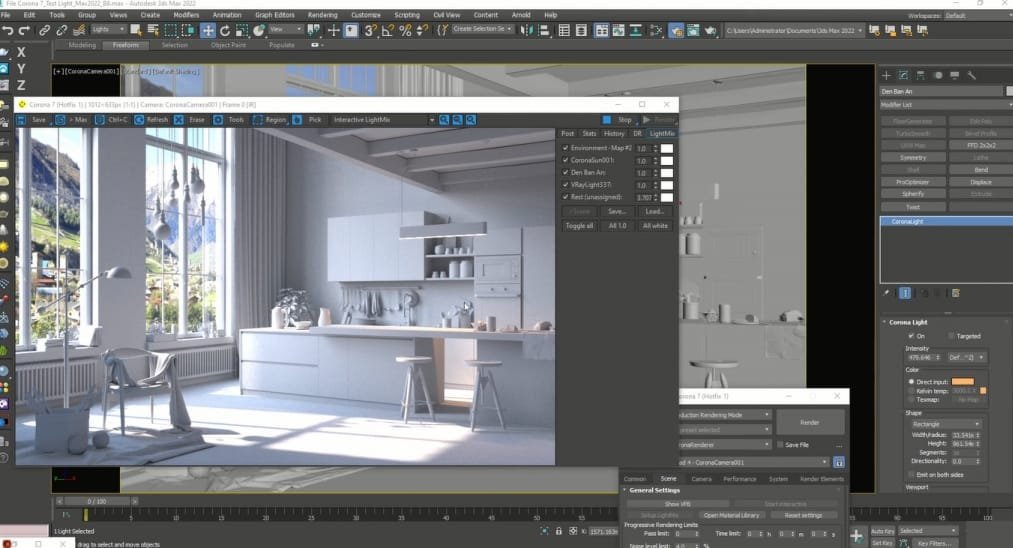
- Renderer Corona: Pelajari Lebih Lanjut
- Manfaat: Ramah pengguna, rendering lebih cepat, dan terutama dirancang untuk visualisasi arsitektur. Bagus untuk pemula.
- Fitur utama: Rendering CPU, Hasil fotorealistik yang mudah dicapai.
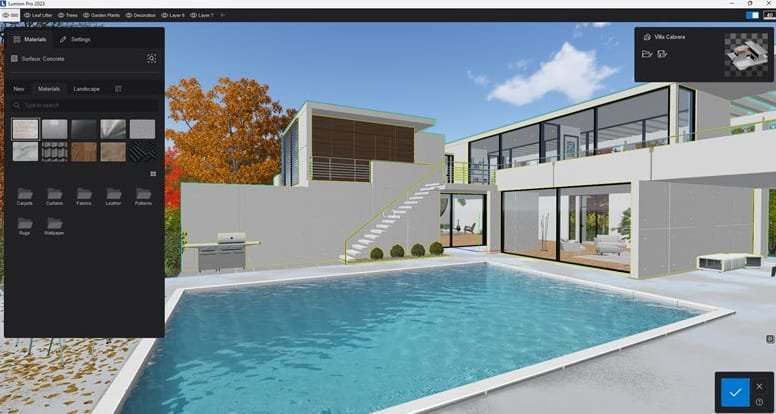
- Lumion: Pelajari Lebih Lanjut
- Manfaat: Rendering real-time, cepat dan mudah digunakan, Perpustakaan aset yang luas. Itu dapat membuat hasil dengan sangat cepat.
- Fitur utama: Antarmuka intuitif, Dukungan Livesync.
- Enscape: Pelajari Lebih Lanjut
- Manfaat: Rendering real-time dan plugin VR yang terintegrasi dengan perangkat lunak BIM. Sangat baik untuk ulasan desain cepat dan presentasi klien.
- Fitur utama: Umpan balik real-time, Kemampuan VR.
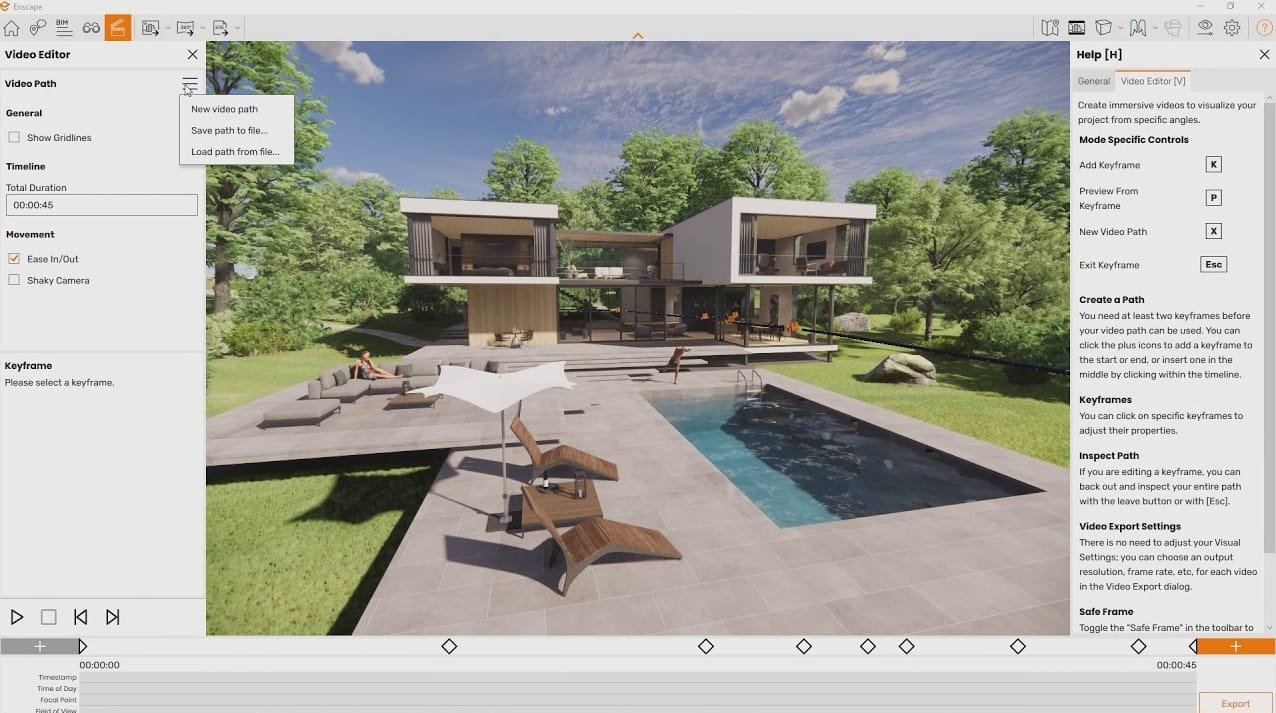
- Pergeseran merah:
- Manfaat: Berbasis GPU, Sangat baik untuk kecepatan. Terkenal karena kecepatan dan efisiensi.
- Arnold:
- Manfaat: Terbukti produksi, rendering berkualitas tinggi. Ini banyak digunakan dalam film dan animasi.
- Render oktan:
- Manfaat: Rendering cepat, Dikenal karena rendering real-time. Juga memberikan hasil fotorealistik.
- Mesin rendering lainnya: Jelajahi opsi seperti TwinMotion, Tergantung pada persyaratan proyek Anda.
Perangkat lunak pasca-produksi (Menambahkan sentuhan akhir)
Alat pasca-produksi digunakan untuk mengedit dan memperbaiki gambar akhir. Ini memungkinkan artis untuk membuat pengalaman yang disesuaikan.
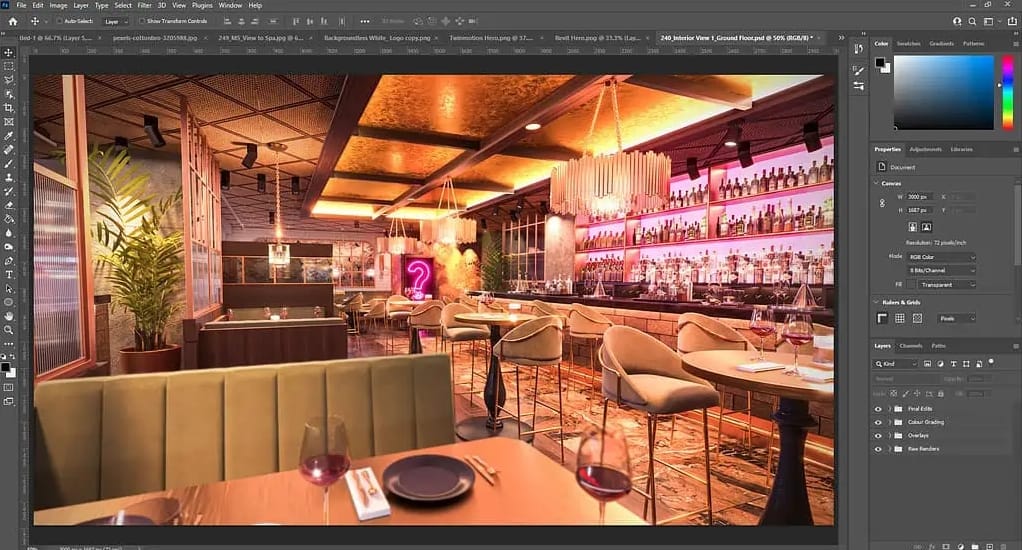
- Adobe Photoshop: Pelajari Lebih Lanjut
- Manfaat: Pengeditan gambar yang serba guna, Penting untuk pasca-pemrosesan. Memungkinkan untuk koreksi warna dan peningkatan.
- Fitur utama: Menyesuaikan warna, Menambahkan efek, dan Tekstur Pemurnian.
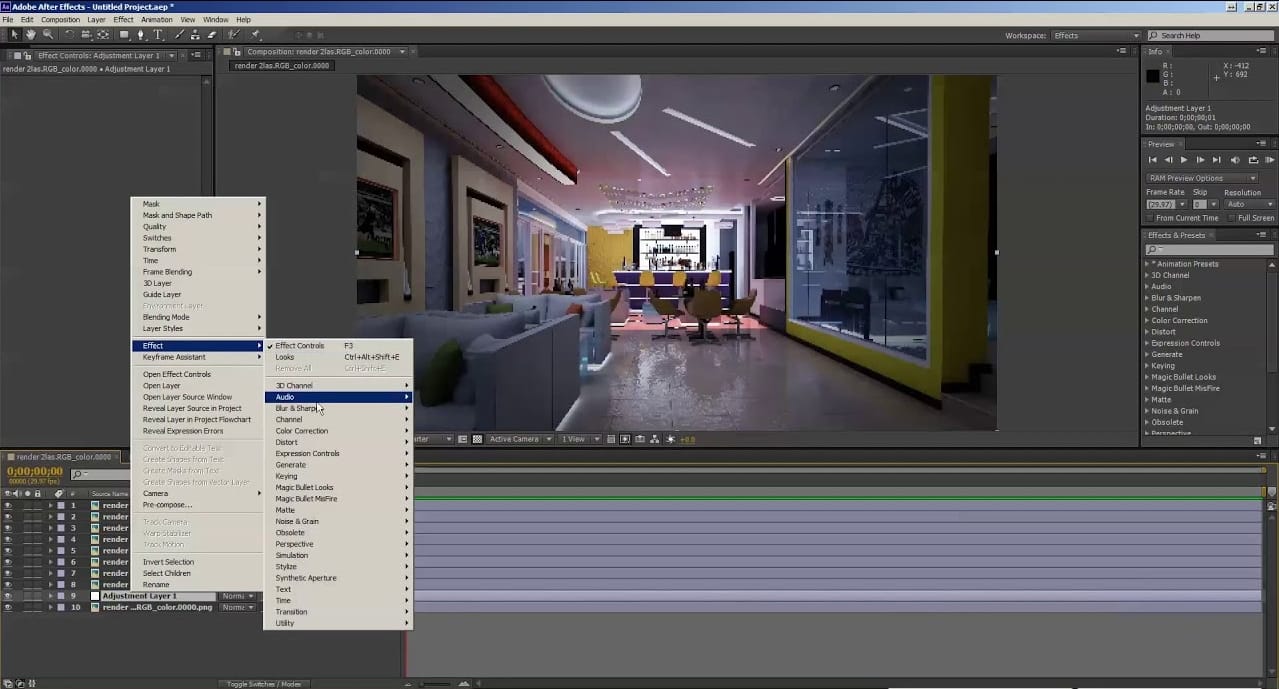
- Adobe After Effects: Pelajari Lebih Lanjut
- Manfaat: Komposit video, Tambahkan efek ke video Anda. Sangat baik untuk grafik gerak.
- Fitur utama: Menyesuaikan warna, Video dan Grafik Gerakan.
- Perangkat lunak lainnya: Pertimbangkan alternatif seperti foto gimp atau afinitas.
Pilihan perangkat lunak sangat penting untuk proyek Anda dan harus dibuat berdasarkan faktor -faktor seperti kompleksitas proyek, anggaran Anda, dan keahlian Anda saat ini. Ada banyak yang bisa dipilih, Tapi di situlah penelitian dan perencanaan menjadi yang paling penting.
 Menguasai kerajinan: Teknik penting untuk rendering arsitektur 3D yang menakjubkan
Setelah Anda memiliki perangkat lunak yang tepat, Saatnya fokus pada teknik yang membuat rendering benar -benar mengesankan. Inilah beberapa teknik penting.
Teknik pencahayaan
Pencahayaan dapat membuat atau memecahkan rendering. Pengaturan pencahayaan yang tepat membawa realisme, menciptakan suasana hati, dan menyoroti detail arsitektur. Tanpa pencahayaan yang tepat, Produk tidak dapat ditampilkan dengan benar.
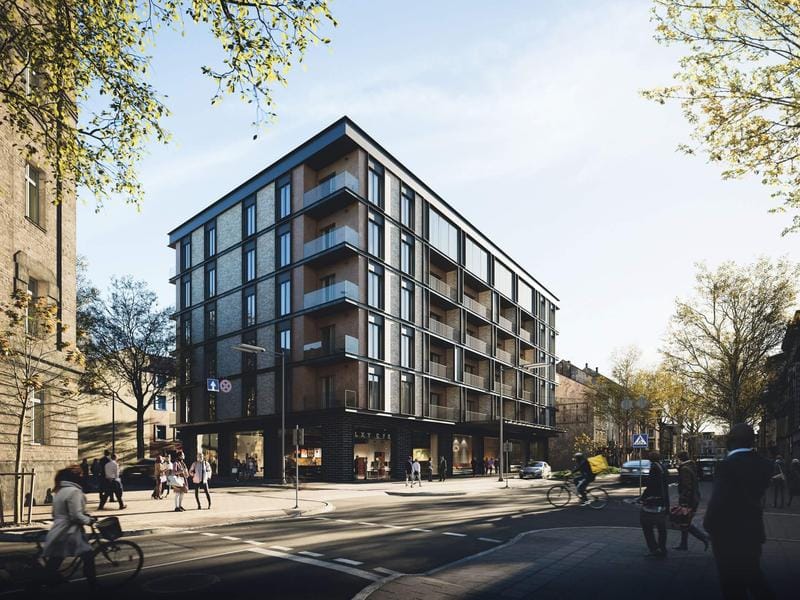
- Pencahayaan alami: Menggunakan sinar matahari dan bayangan untuk menciptakan kedalaman dan realisme. Matahari, langit, dan bayangan dapat digunakan untuk membangun kedalaman dan dimensi. Penggunaan yang cermat dapat sangat meningkatkan dampak proyek.
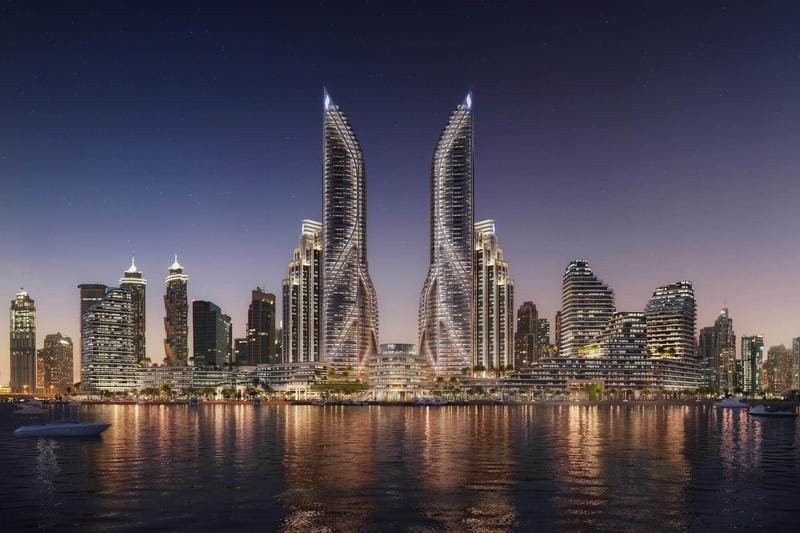
- Pencahayaan buatan: Menempatkan lampu, lampu sorot, dan sumber buatan lainnya.
- Interior vs.. Luar:
- Pedalaman: Fokus pada menyeimbangkan pencahayaan alami dan buatan untuk menciptakan suasana yang ramah. Menggunakan lampu interior dapat mengubah ruang untuk terlihat ramah.
- Luar: Bereksperimen dengan warna langit selama periode senja atau fajar. Kondisi pencahayaan dapat ditingkatkan dengan menggunakan pengaturan langit yang benar.
Untuk diskusi yang lebih menyeluruh tentang cara memanfaatkan pencahayaan sebaik -baiknya, Anda mungkin ingin melalui artikel ini tentang Praktik pencahayaan terbaik untuk rendering arsitektur.
Bahan dan tekstur
Bahan dan tekstur yang realistis sangat penting untuk menciptakan ilusi bangunan nyata.
- Bahan realistis: Menggunakan bahan yang terlihat otentik. Bahan dapat menentukan seberapa bagus proyek yang terlihat.
- Pemetaan Tekstur: Seni menerapkan tekstur pada model 3D Anda.
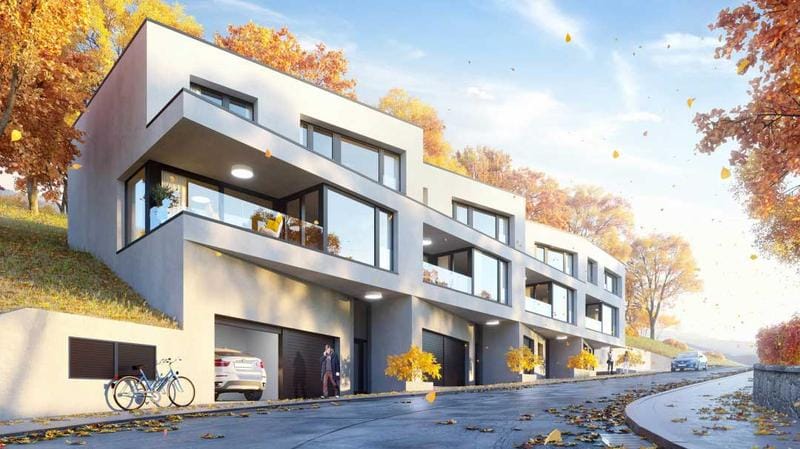
- Sifat material: Bekerja dengan refleksi, dan kekasaran, dan atribut materi lainnya.
Dieksekusi dengan benar, Tekstur bisa menjadi perbedaan antara rendering yang bagus dan yang benar -benar menakjubkan.
Komposisi dan sudut kamera
Pilihan sudut dan komposisi kamera memengaruhi cara penonton melihat proyek Anda. Mereka harus dipilih dengan cermat untuk dampak. Sudut kamera yang sempurna dapat menarik klien.
- Aturan komposisi: Belajar dan menerapkan teknik seperti aturan pertiga. Aturan Ketiga adalah prinsip desain yang menyatakan gambar harus dipecah menjadi pertiga, baik secara horizontal maupun vertikal, sehingga ada sembilan bagian secara total. Tempatkan elemen kunci Anda di sepanjang garis ini atau di persimpangan mereka untuk membuat gambar yang dinamis dan menarik secara visual.
- Sudut dan perspektif kamera: Pilih perspektif yang tepat untuk menyoroti desain Anda.
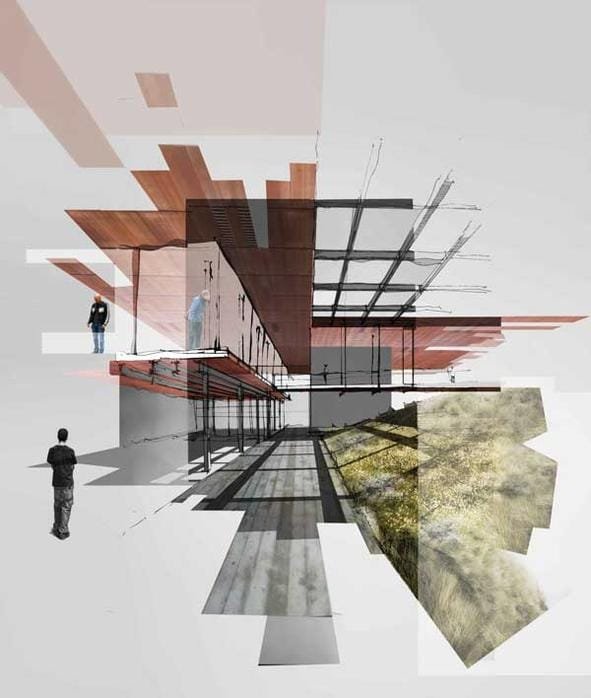
Untuk meningkatkan pemahaman Anda, Lihatlah Sumber Daya Komposisi, seperti buku Komposisi untuk fotografer oleh Harold Davis.
Menambahkan Detail dan Konteks
Detail membawa kehidupan ke rendering Anda. Render 3D yang baik termasuk dimasukkannya faktor manusia.
- Vegetasi: Termasuk tanaman dan lansekap.
- Figur manusia: Tambahkan orang untuk skala dan aktivitas.
- Furnitur dan aksesori: Sertakan elemen -elemen itu untuk menunjukkan keseluruhan lingkungan.
Termasuk elemen seperti orang, vegetasi, dan detail lainnya dapat sangat meningkatkan realisme dan dampak rendering. Mereka juga bisa menceritakan sebuah cerita.
 Menghidupkan: Aplikasi luas rendering arsitektur 3D
3D Rendering Arsitektur D adalah alat yang dapat membuat perbedaan dalam bidang yang berbeda. Ini digunakan untuk semuanya mulai dari pemasaran hingga VR. Mari kita jelajahi beberapa kegunaan paling penting.
Pemasaran dan Penjualan
Rendering berkualitas tinggi adalah alat pemasaran yang kuat. Mereka membantu menarik calon pembeli dan investor.
- Mereka dapat digunakan di situs web, brosur, dan media sosial untuk menunjukkan produk.
Misalnya, Pengembang real estat mendapat manfaat dari rendering ini dengan menarik dan“`html
- Mereka dapat digunakan di situs web, brosur, dan media sosial untuk menunjukkan produk.
Misalnya, Pengembang real estat mendapat manfaat dari rendering ini dengan menarik dan melibatkan pembeli potensial. Dengan aset visual ini, Tim pemasaran dapat menunjukkan citra terbaik dari properti.
Jika Anda ingin mempromosikan produk Anda, Kunjungi Shopify Artikel untuk informasi terbaru.
Presentasi klien
3D Rendering membantu arsitek dan desainer mengomunikasikan ide -ide mereka. Mereka membantu mereka mengomunikasikan ide -ide mereka secara visual. Penggunaan rendering 3D membuat dunia perbedaan saat memberikan presentasi kepada klien.
- Memungkinkan klien untuk memahami desain dengan jelas.
- Memungkinkan pemahaman dan komunikasi yang lebih baik.
Ketika datang ke arsitektur, Banyak klien tidak memiliki latar belakang di lapangan. Mudah untuk salah paham dengan gambar. Dengan rendering 3D, Anda dapat membantu klien memahami visi dan prosesnya.
Persetujuan Proyek
Mereka sangat berharga untuk membantu para pemangku kepentingan untuk membuat keputusan berdasarkan informasi. Mereka membantu pemangku kepentingan menjadi lebih terlibat.
- Memberikan representasi proyek yang akurat.
Dalam konteks persetujuan perencanaan, Ini juga merupakan cara yang bagus untuk menunjukkan kepada komunitas bagaimana bangunan baru akan memengaruhinya.
Pengembangan Desain
Mereka juga bermanfaat untuk proses desain berulang. Itu memberi lebih banyak pemahaman visual.
- Mereka membantu dalam menyempurnakan desain dan membuat perubahan.
Ini bisa menghemat waktu dan uang. Itu memungkinkan pengambilan keputusan yang lebih cepat.
Konstruksi dan Fabrikasi
3D Render telah menjadi kontribusi besar untuk proses ini. Mereka memberikan detail untuk proses pembangunan
- Gunakan gambar untuk tim konstruksi dan pemangku kepentingan.
Rendering terperinci dapat membantu proses desain dan eksekusi dan meminimalkan miskomunikasi. Ini juga dapat membantu menampilkan semua fase proyek yang berbeda.
Perencanaan kota
Rendering udara berguna untuk memvisualisasikan dan menunjukkan lingkungan sekitarnya.
- Mereka dapat digunakan untuk membuat rencana situs.
 Realitas virtual (Vr) dan augmented reality (Ar)
Tingkatkan pengalaman dengan pengalaman virtual yang mendalam dan interaktif. Mereka meningkatkan pengalaman klien.
- Memberikan pengalaman mendalam kepada klien dan pemangku kepentingan.
Penggunaan AR dan VR memungkinkan pengalaman yang lebih mendalam bagi pelanggan. Anda hampir dibawa dalam tur. Mereka membantu memahami visi arsitek. Lebih mudah untuk mengomunikasikan manfaat proyek.
 Dari harga hingga kemitraan: Menavigasi bisnis rendering arsitektur 3D
Membuat rendering dapat memiliki biaya yang sangat berbeda, tergantung pada beberapa faktor. Semakin banyak detail yang Anda tambahkan semakin mahal.
3D biaya rendering
Faktor -faktor yang mempengaruhi biaya rendering 3D:
- Kompleksitas proyek: Semakin kompleks desain, Semakin biayanya.
- Tingkat detail: Tingkat detail yang tinggi akan meningkatkan biaya.
- Jumlah tampilan: Lebih banyak tampilan berarti biaya yang lebih tinggi.
- Ukuran proyek: Harga naik dengan ukuran proyek.
- Revisi: Revisi mungkin menambah biaya.
- Tenggat waktu: Pekerjaan terburu -buru lebih mahal.
Model harga umum termasuk per gambar, per proyek, atau tarif per jam.
| Model Harga | Keterangan | Pro | Kontra |
|---|---|---|---|
| Per gambar | Biaya ditentukan oleh jumlah gambar. Ini adalah salah satu struktur harga yang paling umum. | Mudah untuk menganggarkan untuk kiriman individu. Harga yang Dapat Diprediksi. | Tidak memperhitungkan kompleksitas proyek. Biayanya mungkin lebih banyak lagi. |
| Per proyek | Harga total disepakati untuk seluruh proyek. | Menawarkan total biaya yang jelas. Anda bisa mendapatkan ide yang sangat jelas tentang berapa biaya proyek. | Perubahan ruang lingkup dapat mempengaruhi harga. |
| Tarif per jam | Biaya didasarkan pada jumlah jam kerja. | Memberikan fleksibilitas untuk mengubah persyaratan. Arsitek bertanggung jawab atas produk akhir, dan perubahan bisa dilakukan dengan sangat cepat. | Bisa sulit untuk memperkirakan total biaya. Proyek ini mungkin lebih mahal dari yang direncanakan sebelumnya. |
Anda harus mencoba memahami faktor -faktor dan memahami berapa biaya proyek, Tetapi Anda juga harus memahami nilai yang akan dibawa oleh rendering kepada Anda.
Contoh: Proyek komersial seringkali harganya lebih mahal daripada proyek perumahan karena kompleksitasnya.
Memilih layanan rendering 3D
Menemukan layanan rendering yang tepat adalah kunci untuk proyek yang sukses. Penting untuk meluangkan waktu Anda. Berikut beberapa langkah penting untuk menemukan perusahaan yang tepat:
- Analisis Portofolio:
- Menilai kualitas pekerjaan sebelumnya.
- Periksa pengalaman perusahaan.
- Bagaimana perusahaan telah menangani proyek serupa di masa lalu. Apa yang disajikan perusahaan menceritakan banyak hal tentang itu.
- Pengalaman:
- Menilai keahlian tim.
- Pengalaman dalam proyek tertentu.
- Diskusikan Pengalaman Industri. Anda harus memilih tim yang memiliki pengalaman.
- Komunikasi dan kolaborasi:
- Menilai apakah penyedia layanan mudah didekati.
- Jika tim akan tersedia di seluruh proyek. Semakin mudah untuk berkomunikasi, Semakin mungkin memiliki pengalaman yang baik.
- Ulasan dan Reputasi:
- Cari kesaksian.
- Pertimbangkan berbicara dengan klien sebelumnya. Anda juga dapat memeriksa studi kasus yang telah diterbitkan perusahaan.
- Waktu penyelesaian dan tenggat waktu:
- Tenggat waktu yang jelas dan manajemen proyek yang baik itu penting.
- Pastikan layanan rendering dapat bekerja di bawah tenggat waktu yang diperlukan.
- Proyek singkat dan referensi:
- Jelaskan dengan jelas kebutuhan Anda untuk memastikan kualitas.
- Memberikan dokumentasi yang diperlukan. Ringkasan yang bagus dapat memastikan pengirimannya.
- Konsultasi awal:
- Jelaskan nilai komunikasi yang baik
- Memahami pentingnya komunikasi.
- Meminta penawaran:
- Menjelaskan langkah -langkah yang terlibat dalam meminta penawaran. Pastikan semua elemen dijelaskan dengan baik sebelum memutuskan.
- Sampel dan tes:
- Mulailah dengan proyek uji kecil. Uji kualitasnya.
Sebelum memilih penyedia, membaca informasi yang diberikan oleh sumber seperti: ArchDaily, untuk mendapatkan pembaruan terbaru dari industri.
Manajemen Proyek
Manajemen proyek yang jelas penting untuk keberhasilan proyek. Manajemen proyek adalah langkah yang sangat penting.
- Membuat brief rinci.
- Semakin baik brief, semakin baik hasilnya. Ini membantu mencapai hasil yang lebih baik.
- Pentingnya komunikasi.
- Anda harus memiliki komunikasi langsung dengan artis untuk berbagi ide.
- Tetapkan harapan yang realistis.
- Hindari tekanan waktu. Proyek terbaik memiliki garis waktu yang baik.
- Menetapkan umpan balik.
- Membuat semua pemangku kepentingan terlibat dalam proses tersebut. Pastikan setiap langkah sangat cocok untuk pelanggan dan klien.
 Tren masa depan dan evolusi rendering arsitektur 3D
3D Rendering arsitektur terus berkembang.
- Kemajuan dalam Rendering Technology:
- Perbaikan berkelanjutan.
- Kecepatan dan realisme yang lebih baik.
- AI untuk peningkatan kinerja. Teknologi berubah dengan cepat dan akan memberi klien hasil yang lebih baik.
- Munculnya rendering real-time:
- Popularitas rendering real-time.
- Manfaat menggunakan ini.
Rendering real-time memungkinkan perubahan desain instan dan interaksi klien yang lebih baik.
- Integrasi realitas virtual (Vr) dan augmented reality (Ar):
- Bagaimana teknologi ini mengubah visi arsitektur.
- Pengalaman klien yang lebih baik.
Teknologi ini memberikan pengalaman yang mendalam dan interaktif.
- Keberlanjutan dan pertimbangan lingkungan:
- Membantu dalam penggunaan efisiensi energi.
Arsitek semakin menggunakan rendering untuk memvisualisasikan dan mempromosikan desain berkelanjutan.
- Membantu dalam penggunaan efisiensi energi.
- Integrasi BIM:
- Bagaimana ini membantu dalam prosesnya.
Bim (Membangun Pemodelan Informasi) terus menjadi penting untuk membuat visual.
- Bagaimana ini membantu dalam prosesnya.
- Alat dan otomatisasi bertenaga AI
- Penggunaan AI dalam Arsitektur.
AI membantu merampingkan alur kerja dan diharapkan untuk menumbuhkan sektor ini.
- Penggunaan AI dalam Arsitektur.
Untuk menggali lebih jauh, Jelajahi artikel ini tentang bagaimana AI digunakan dalam arsitektur:
Bagaimana Kecerdasan Buatan Mengubah Masa Depan Arsitektur
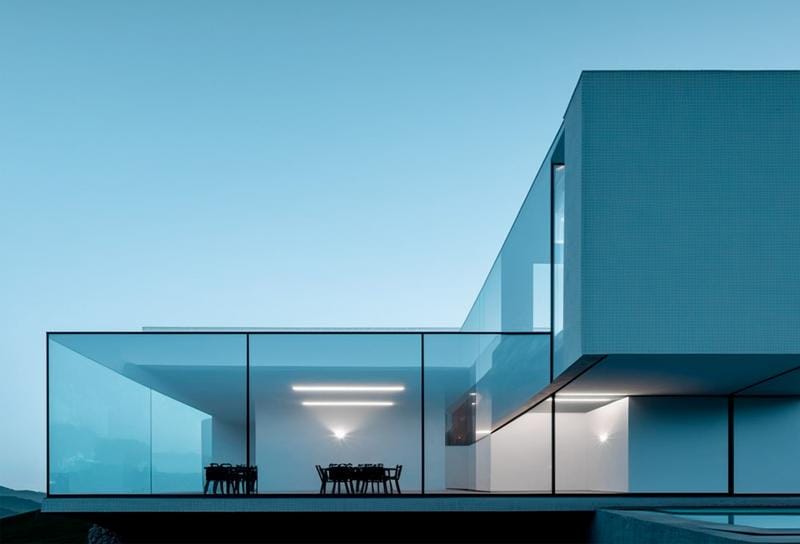 Kesimpulan: Merangkul masa depan visualisasi arsitektur
3Rendering arsitektur D sangat penting dalam lingkungan arsitektur saat ini; Ini menawarkan arsitek dan desainer lebih banyak manfaat dan lebih banyak alat untuk digunakan untuk membuat pekerjaan mereka lebih mudah. Dengan memahami prosesnya, perangkat lunak, dan teknik, Anda dapat memanfaatkan kekuatan rendering 3D untuk menghidupkan visi arsitektur Anda. Anda juga dapat membuat produk hebat untuk klien Anda.
Apakah Anda siap untuk membawa proyek arsitektur Anda ke tingkat berikutnya?
Hubungi kami hari ini untuk membahas kebutuhan rendering 3D Anda!
Pertanyaan terbakar Anda dijawab: FAQ Tentang Render Arsitektur 3D
Berikut adalah beberapa pertanyaan yang sering diajukan tentang render arsitektur 3D:
- Apa itu render arsitektur 3D?3D Rendering Arsitektur adalah proses menciptakan gambar fotorealistik atau animasi desain arsitektur menggunakan perangkat lunak khusus, seperti V-Ray, 3DS Max, dan Lumion. Ini memungkinkan arsitek, desainer, dan klien untuk memvisualisasikan proyek sebelum konstruksi. Ini memungkinkan visualisasi yang akurat, komunikasi, dan kemampuan untuk memasarkan proyek Anda. Rendering memungkinkan Anda untuk melihat pratinjau bangunan atau ruang dan mengalaminya sebelum dibangun.
- Apa manfaat utama dari rendering 3D?Manfaat utama termasuk visualisasi yang ditingkatkan, komunikasi desain yang lebih baik, pengambilan keputusan yang efisien, Pemasaran yang efektif, komunikasi klien yang ditingkatkan, dan persetujuan proyek. Lebih-lebih lagi, Ini adalah metode yang bagus untuk membuat koneksi yang hebat dengan pelanggan dan klien.
- Berapa biaya rendering 3D?Biaya bervariasi tergantung pada kompleksitas proyek, tingkat detail yang dibutuhkan, dan layanan rendering yang dipilih. Biaya dapat berkisar dari beberapa ratus dolar per gambar hingga ribuan untuk proyek kompleks. Faktor -faktor seperti ukuran proyek, gaya, jumlah tampilan, dan revisi semuanya berperan. Hubungi layanan rendering untuk penawaran terperinci. Ada juga aspek anggaran, Pelanggan perlu memastikan dia memiliki anggaran sebelum memulai proyek.
- Berapa lama waktu yang dibutuhkan untuk membuat proyek?Waktu rendering tergantung pada ukuran dan kompleksitas proyek. Proyek sederhana mungkin memakan waktu beberapa hari, sementara proyek yang kompleks bisa memakan waktu berminggu -minggu atau bahkan berbulan -bulan. Ini bisa membuat perbedaan dalam keseluruhan proses.
- Informasi apa yang perlu saya berikan untuk layanan rendering 3D?Anda biasanya perlu memberikan rencana arsitektur, ketinggian, Ide Desain, sampel material, File CAD, dan permintaan atau preferensi tertentu. Lebih detail yang Anda berikan, Semakin baik hasil akhirnya. Ringkasan yang dipersiapkan dengan baik mengarah pada hasil yang lebih baik dan lebih cepat.
- Apa opsi perangkat lunak terbaik?Perangkat lunak populer termasuk Revit, 3DS Max, Sketsa, Badak, Blender, V-Ray, Renderer Corona, Lumion, dan enscape. Perangkat lunak terbaik tergantung pada persyaratan dan preferensi proyek Anda. Perangkat lunak yang berbeda membantu di setiap tahap proyek.
- Apa jenis rendering umum?Jenis umum termasuk rendering eksterior, rendering interior, rendering udara, rendering denah lantai, dan animasi/panduan arsitektur. Masing -masing dibangun untuk mencapai tujuan yang berbeda.
- Bagaimana cara memilih layanan rendering 3D yang baik?Pertimbangkan portofolio layanan, pengalaman, keterampilan komunikasi, Ulasan, waktu penyelesaian, dan harga. Anda juga dapat memulai dengan proyek kecil untuk menilai kualitas sebelum memulai yang besar. Dengan menjelajahi perusahaan rendering, Anda akan mendapatkan ide yang lebih baik tentang proyek dan bagaimana mereka bekerja.


